

The complete DIP switch USB stick plugged into my Surface Pro tablet.
Tired of editing XML and JSON files to store configuration settings for your hardware or software? What if we could go back to using DIP switches for configuration settings? Well, with the DIP switch USB stick, you can! No more telling relatives how to fire up vim or emacs and edit a file during those late-night family tech support calls. Yeah, just flip the red switch!
This project was inspired by @nanoraptor‘s tweet debuting her One Tetrabyte SSD and the resulting comment thread on that tweet. My only goals for the project were to design something that looked like a USB memory stick and get it designed and built as quickly as possible. For these reasons, I stuck to using familiar components and parts I already had on hand.
Component Selection
I designed and built two different versions of the DIP switch USB stick. The first uses a very compact surface-mount DIP switch. The second uses a unique rainbow DIP switch mounted in a surface-mount DIP socket. The following is a quick rundown of the components I selected for this project and why I selected them.
USB A Plug

Molex USB A plug.
This is a USB Type A plug that mounts on to the end of circuit board and plugs directly into a USB A jack on the front or side of many computers. I could have used a USB Type C plug instead but none of my computers have readily accessible USB Type C ports. I’ve also used this plug before so I know the PCB footprint and symbol are good although I’d change the footprint to use slots instead of drills for the side tabs on my next board. It may say “Molex 21043″ on top of it but the real part number is Molex 48037-0001.
PIC16F1459
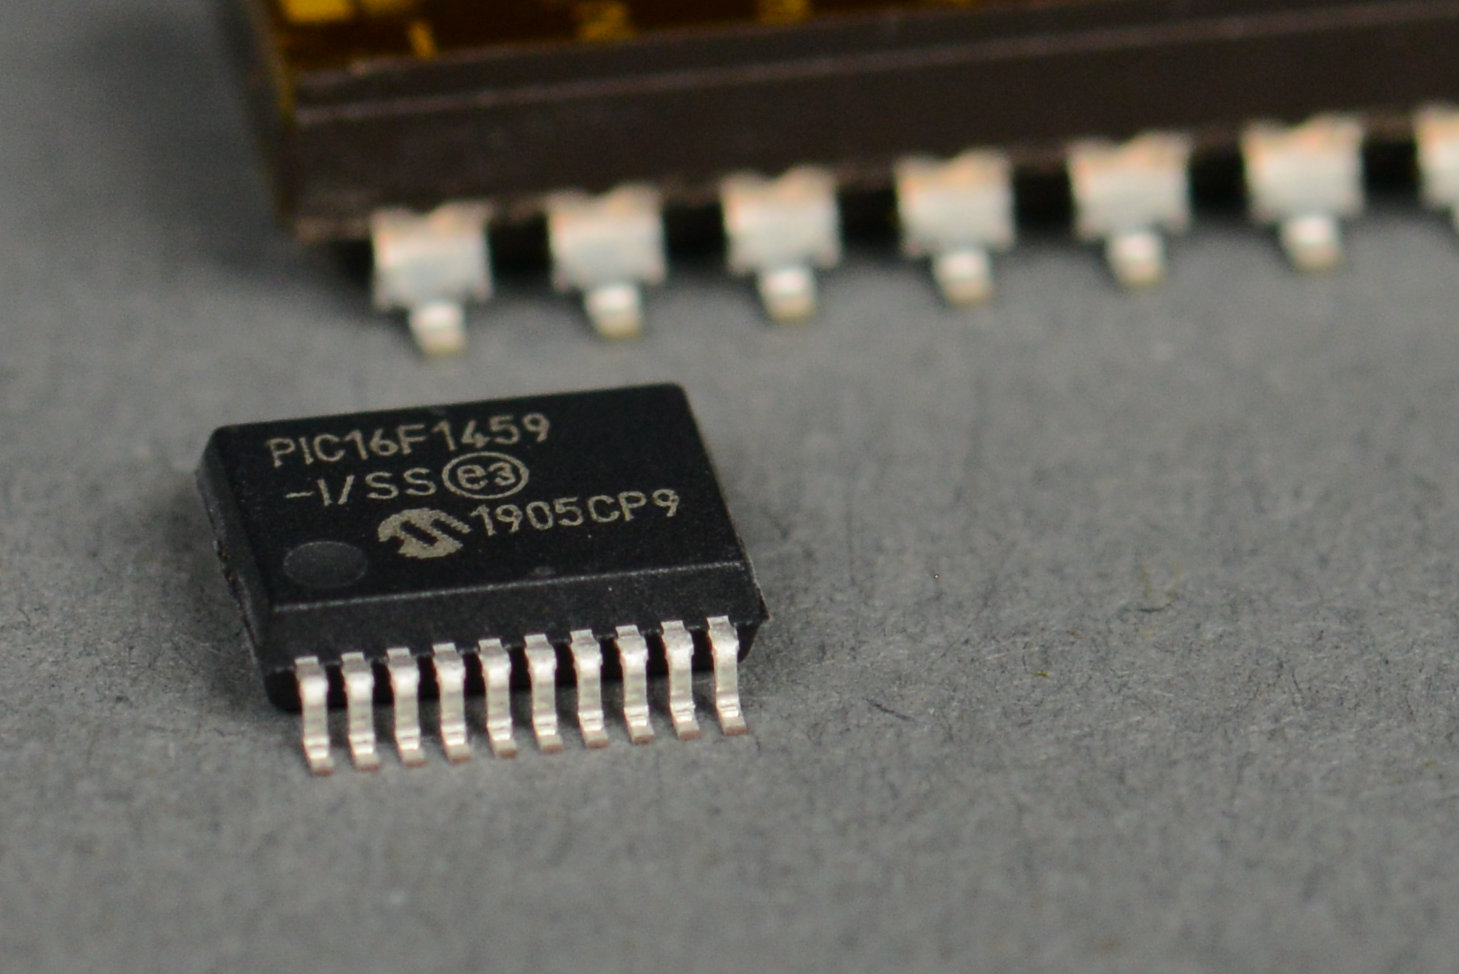
PIC16F1459 in a TSSOP-20 package with an eight position SMD switch behind it for scale.
I like 8-bit USB microcontrollers. One of my favorites is the Microchip PIC16F1459 in the TSSOP-20 package. I’ve used this microcontroller before so I’m familiar with the required support circuitry and USB software. The only question was if it had enough input pins for the 8 inputs from the DIP switch. A quick check of the datasheet confirmed it had enough inputs pins available after connecting the basic components required for USB operation.
Surface Mount DIP Switch

CTS SMD DIP switch with protective coating in place. The protective coating allows use of pick and place equipment and protects switch during washing.
To make this design as compact as possible, I wanted to put the microcontroller on the bottom of the board and the switch on the top of the board. This required a surface-mount switch. After browsing tons of parts I settled on a CTS 219-8MSTR 8-position surface mount slide switch. Not sure you can still call it a DIP switch if it’s surface mount.
This switch comes with a removable tape seal on top of it. This permits the switch to be used with pick and place equipment and allows the switch to withstand high soldering temperatures and board washing.
Rainbow Through Hole DIP Switch
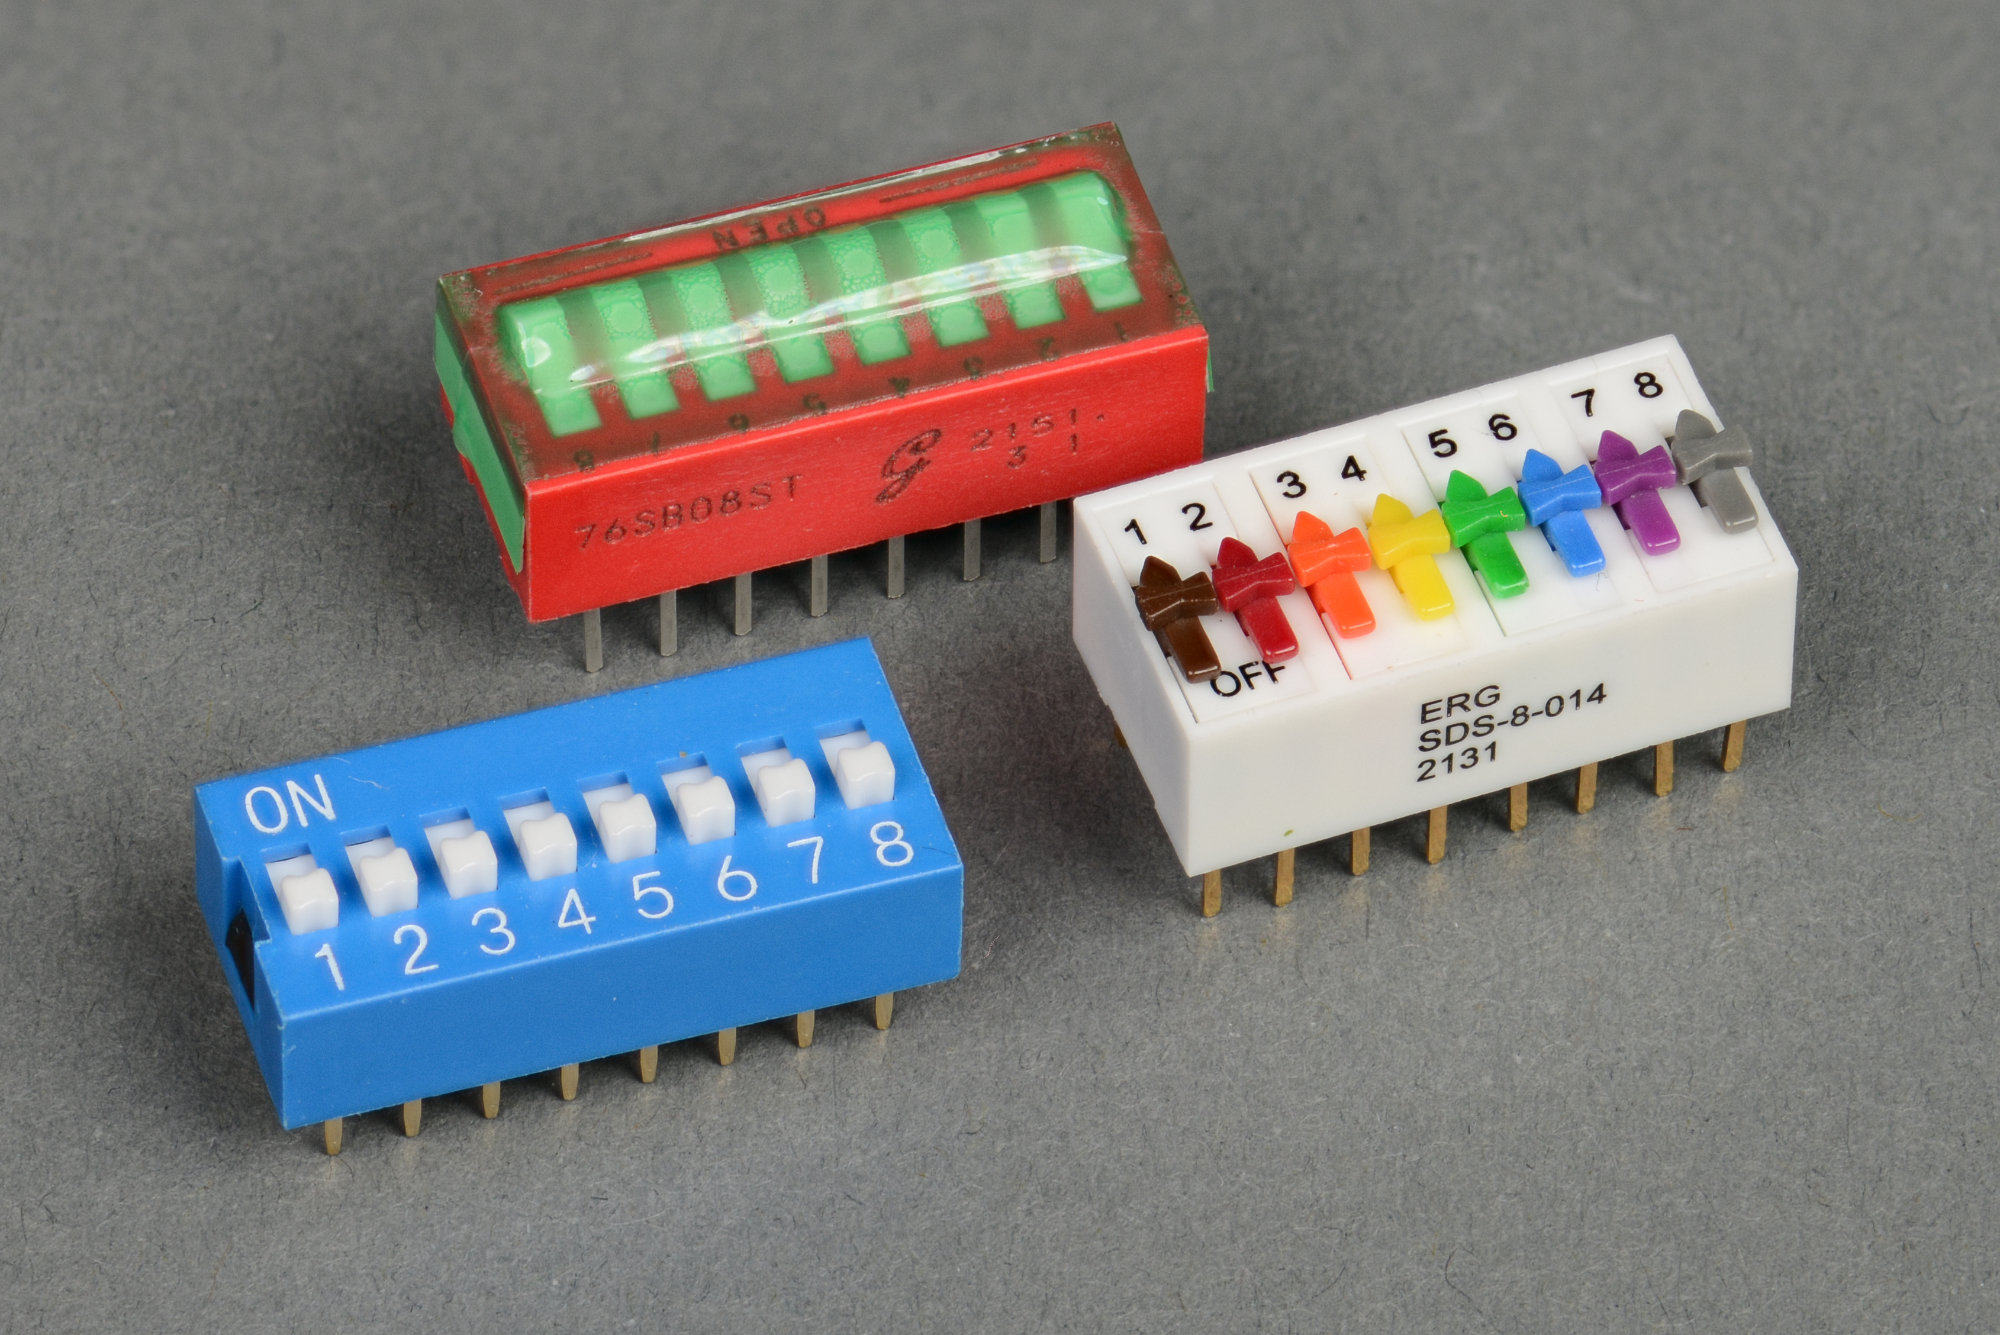
The three candidate through hole DIP switches for this project. I went with the rainbow model from ERG.
While designing the first version, I remembered that ITW ERG made rainbow through-hole DIP switches and designed a second version with a surface-mount DIP socket for a rainbow DIP switch. The rainbow DIP switch has quite the striking appearance compared to similar slide and rocker DIP switches.
Surface Mount DIP Socket
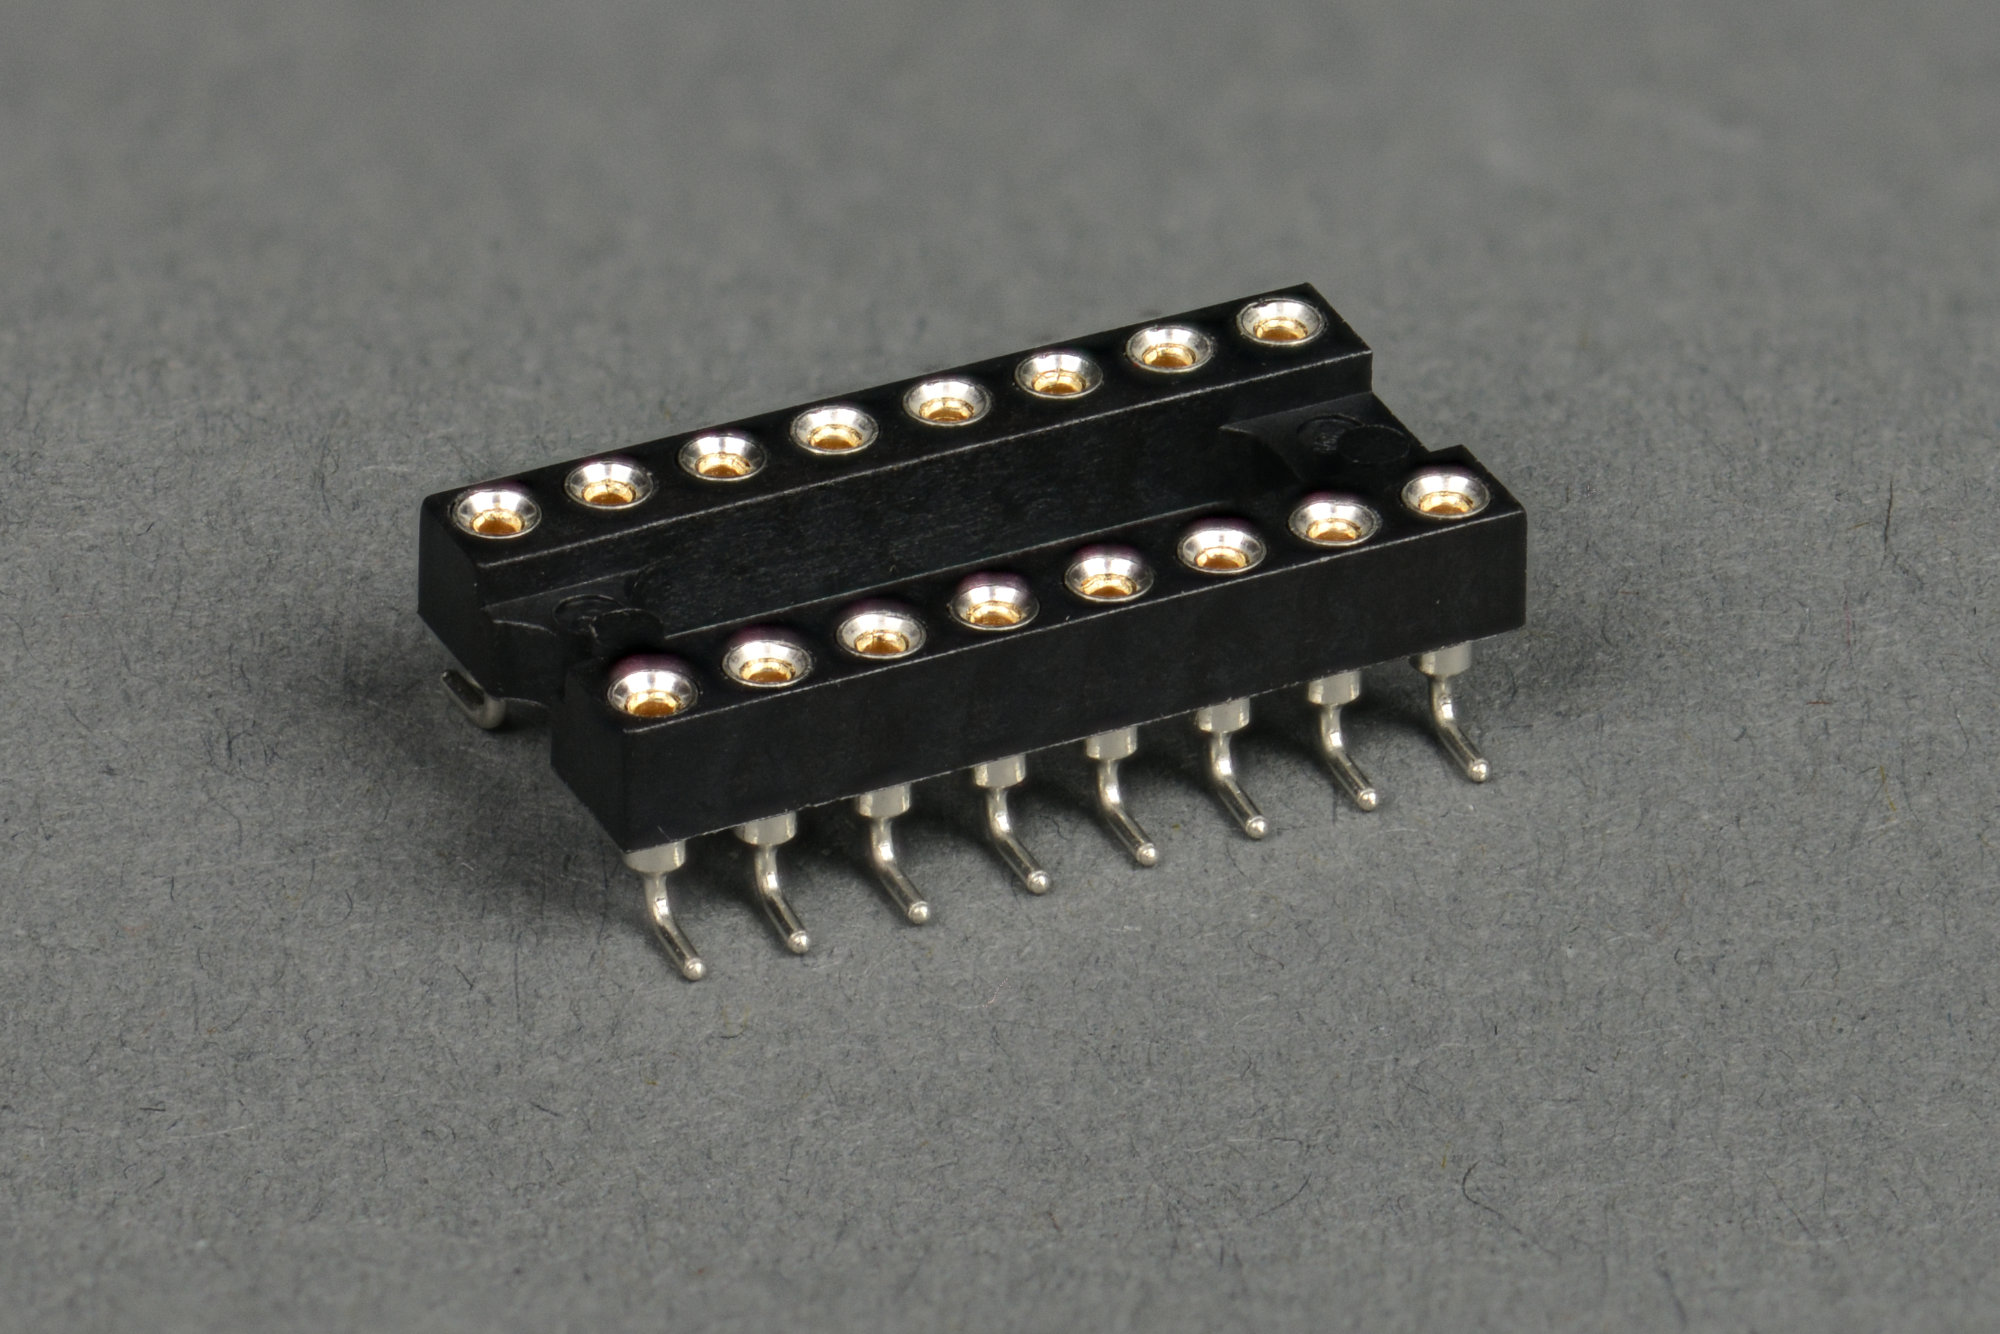
Surface-mount DIP socket. I think this is what they do to any through-hole DIP switches that get damaged during production.
This sent me on a frantic scurry to find a surface-mount DIP socket so I could use the first version of the board with minimum modifications with the fancy rainbow DIP switch. I eventually selected a Mill-Max 110-47-316-41-105000 surface mount DIP socket to hold the ERG SDS-8-014 rainbow DIP switch.
Schematic Design
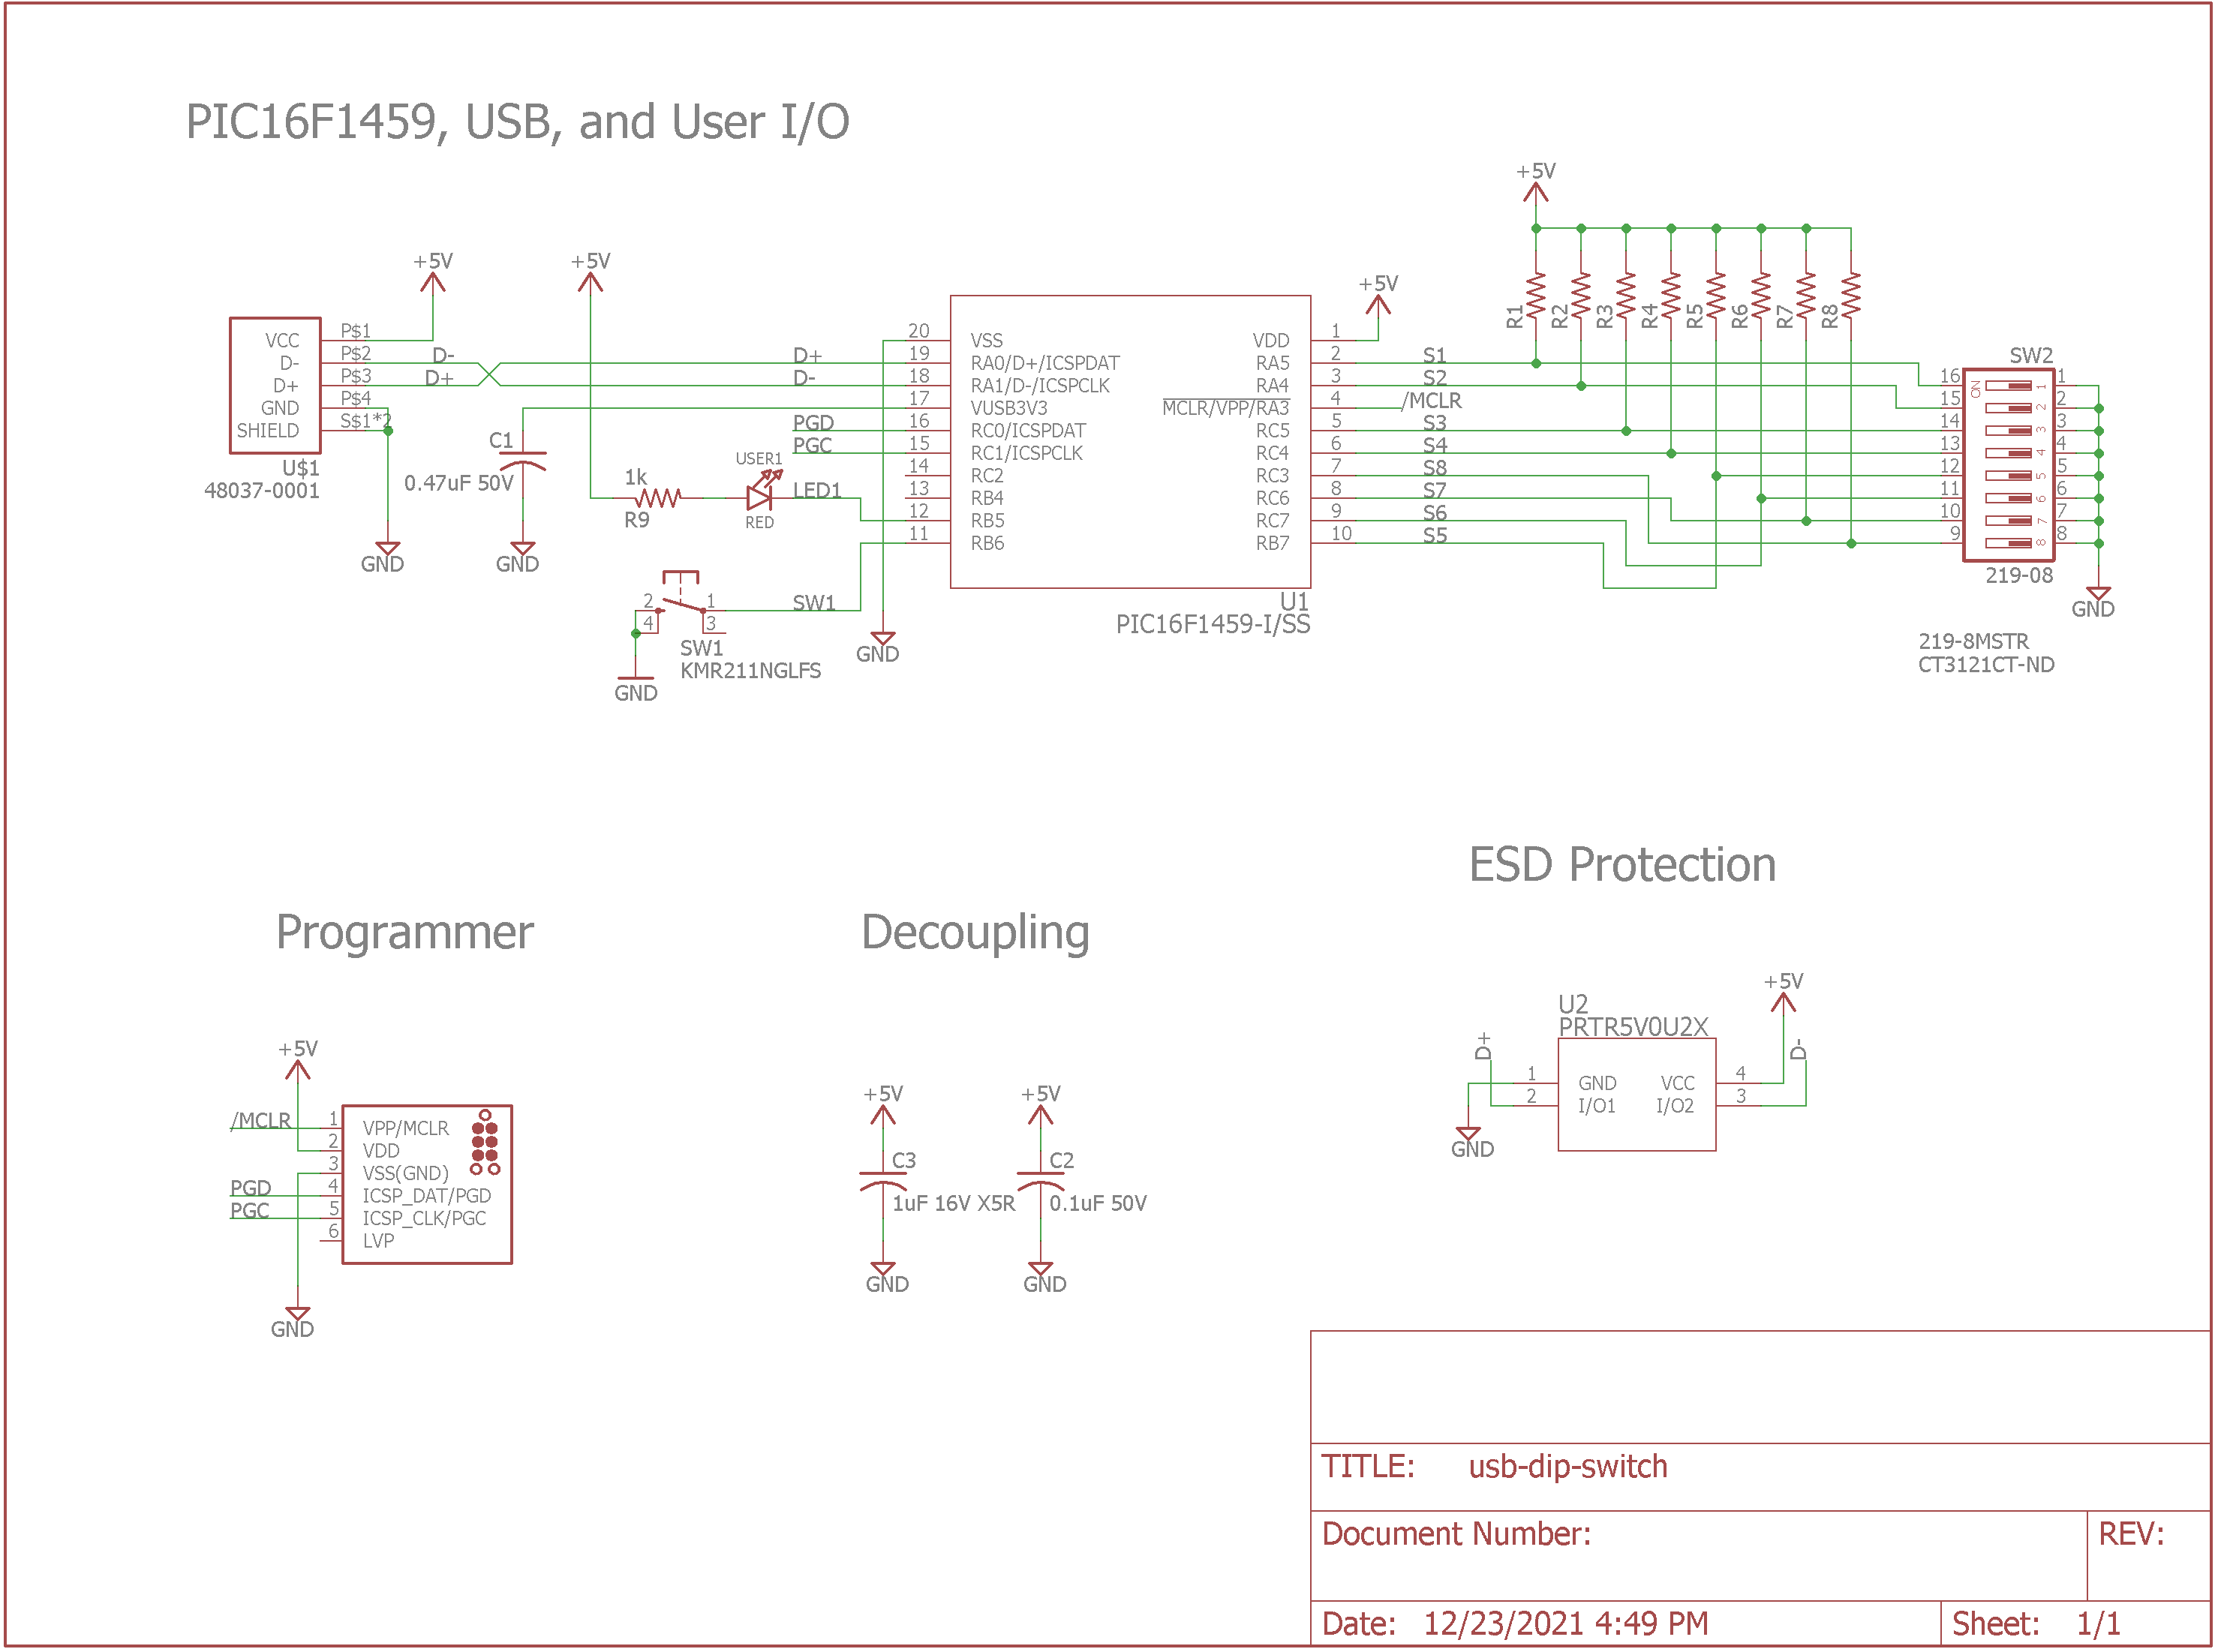
The completed schematic.
The basic connections to the PIC16F1459 microcontroller are the same as for my one-key keyboard and annoying caps lock buzzer projects. For this project, I needed to find 8 GPIO pins to connect to the DIP switch. I picked 8 pins on the side of the microcontroller closest to the DIP switch.
Unfortunately not all these GPIO pins have internal weak pull-ups available so I had to add some pull-up resistors to pull the pins high when their respective switches are open. With this configuration, the GPIO pin will read high when the switch is open (off) and low when the switch is closed (on).
There’s an obligatory pushbutton switch and blinky LED. The pushbutton switch could be used with a bootloader to allow upgrading the DIP switch USB stick firmware without a PIC programmer and Tag-Connect cable. The blinky LED is programmed to indicate the USB enumeration status. A slow blink indicates the board is powered but not enumerated. A fast blink indicates the board is powered up and enumerated.
Board Design
Surface Mount Switch Version
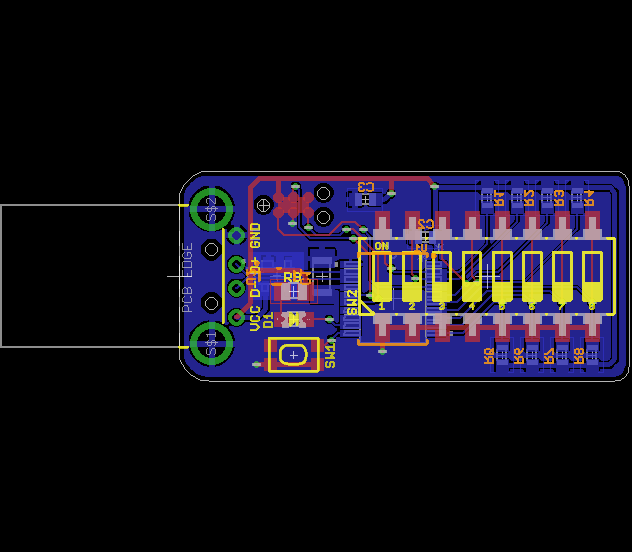
The non-socketed version of the board.
With the schematic design complete, I turned my attention to the board design. I designed the board for use with the CTS SMD slide switch first. The final layout is shown in the image above.
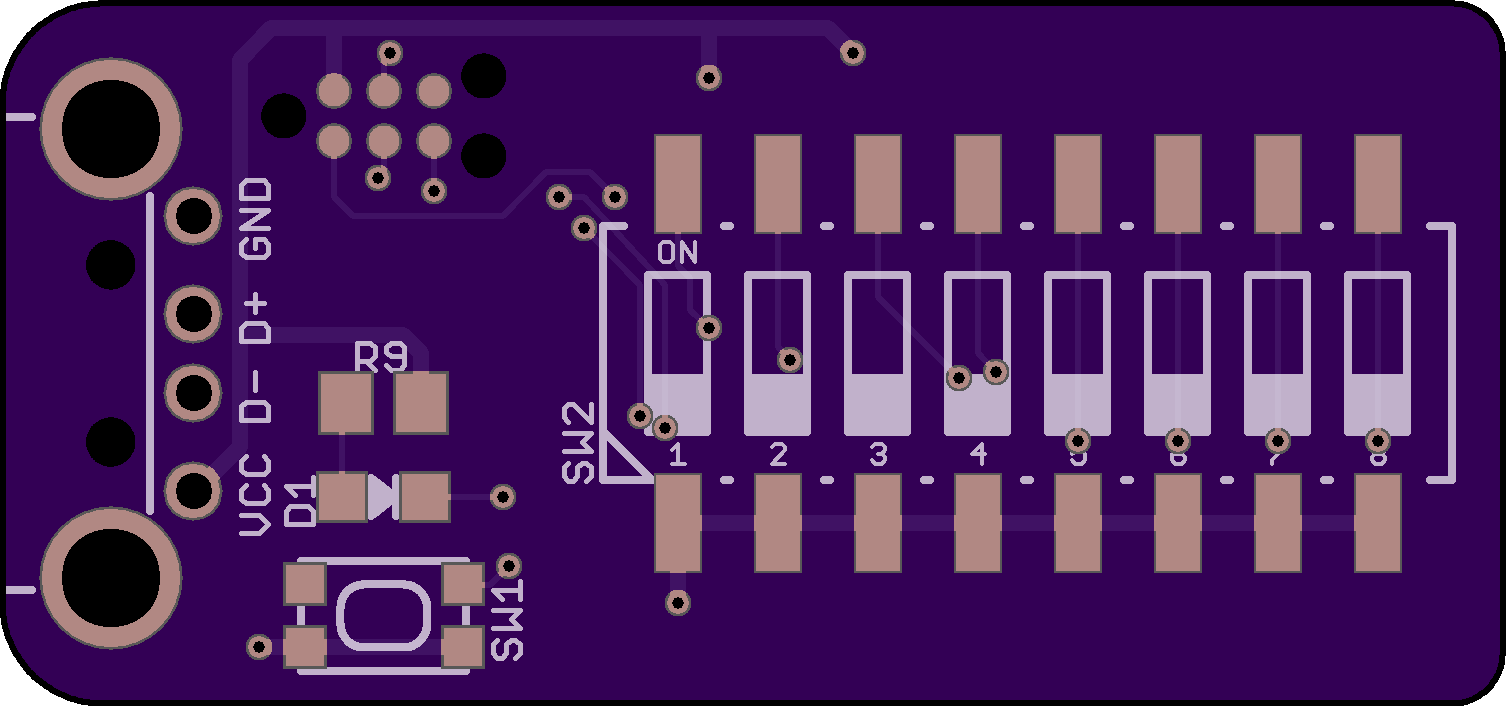

When I was happy with the layout, I uploaded the Gerbers to OSH Park and viewed the board preview images shown above. With no obvious issues in the previews, I ordered the boards.
Surface Mount DIP Socket Version
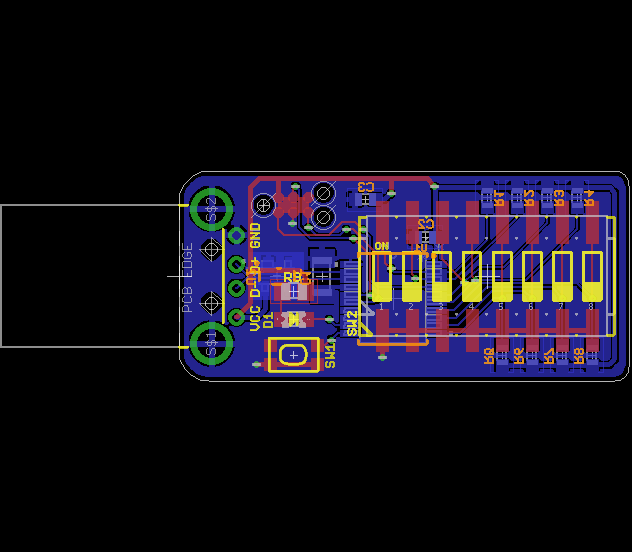
The socketed version of the board.
After designing the board for use with the CTS SMD slide switch, I turned my attention to designing the board for use with the surface-mount DIP socket and ERG rainbow DIP switch. The final layout is shown in the image above. The only real difference is the width and height of the 16 pads for the switch or socket.

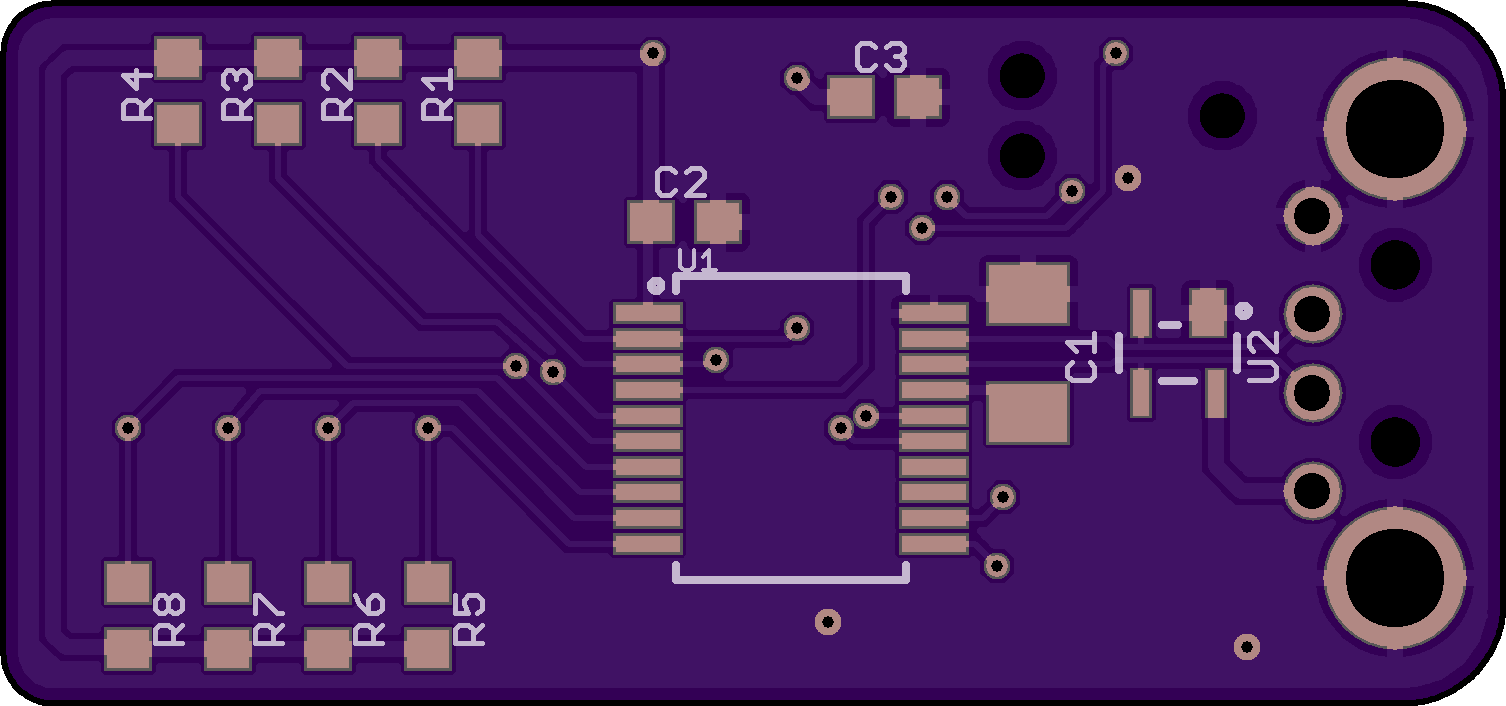
When I was happy with the layout, I uploaded the second set of Gerbers to OSH Park and viewed the board preview images shown above. With no obvious issues in the previews, I ordered the second set of boards.
Software Development
I used a PIC low-pin count USB development board to write the software before the real boards were back from fab.
While the boards were being fabbed, I used a Microchip Low-Pin Count USB Microcontroller development board to write the software for the project.
I tried implementing a USB mass storage device class containing a single file with the state of the switches. Unfortunately, modern operating systems cache file system reads. As a result, the value of the switches could be read from the file once but then would no longer update when the switches were changed. To get around this, I tried performing a soft detach and re-attach every time the switches were changed but this resulted in numerous annoying unsafe eject and new volume found messages / windows / alert sounds.
Instead, I implemented the DIP switch USB stick as a vendor-defined USB HID device. The USB host can send a USB OUT report to the dip switch USB stack asking for the current state of the switches. The dip switch USB stick will respond with a USB IN report containing the current state of the switches. The dip switch USB stick also responds with a USB IN report containing the current state of the switches whenever a switch is changed.
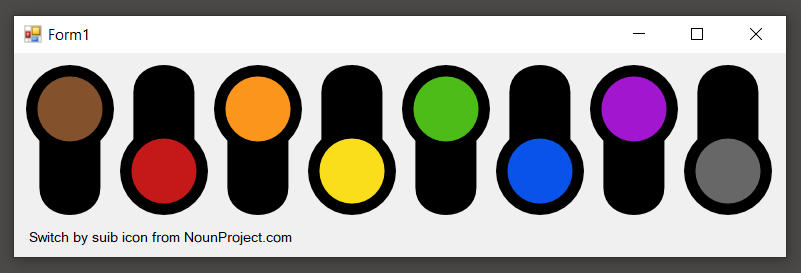
The C# .NET Windows Forms demo app.
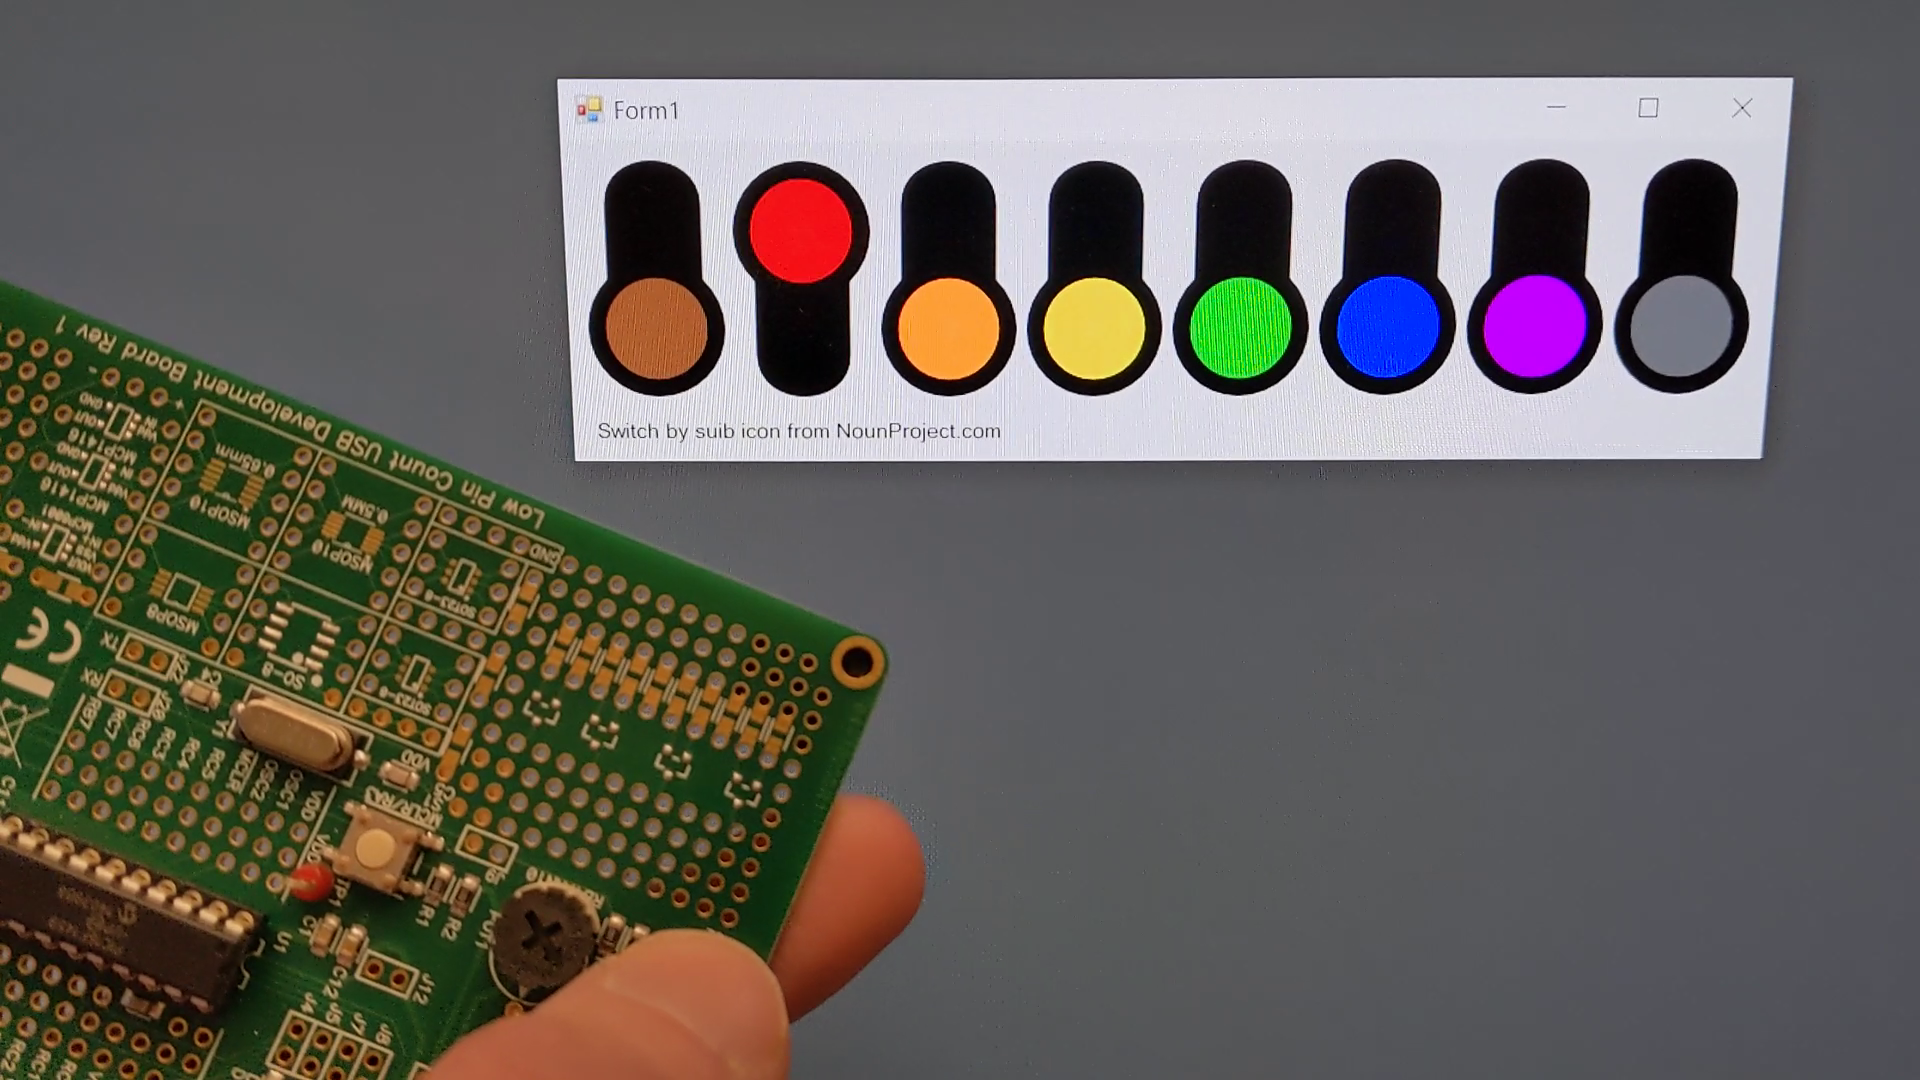
To demonstrate the dip switch USB stick, I wrote a quick C# .NET Windows Forms app. The app communicates with the development board or the real DIP switch USB stick board. With the development board, the pushbutton switch toggles the red switch image. With the real board, the switch images in the app mirror the state of the switches on the dip switch USB stick. The icons in the app were derived from the switch icon by suib icon from NounProject.com.
Finished Boards
SMD version finished boards.
The finished boards for use with the surface mount switch are shown above.
Socket version finished boards.
The finished boards for use with the surface mount socket and through-hole DIP switch are shown above.
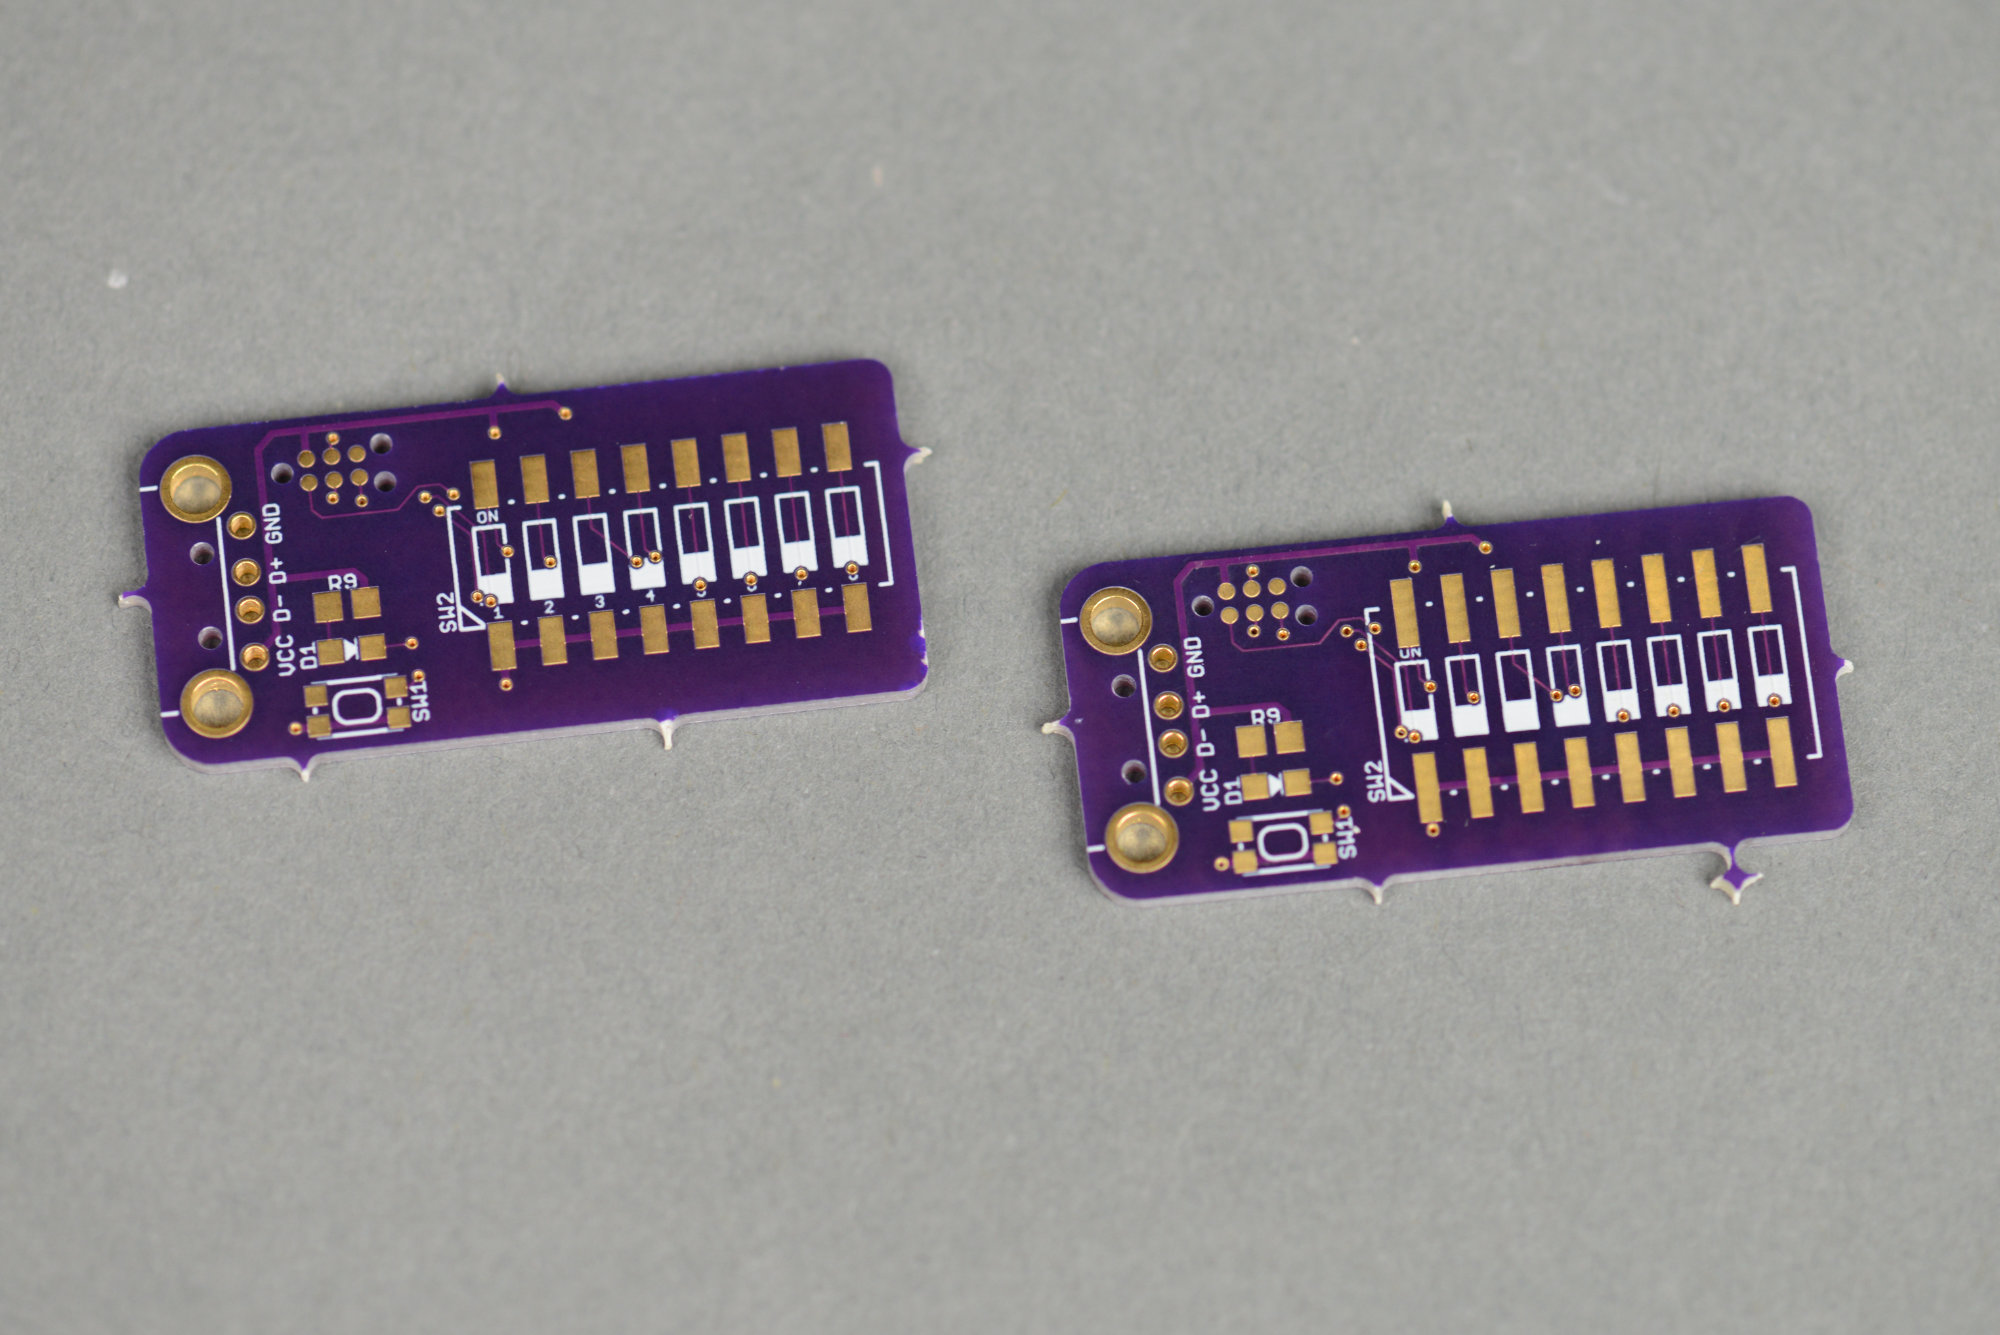
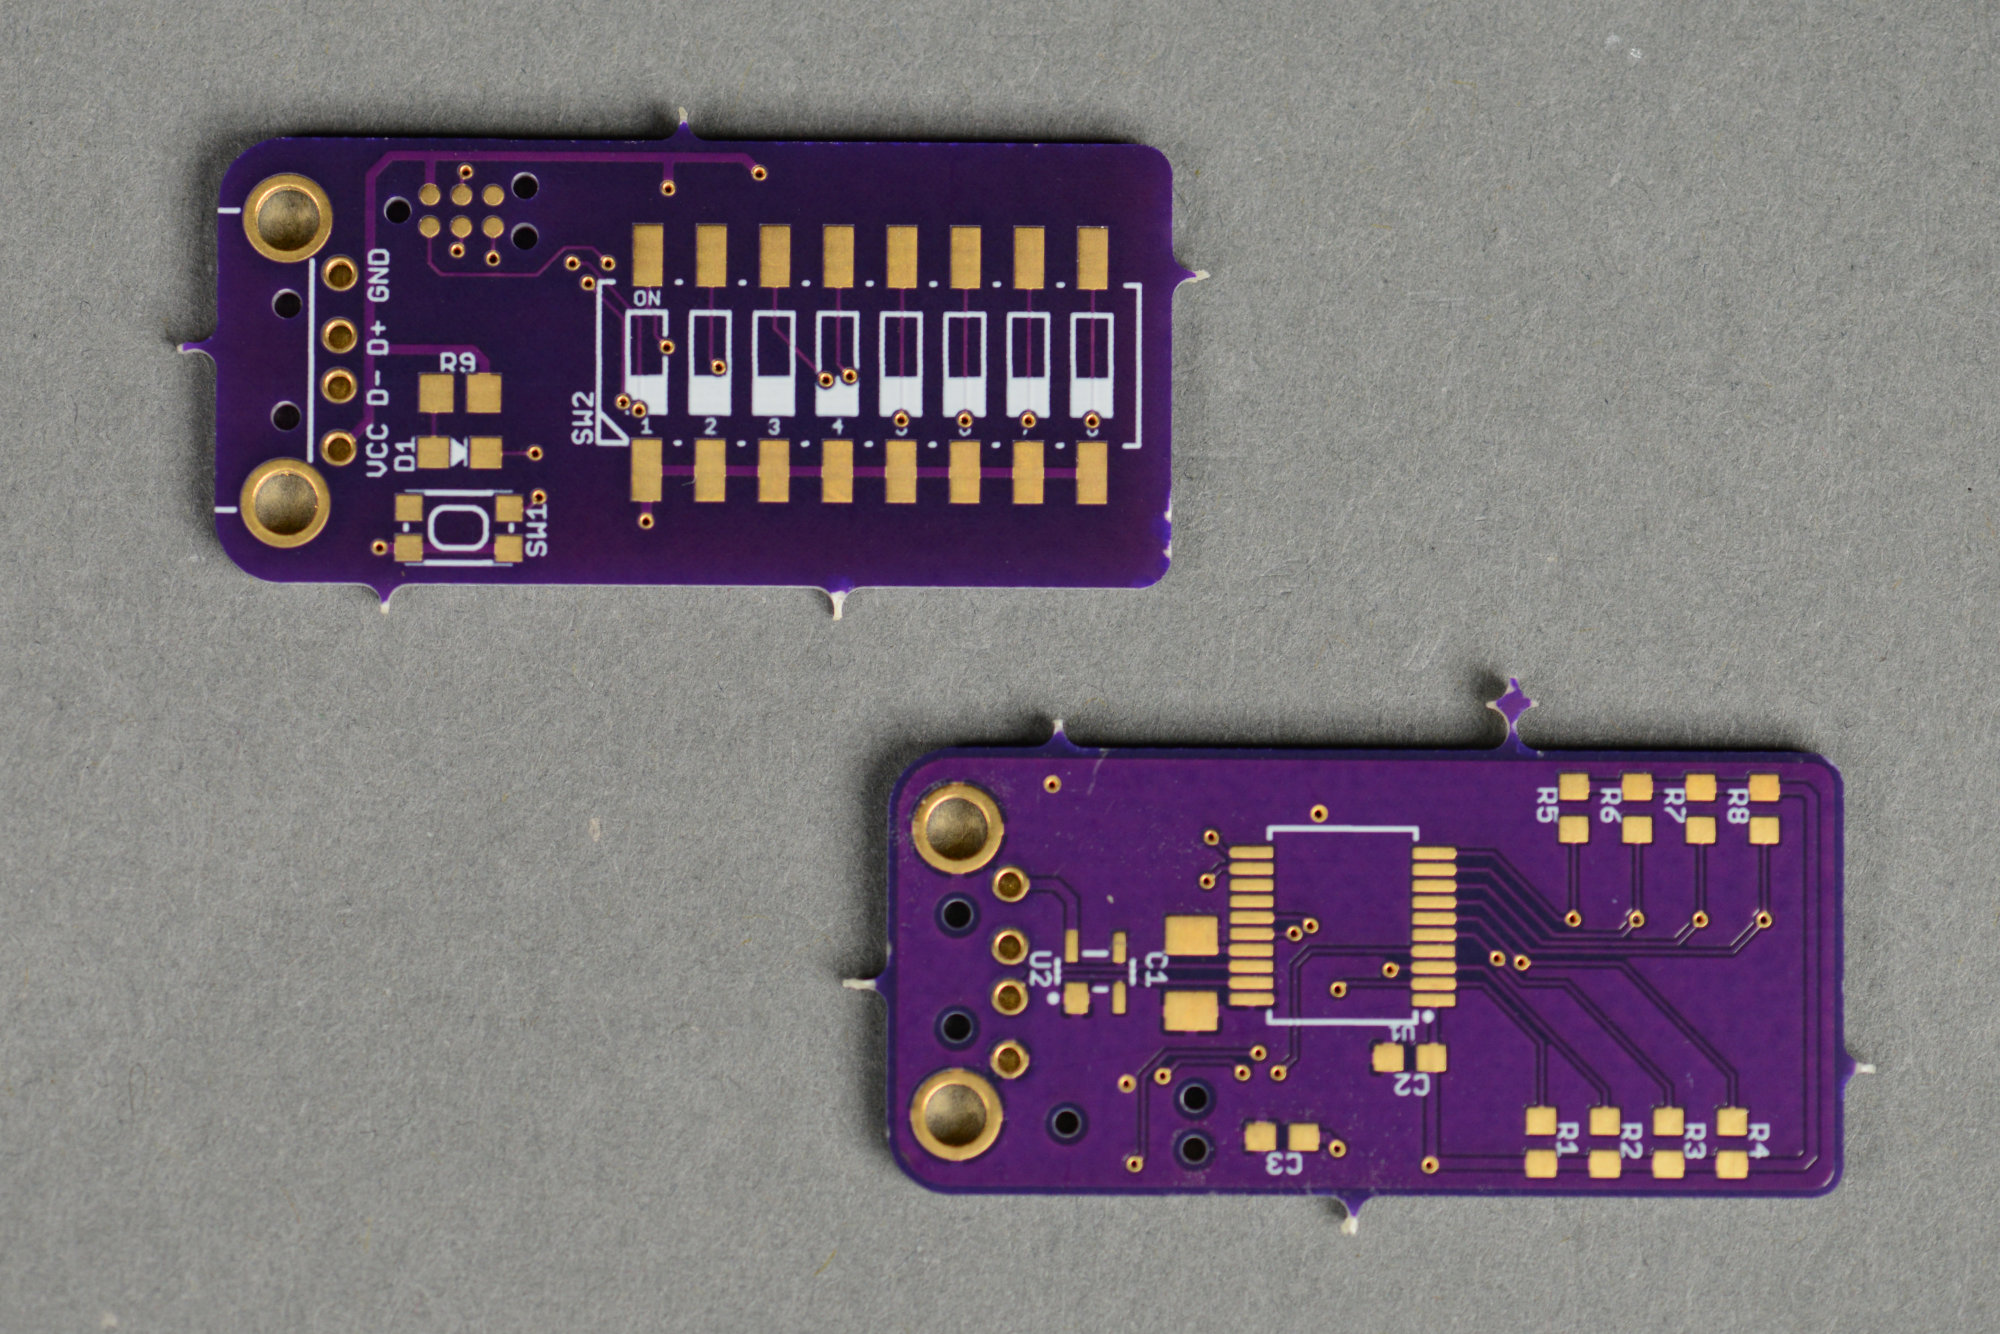
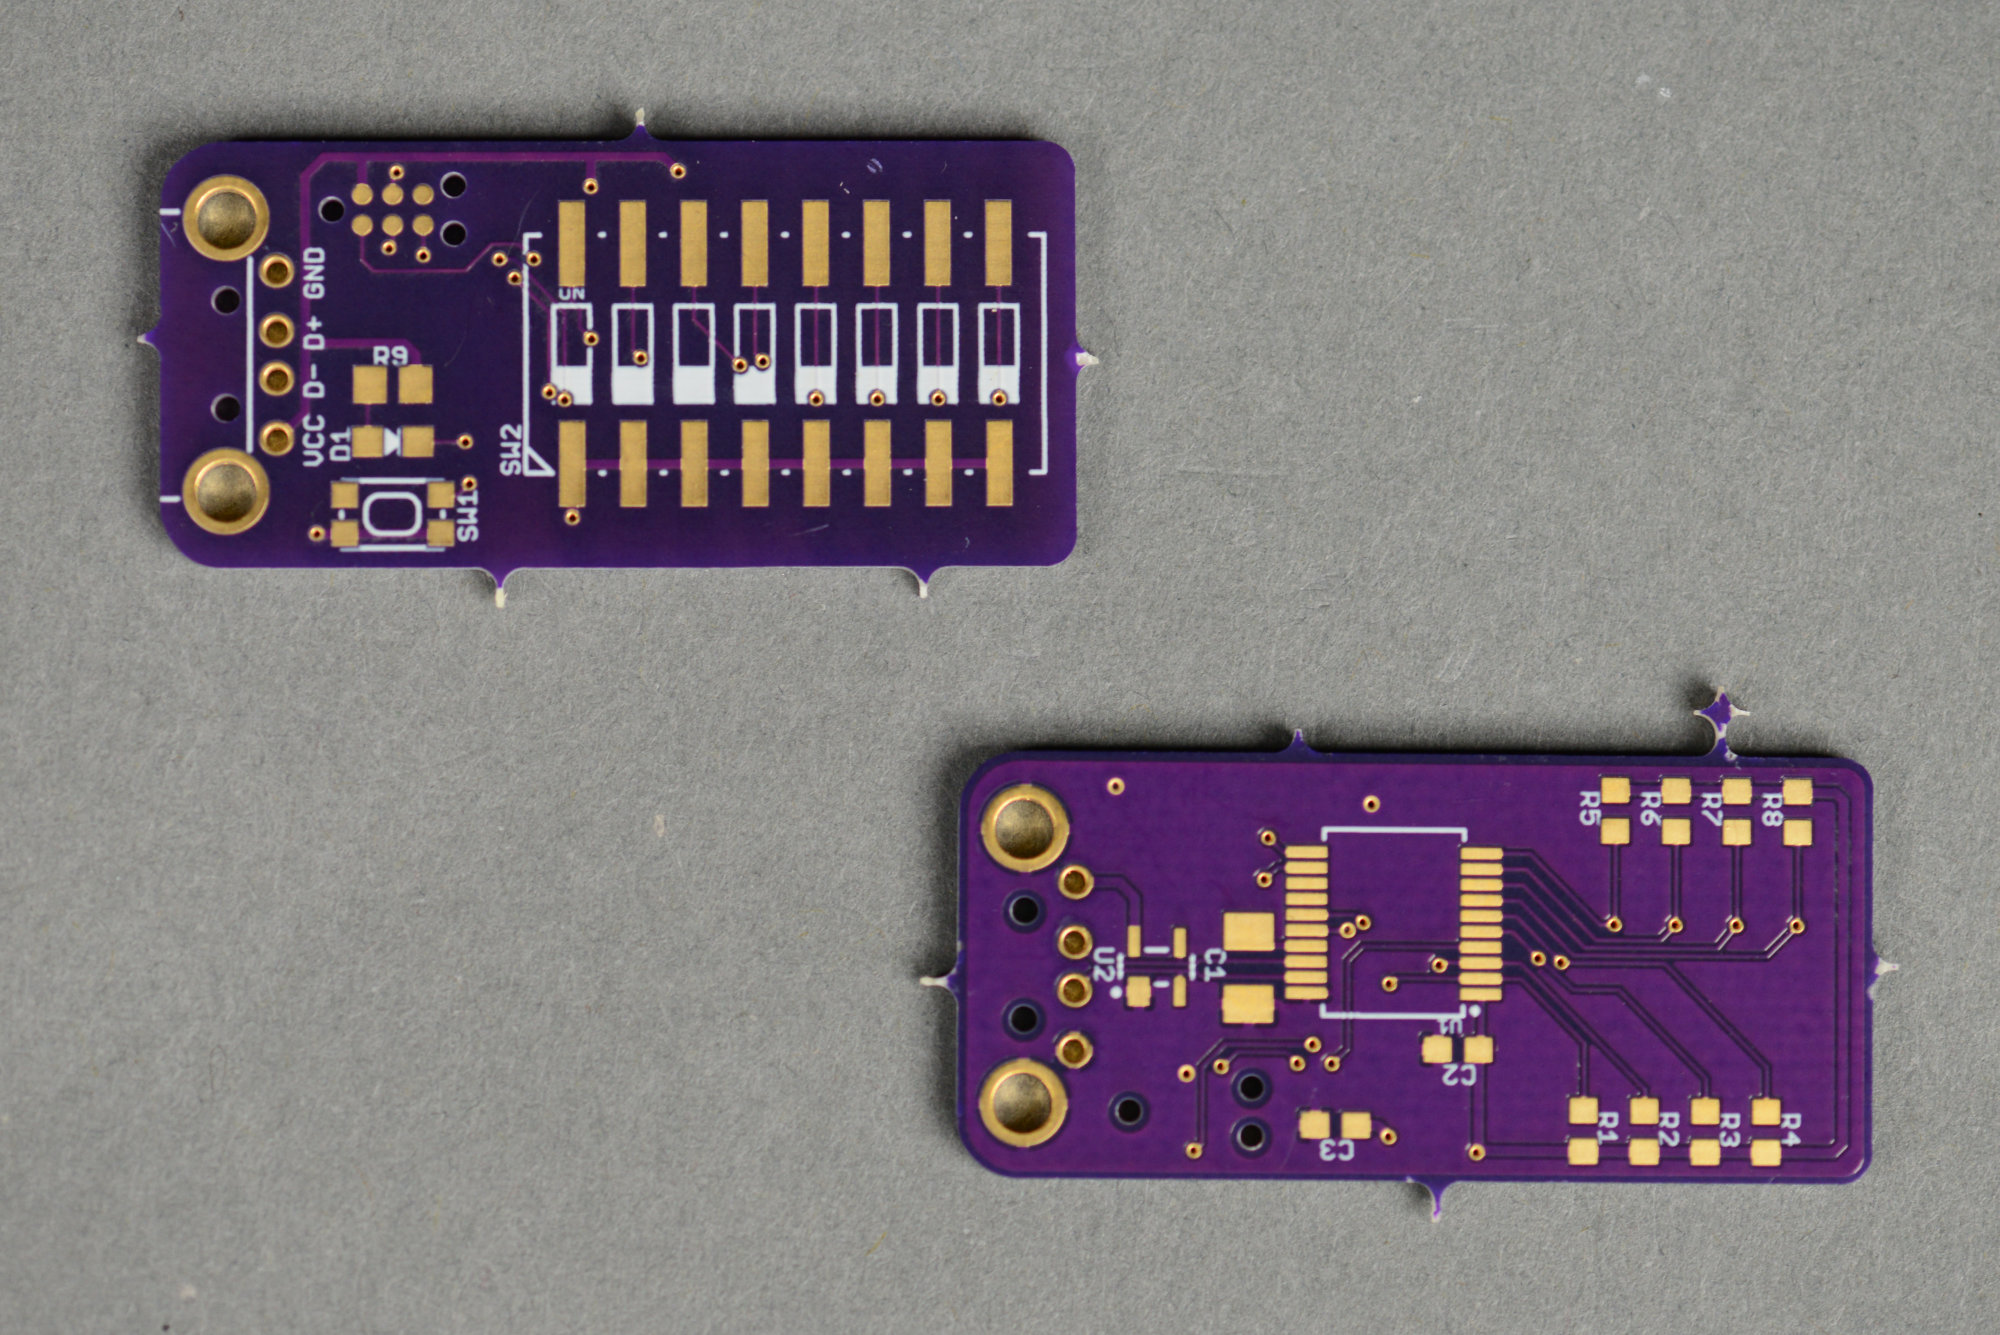
Board versions compared.
The image above shows the surface mount switch version of the board on the left and the surface mount socket version of the board on the right. Once again, the only real difference is the width and height of the 16 pads for the switch or socket.
Assembly and Testing
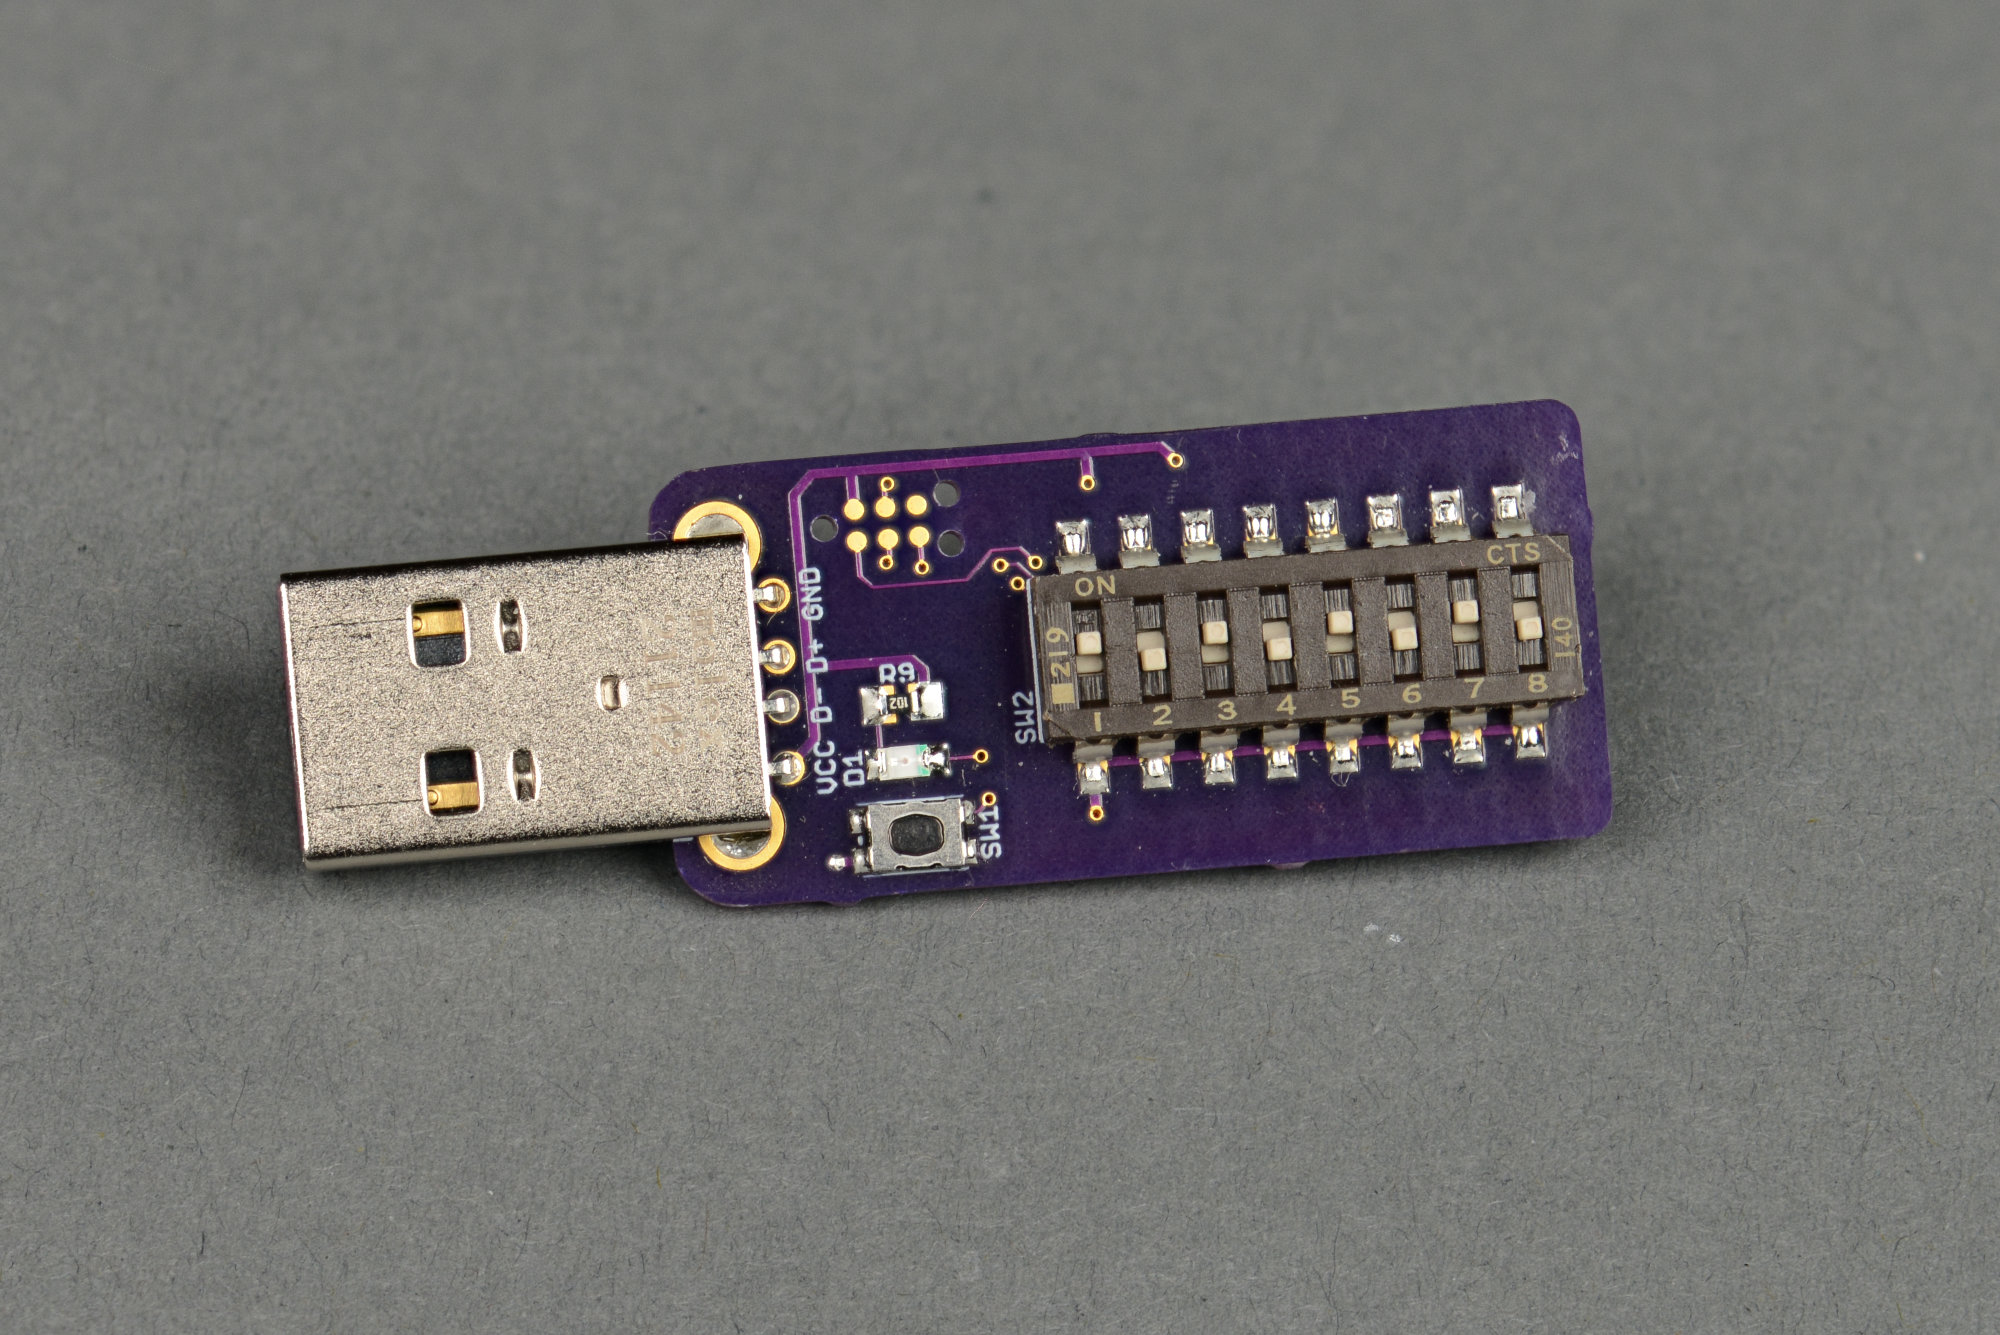
SMD version of the DIP switch USB stick.
With the boards back, I assembled and tested the surface mount switch version of the board first. I used my Microchip REAL ICE programmer and a Tag-Connect cable to program the software into the PIC16F1459. Once programmed, Windows found a new device and I launched my demo application. Everything worked as expected!

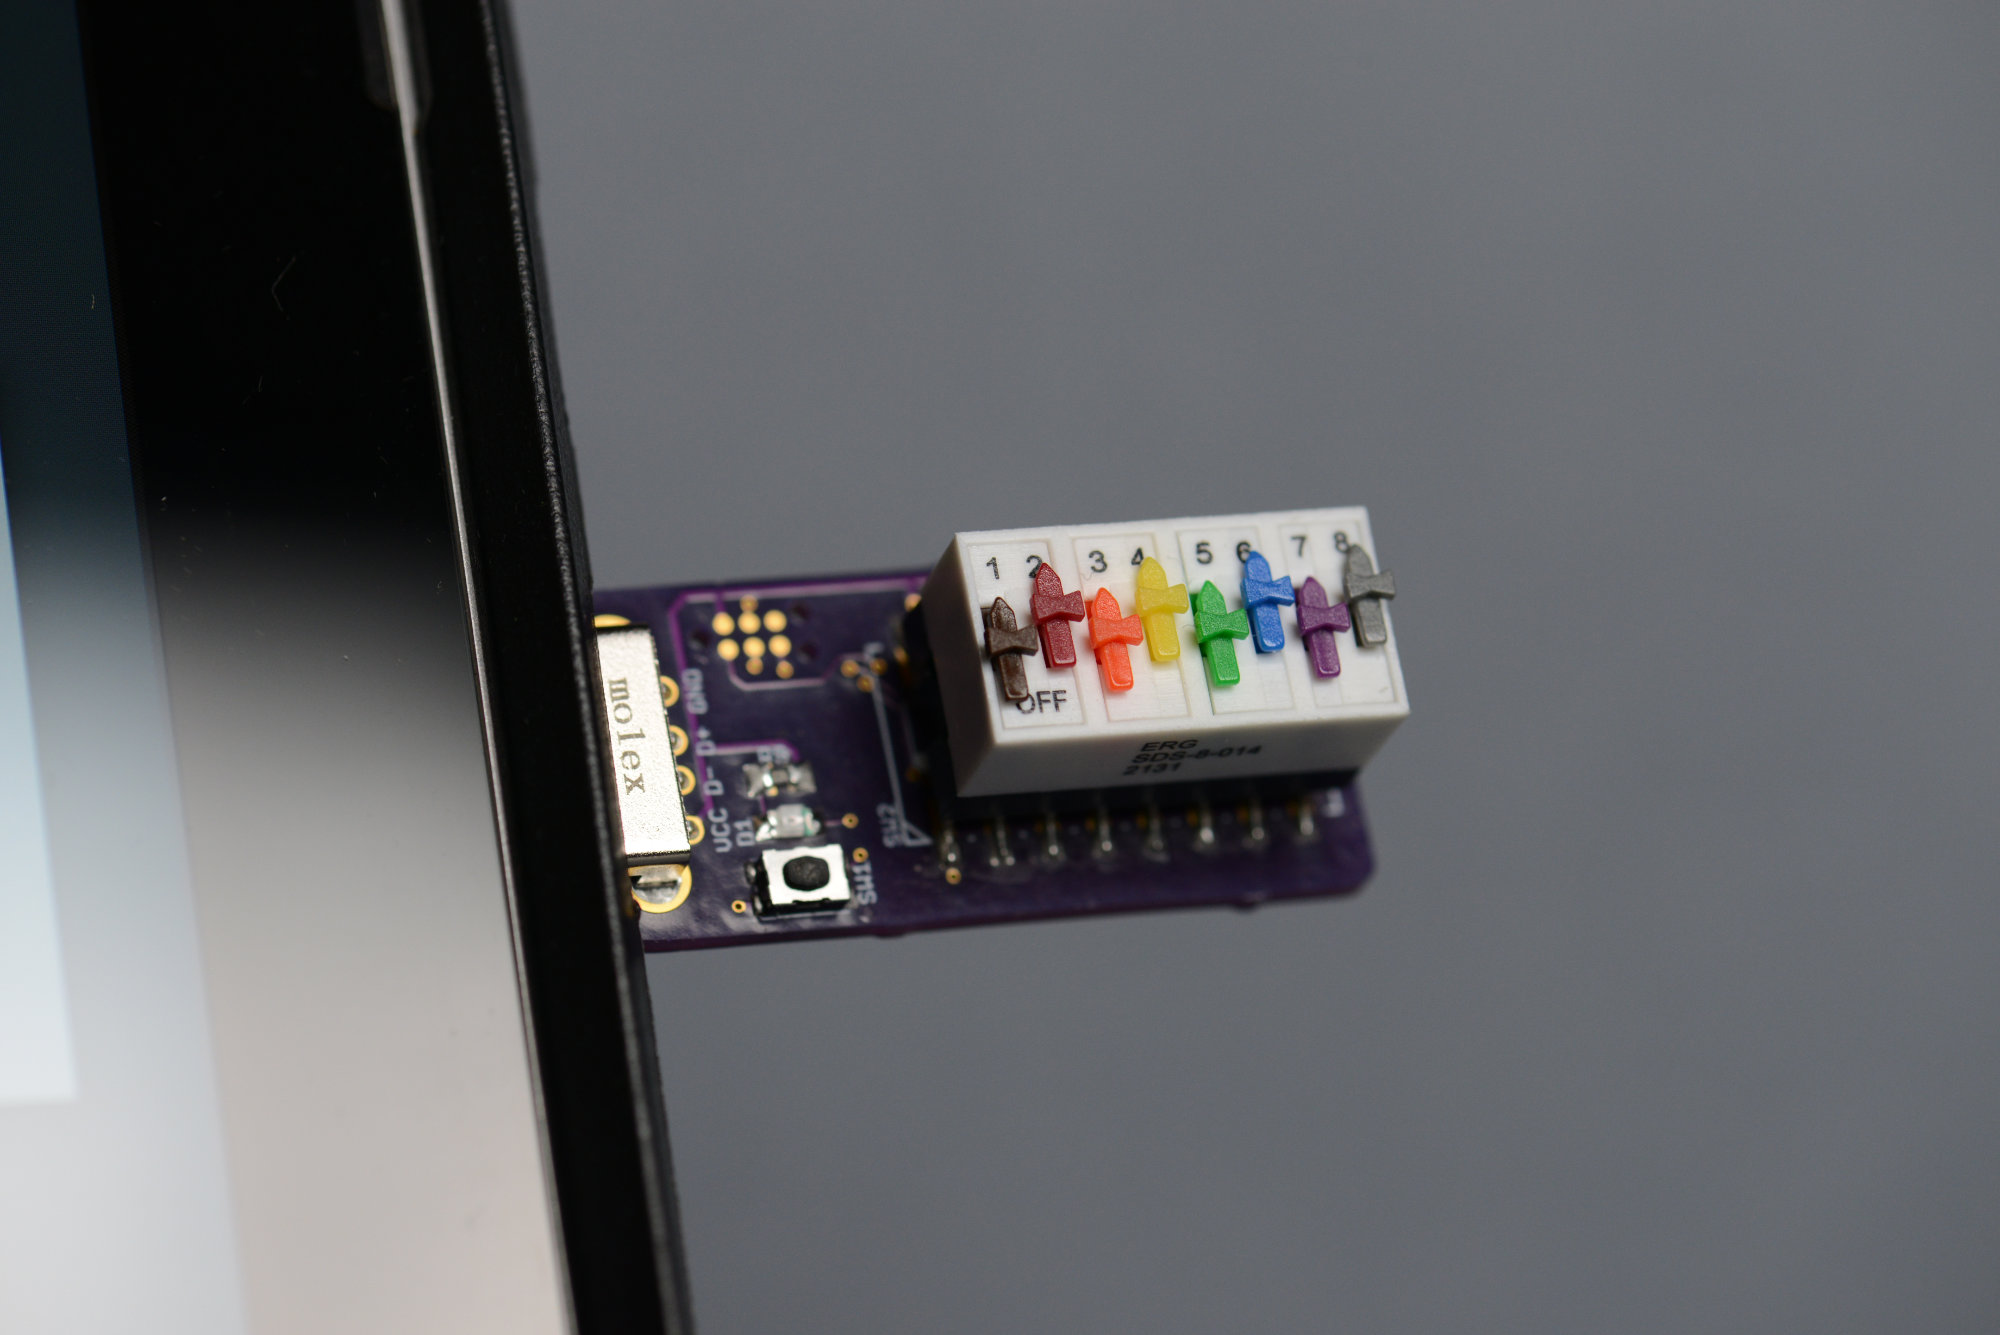
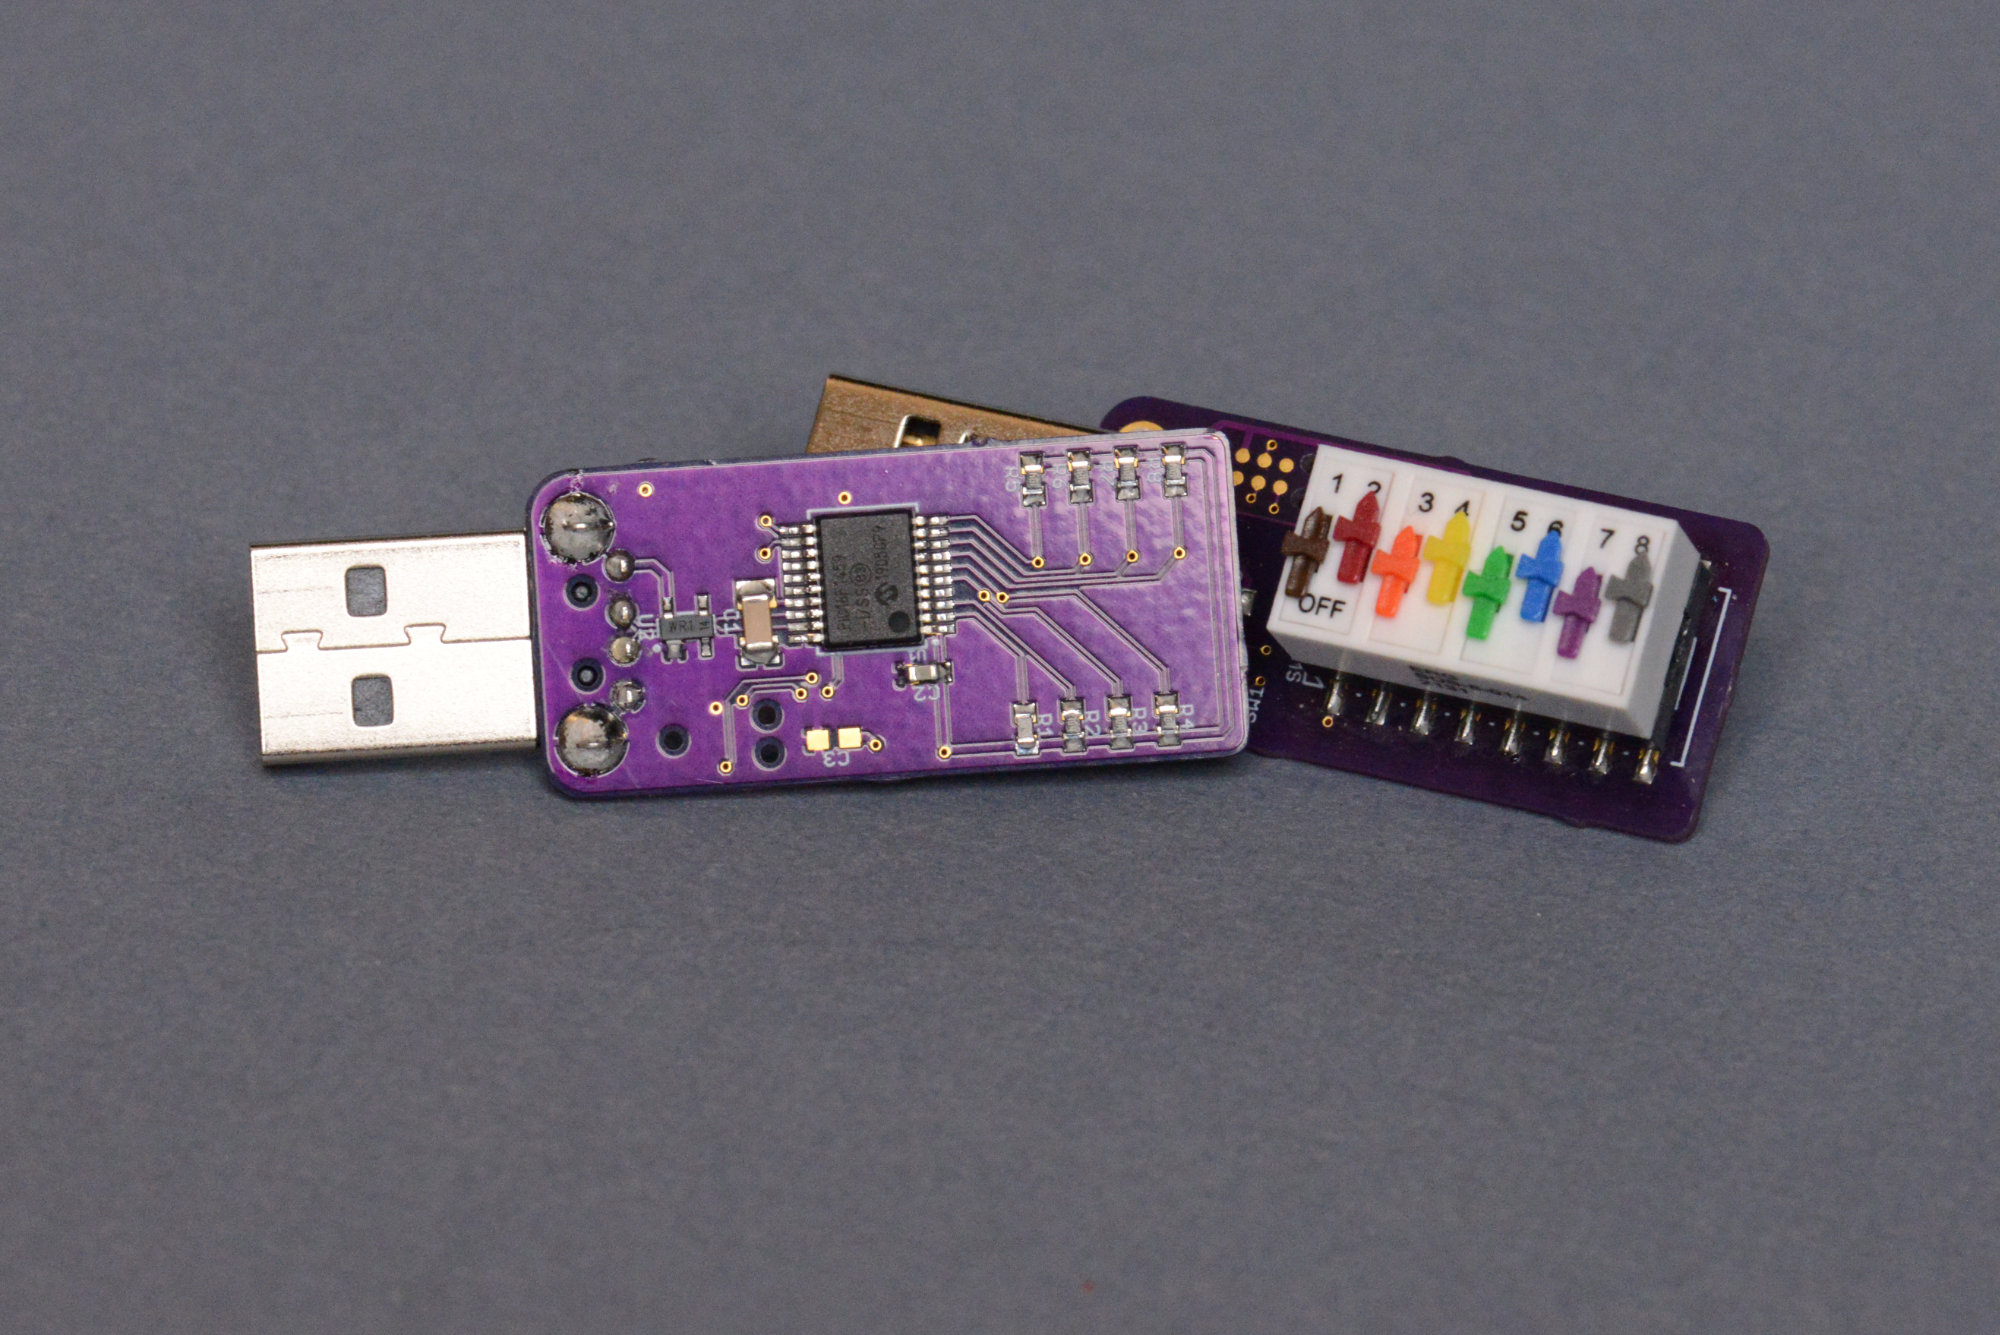
Through-hole version of the DIP switch USB stick.
Once I was happy with the surface mount switch version of the board, I assembled and tested the surface mount socket version of the board. It worked too!
I did learn that the ERG DIP switches are bit finicky. If a switch is pushed up past its on position, it will briefly open up again until it is released and settles back into its on / closed position. I did not experience this phenomenon with the blue TE through-hole slide switches or the red Grayhill through-hole rocker switches.
Additional Photos
Below are some additional photos of the DIP switch USB stick.
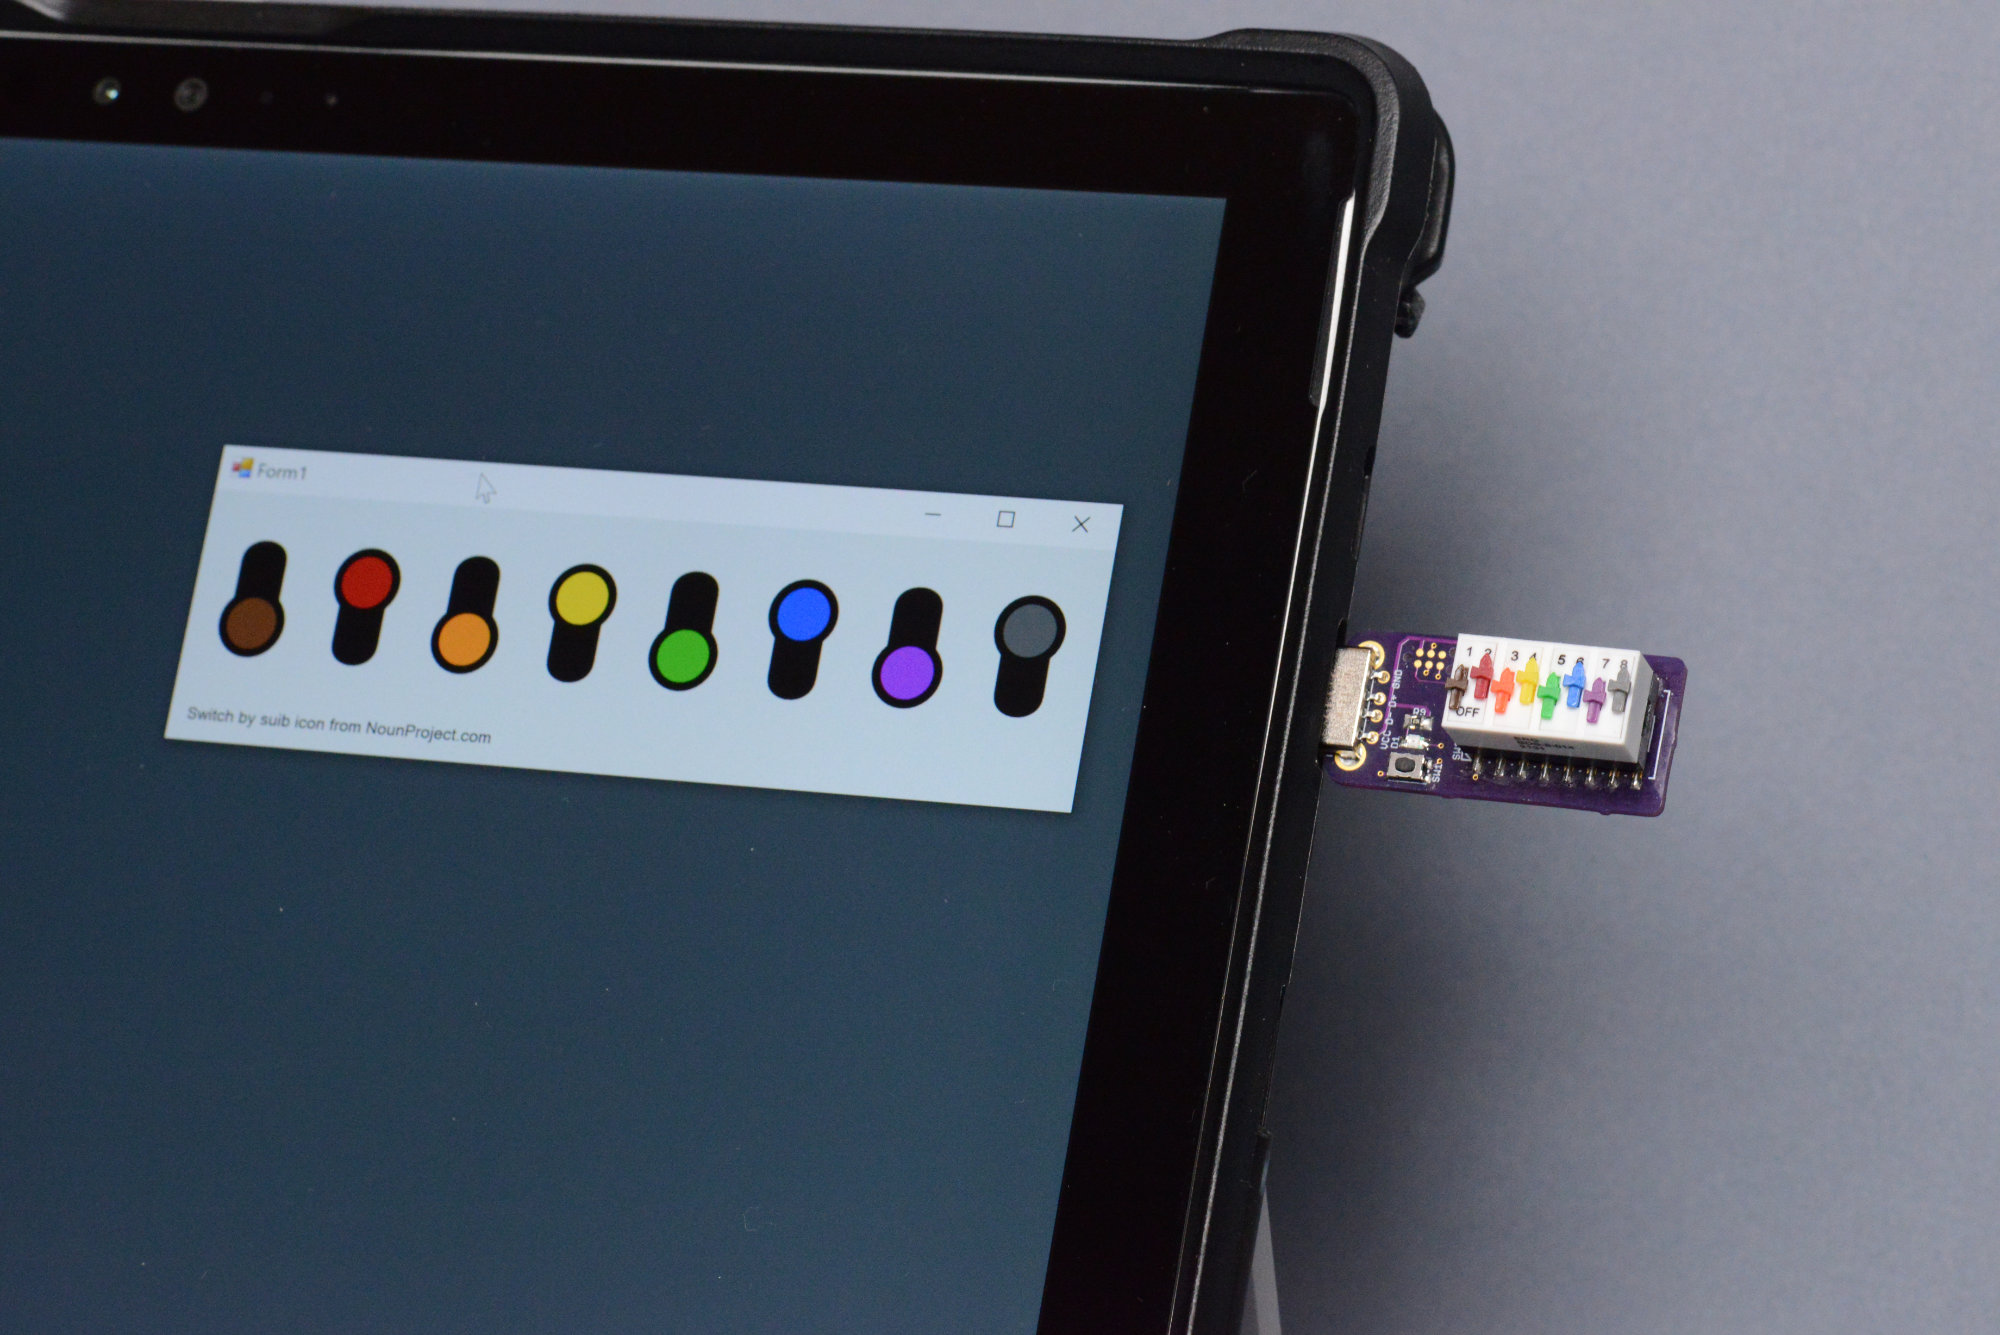
Dip switch USB stick plugged into a Surface Pro and running the demonstration app.

Dip switch USB stick plugged into Surface Pro.
Dip switch USB stick plugged into Surface Pro.
Rear and front view of dip switch USB stick.
Design Files
The design files for the circuit boards, the PIC16F1459 firmware, and the C# .NET demo application are available in my DIP switch USB stick repository on Github.