

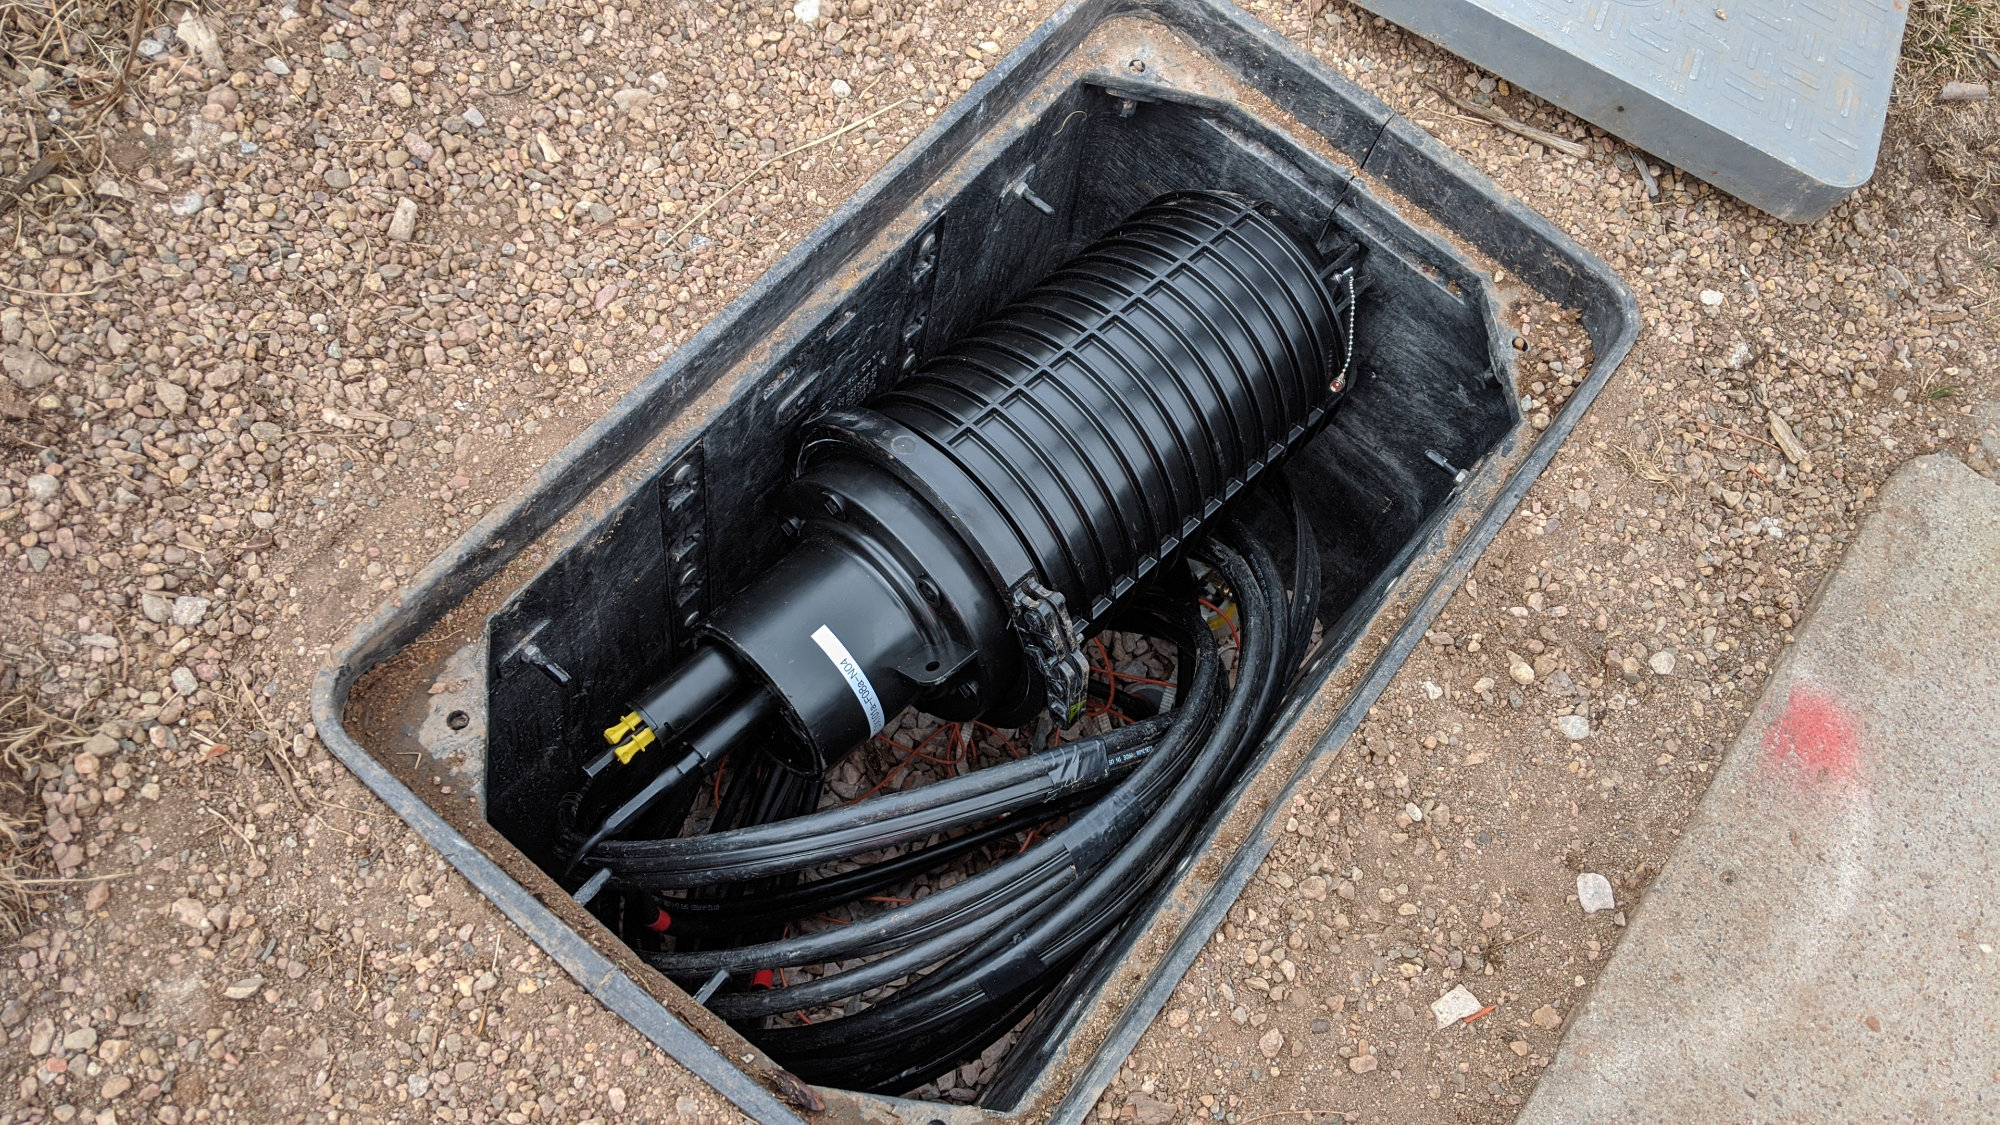
A 24-count, gel-filled fiber cable is terminated inside this small splice enclosure. The splice enclosure is then placed inside the underground vault to await connections to drop fibers to people’s homes.
Welcome to part four of my blog post on the construction and installation of the Fort Collins Connexion municipal broadband fiber network. In part three, we looked at the installation of service at my friend Collin’s house. In part four, we’re returning to my neighborhood and documenting the final construction steps before service goes live on my street.
January 30, 2020 – Splice Trucks in My Neighborhood
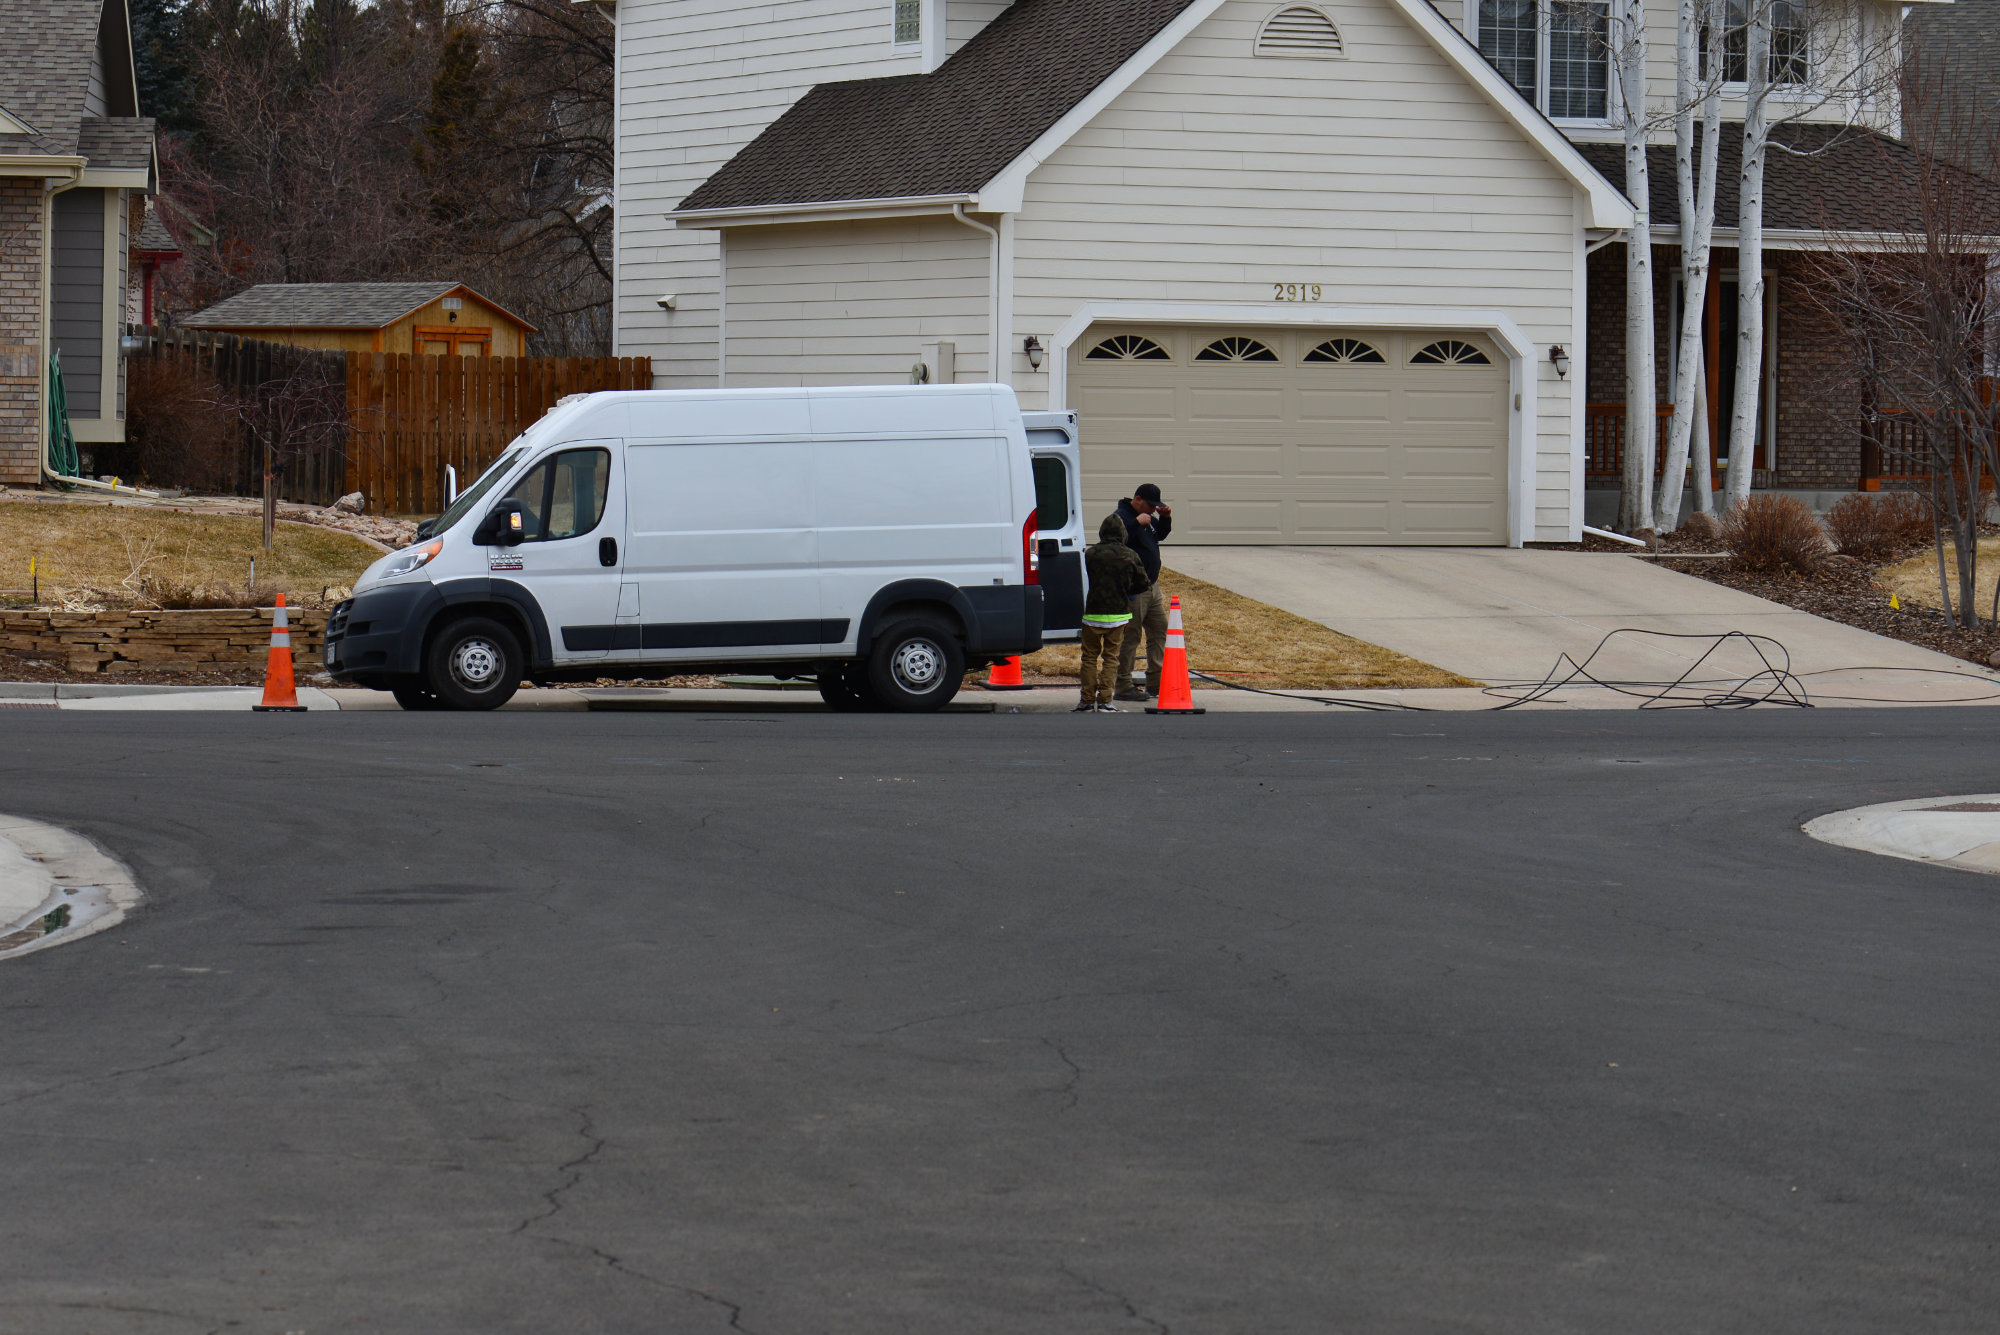
Technicians unroll the fiber cables from the vault before bringing them into the van to splice together.
On Thursday, January 30, 2020, contractors for Connexion were splicing fiber cables together to connect the fibers distributed throughout the neighborhood back to the fiber distribution hub (FDH) for the area. One technician worked at the vault across the street while another technician worked at the vault directly in my cul-de-sac.
At the Splice Vault on Our Cul-De-Sac
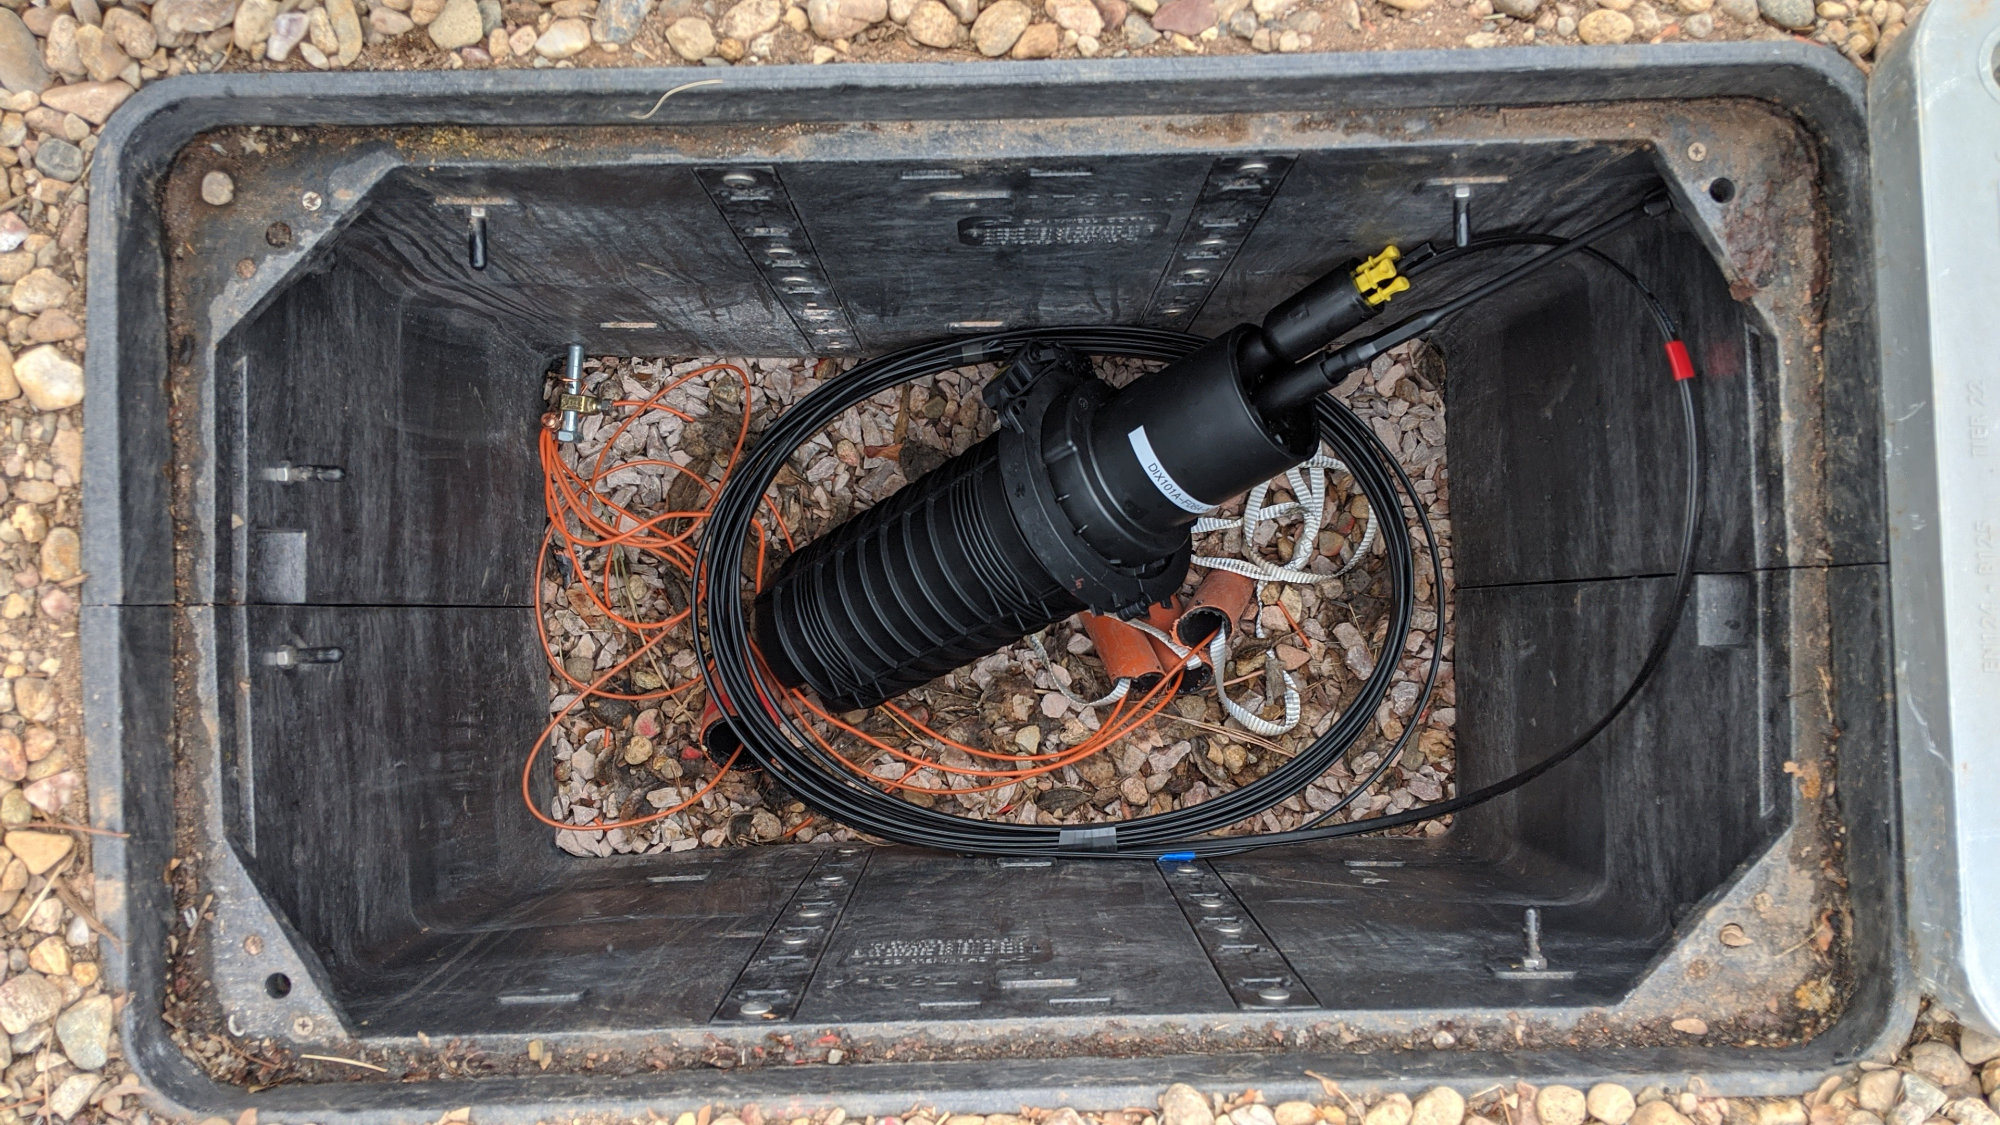
24-count gel filled fiber mounted in a small splice enclosure. The 6 fibers that will feed the houses on my cul-de-sac are routed to the top; the 18 unused fibers to the bottom. The slots will hold the fusion splices connecting to the drop fibers.
A fiber cable runs from the vault across the street to the vault on my cul-de-sac. Inside the vault on my cul-de-sac are four pieces of conduit. One conduit contains the fiber cable from across the street. The other three smaller conduits are empty. The three empty lengths of conduit run to three flower pots distributed in front of about ten houses.
When someone orders service, a drop fiber is buried from the house to the flowerpot. The fiber is then pulled through the conduit in the flower pot up and into this vault. Inside the vault the drop fiber will be fusion spliced to the existing distribution fiber that runs through the larger conduit and across the street.
The splices are protected using a waterproof splice enclosure and a splice tray. The splice tray is shown in the photo above. The technician disassembled the splice enclosure and fed the fiber cable from across the street into the bottom of the splice enclosure. When houses subscribe to service, their drop fibers will be fed up into the bottom of the splice enclosure too.
This particular fiber cable was a 24-count, gel-filled cable. The technician removed the outer sheath of the fiber cable exposing the gel and 24 individual fibers. He used some isopropyl alcohol to remove the sticky gel from the fibers then placed the fibers into the races on the tray.
The 24 fibers were divided into a group of 18 and a group of 6. The 18 fibers were placed in the bottom of the tray (left side in photo). These fibers are not connected to the network and will not be used for service.
The remaining 6 fibers were placed in the top of the tray (right side in photo). These fibers will be spliced to the fibers that connect to the houses on our street. The space in the middle will hold and protect the individual splices when the time comes to install the drop fibers.
All sealed up and waiting for the drop fibers. The larger conduit holds the distribution fiber. The three smaller empty conduits go to the flower pots in front of our houses and will hold the drop fibers. All the tracer wires are grounded in the vault.
Remember that I wrote earlier that there are about 10 houses served by the conduit and flower pots out of this vault? There’s only six fibers allocated for connections to service though. Connexion is betting that not everyone will subscribe to service.
If more than six houses subscribe, technicians will have to reallocate and re-splice fibers from the splice vault all the way back to the fiber distribution hub to accommodate the extra houses. This is unlikely to happen.
After routing the fibers in to their raceways, the technician closed the splice enclosure and placed it into the vault as shown in the photo above. The splice enclosure is waterproof and will protect the exposed fibers and splices inside.
The orange wires in the vault are tracer cables used to locate the conduit and fiber underground. If you look closely, you can see that they’re tied to a ground rod in the side of the vault. The red tape on the fiber cable indicates that fiber cable runs toward the headend. Blue tape is used on fibers that run toward subscribers. Finally, the technician closed the vault.
At the Splice Vault Across the Street

Meanwhile across the street in the splice truck, another technician exposes the fibers in the distribution fiber. He’ll carefully pull out six of the fibers from this larger cable and splice them to the six used fibers feeding into the vault.
Meanwhile across the street, a technician had the job to splice the six allocated fibers from the vault in the cul-de-sac into the 144-fiber cable running through this vault and through the neighborhood. The splicing is done inside the splice truck to provide a dry, clean, controlled work environment for the equipment, fiber, and operator.
The fibers before and after fusion splicing.
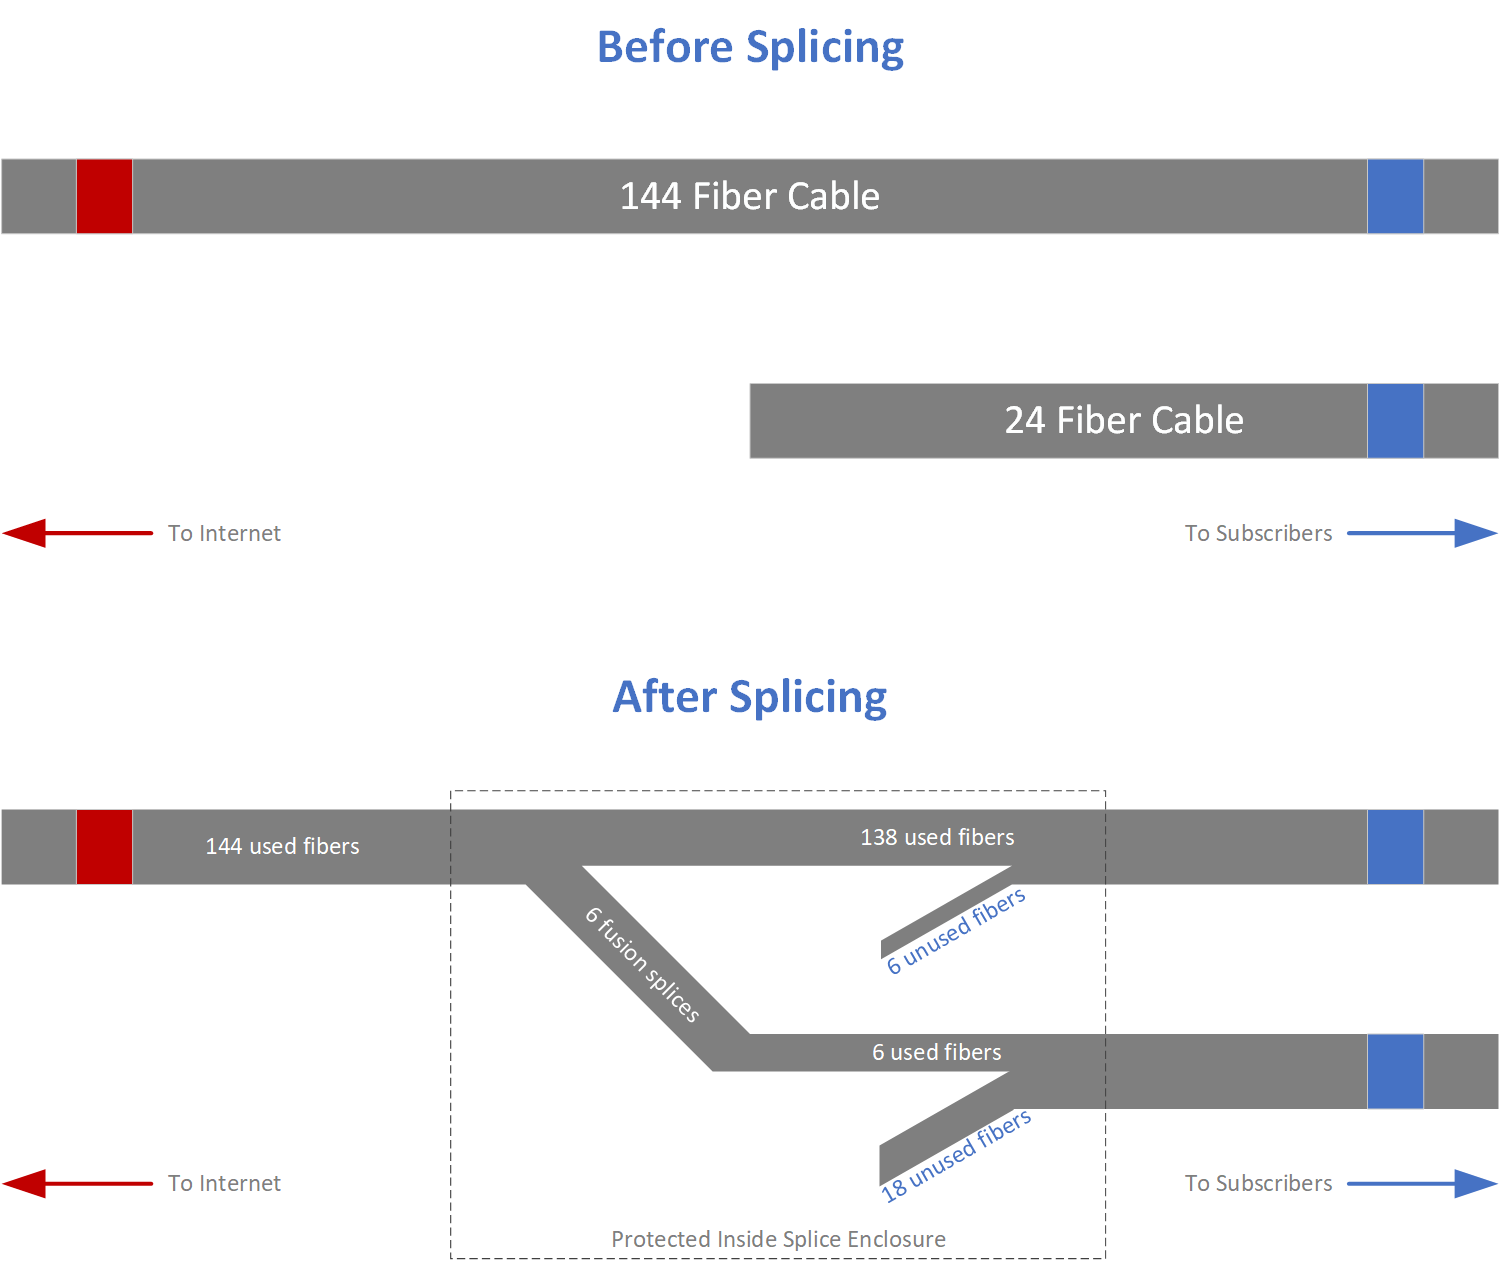
Inside the vault are two fiber cables. The first cable has 144 fibers. It comes into the vault, some extra cable is coiled up, and then it leaves the vault. It is a continuous piece of cable. The second cable has 24 fibers. It begins at this vault and ends at the vault on my cul-de-sac. This is the situation shown in “Before Splicing” in the diagram above.
The technicians job is to carefully pluck out six fibers from the 144 fiber cable, cut them, and splice them to six fibers of the 24 fiber cable running to our cul-de-sac. The first step in the process is to pull the outer protective sheath off the 144 fiber cable and pull a section of it into the splice enclosure. The 144 fibers are carefully placed into raceways inside the splice enclosure. Unfortunately, I don’t have photo of this.
The 24 fiber cable is then stripped and pulled into the splice enclosure. The 24 fibers are run around raceways as well. After all the individual fibers are in their raceways, the technicians pulls 6 fibers from the 144 fiber cable and cuts them. He then uses a fusion splice machine to splice these 6 fibers to the 6 fibers allocated to our cul-de-sac. This leaves 6 fibers in the 144 fiber cable and 18 fibers in the 24 fiber cable headed towards everybody’s houses orphaned. This is depicted in the “After Splicing” section of the diagram above.
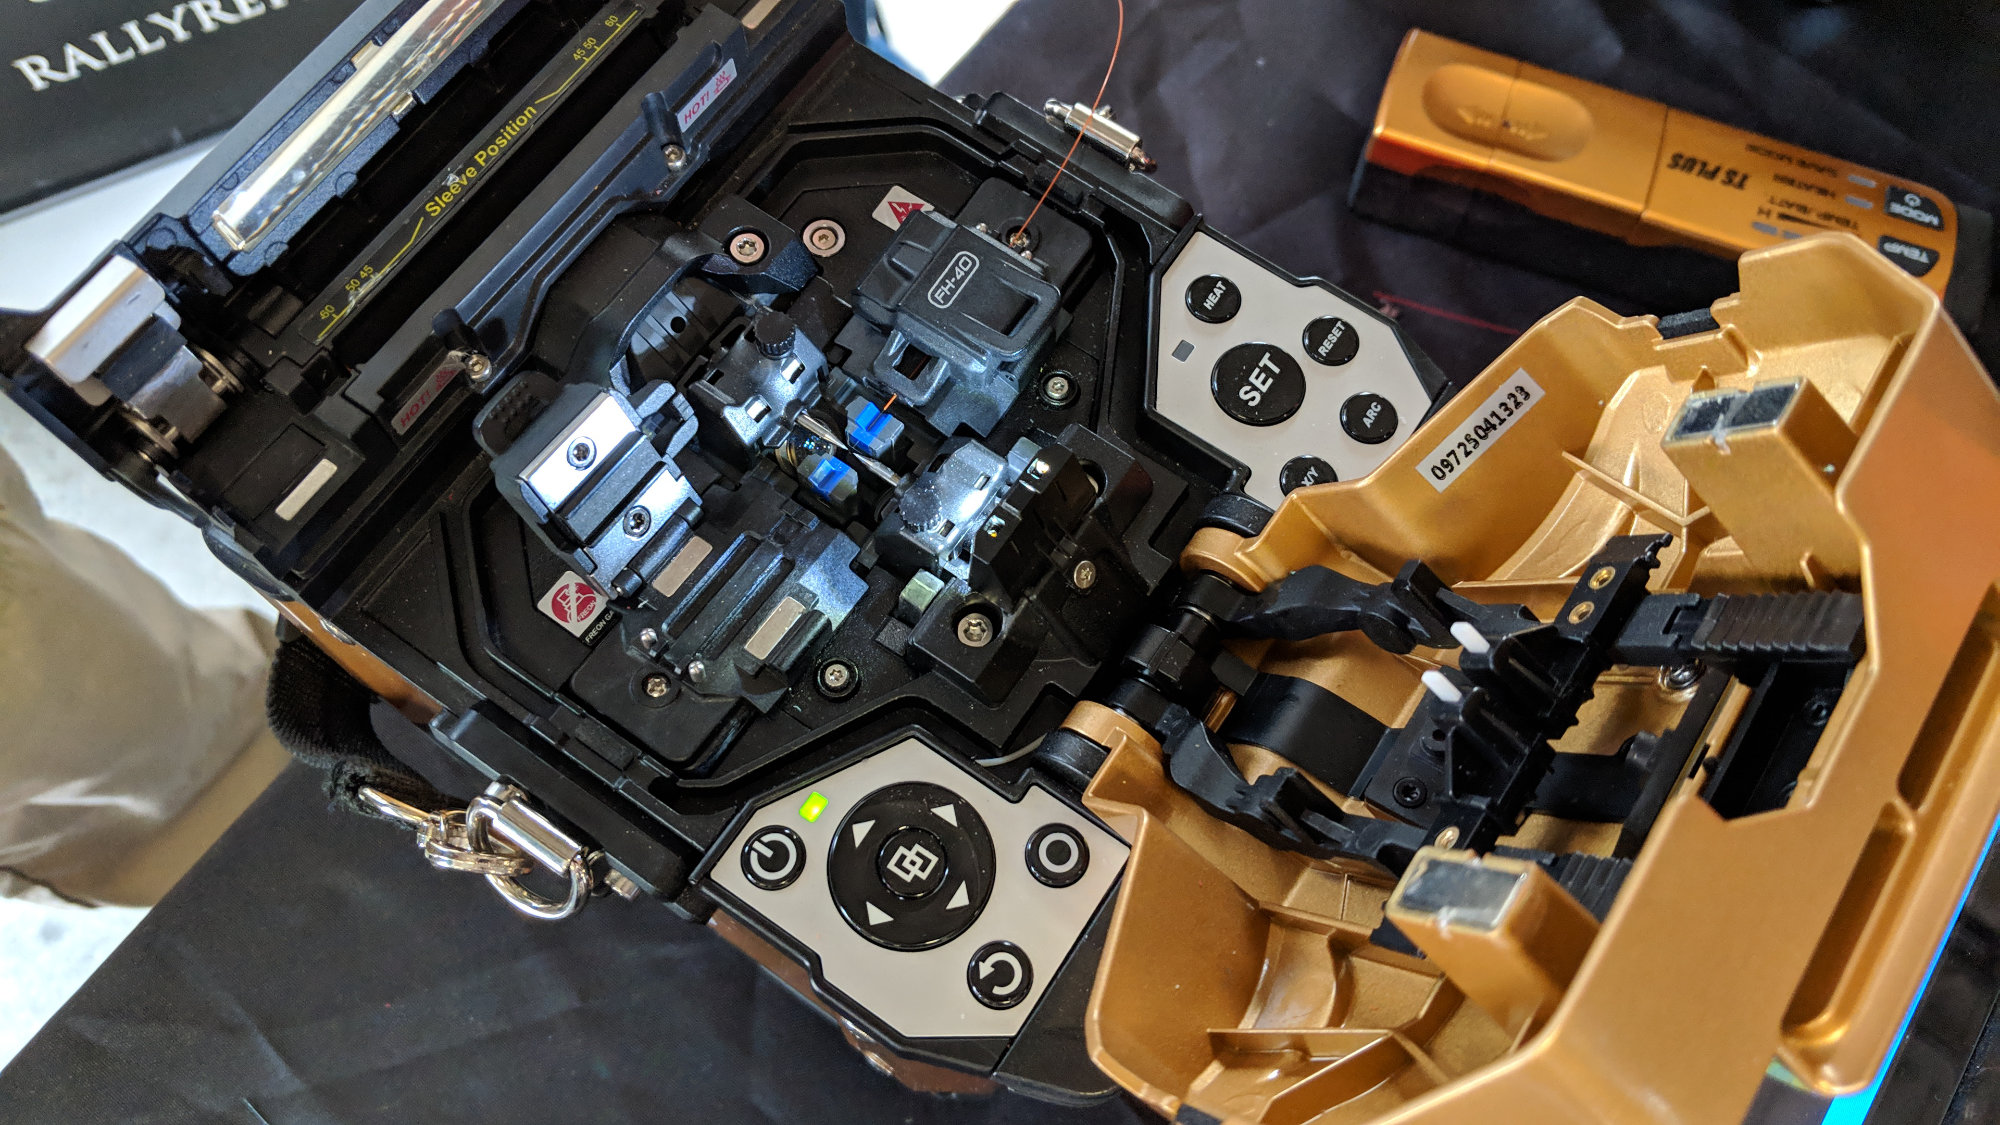
The distribution fiber contains 144 fibers. He’ll roll up the ones that don’t need to be spliced into the splice tray on the workbench in the previous photo. He’ll then use a fusion splicer similar to this one to splice the 6 fibers to our vault into the cable.
The fusion splicer automatically aligns the ends of the fibers then applies heat using an electric arc to fuse them into a single continuous piece of glass. A separate heater at the back of the machines shrinks heat shrink tubing to protect the splice.
When the splice truck drives off there will be continuous pieces of fiber from the vault for the drop fibers on our cul-de-sac to the fiber distribution hub (FDH) at the edge of the neighborhood. Inside the FDH, fibers from up to 32 homes are combined using a passive optical splitter into a feeder fiber.
The feeder fibers then run to an OLT at a fiber hut co-located at an electrical substation. From there, it’s redundant 100 Gbps fiber to core routers and to the Internet.
Managed to get a quick photo of the assembled very large splice enclosure before they closed the vault and drove off. There’s two 144 fiber cables and a 24 fiber cable coming out of the bottom of the enclosure. Red tape points toward FDH/CO. Blue tape points toward houses.
When the technician is done splicing the cables, the splice enclosure is sealed, the fiber is coiled up, and everything is placed in the underground vault. In theory the fiber on my street and in my cul-de-sac now connects all the way back to the electrical substation where the fiber hut containing the OLTs is located.
February 15, 2020 – A Bit More Splicing

Splice truck at the corner of Skimmerhorn and Overland Trail. The grey above ground cabinets in the lower right are Comcast equipment. All the Connexion equipment is located in underground vaults.
I was riding my bike today and noticed another splice truck at the intersection of Overland and Skimmerhorn. I believe this is where the fiber from the electrical substation and fiber hut enters our neighborhood and where our fiber distribution hub is located.
This splice truck is a bit fancier than the previous splice truck. It has a window that’s just big enough for the splice enclosure to fit through. Inside that window is a smaller window that’s just big enough for the fiber cables to fit through. And inside that smaller window is a chunk of foam to keep the cold air outside the truck.
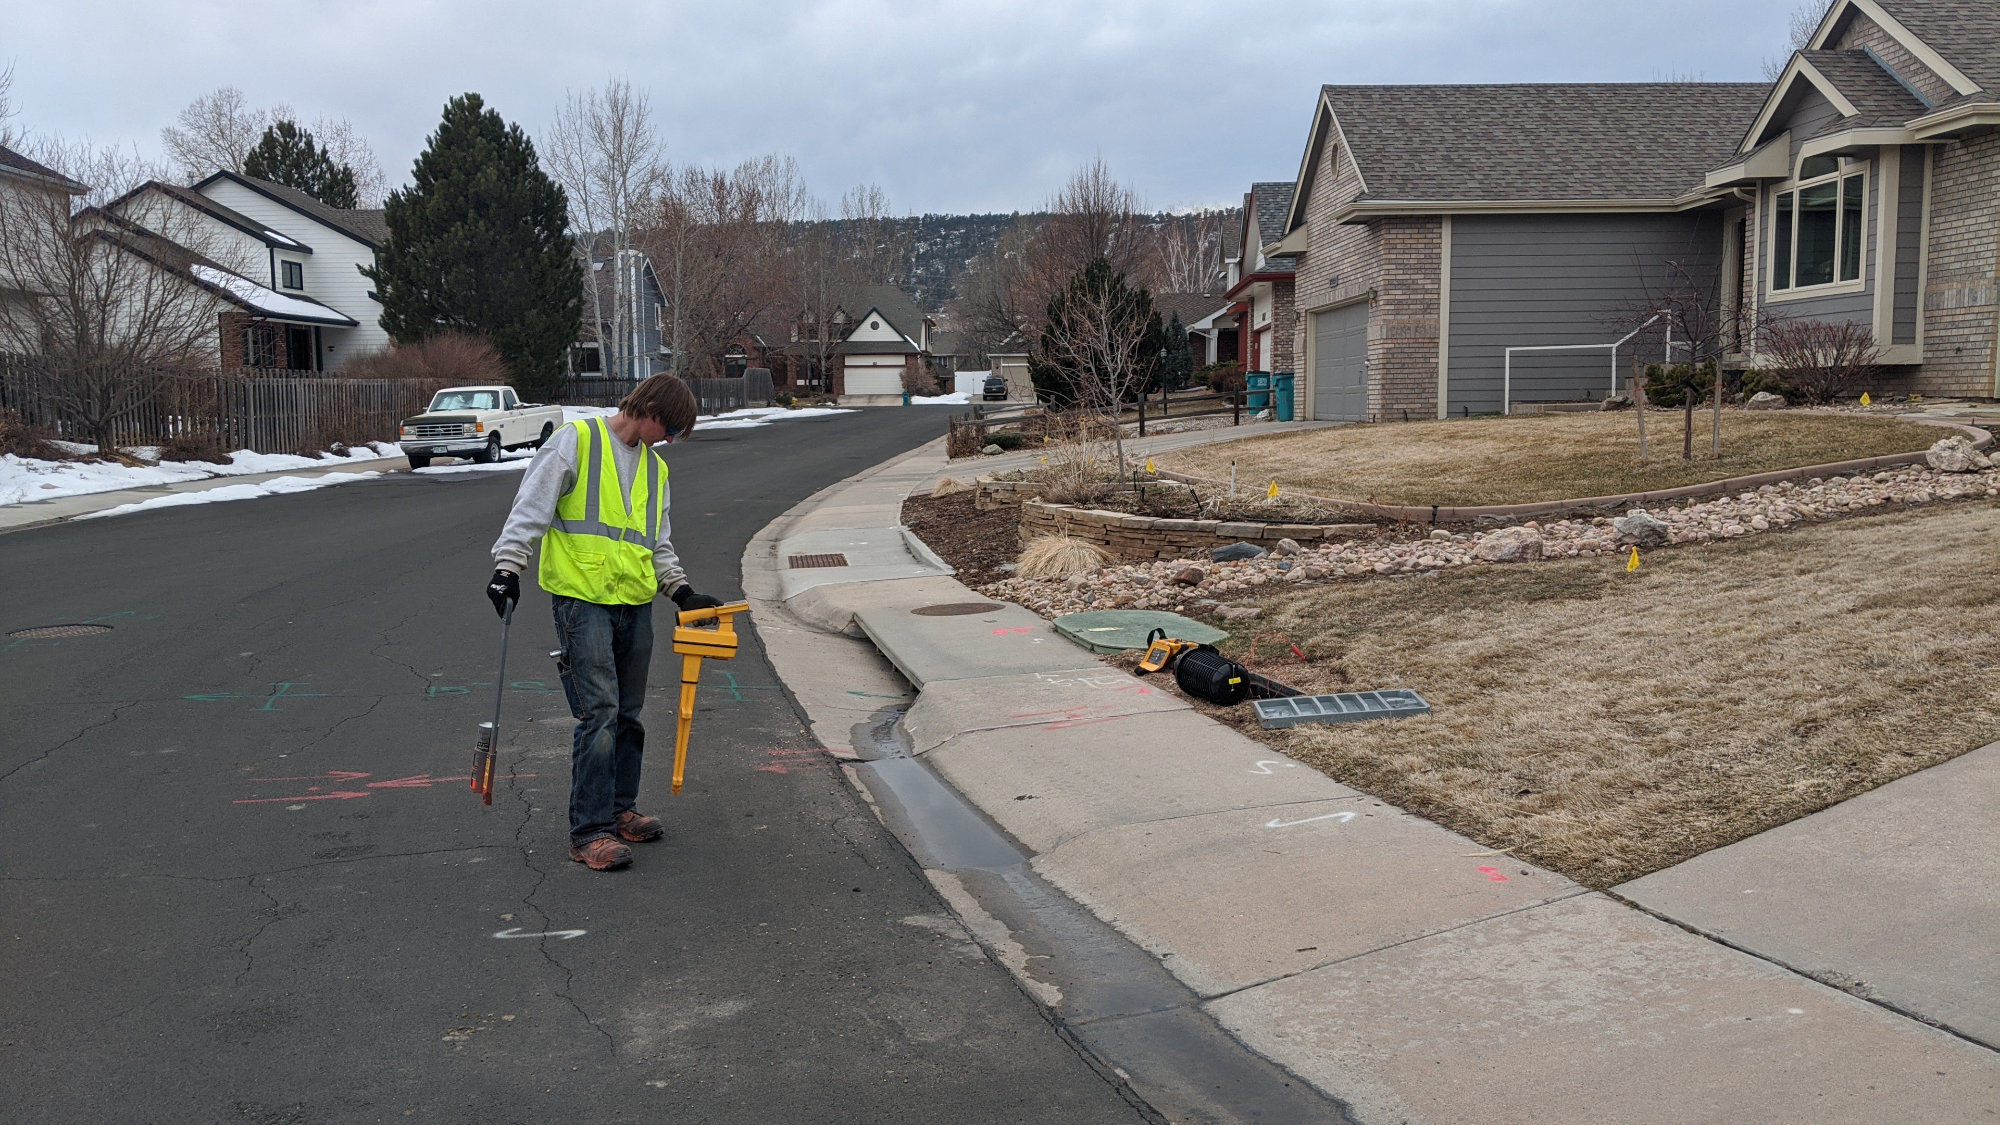
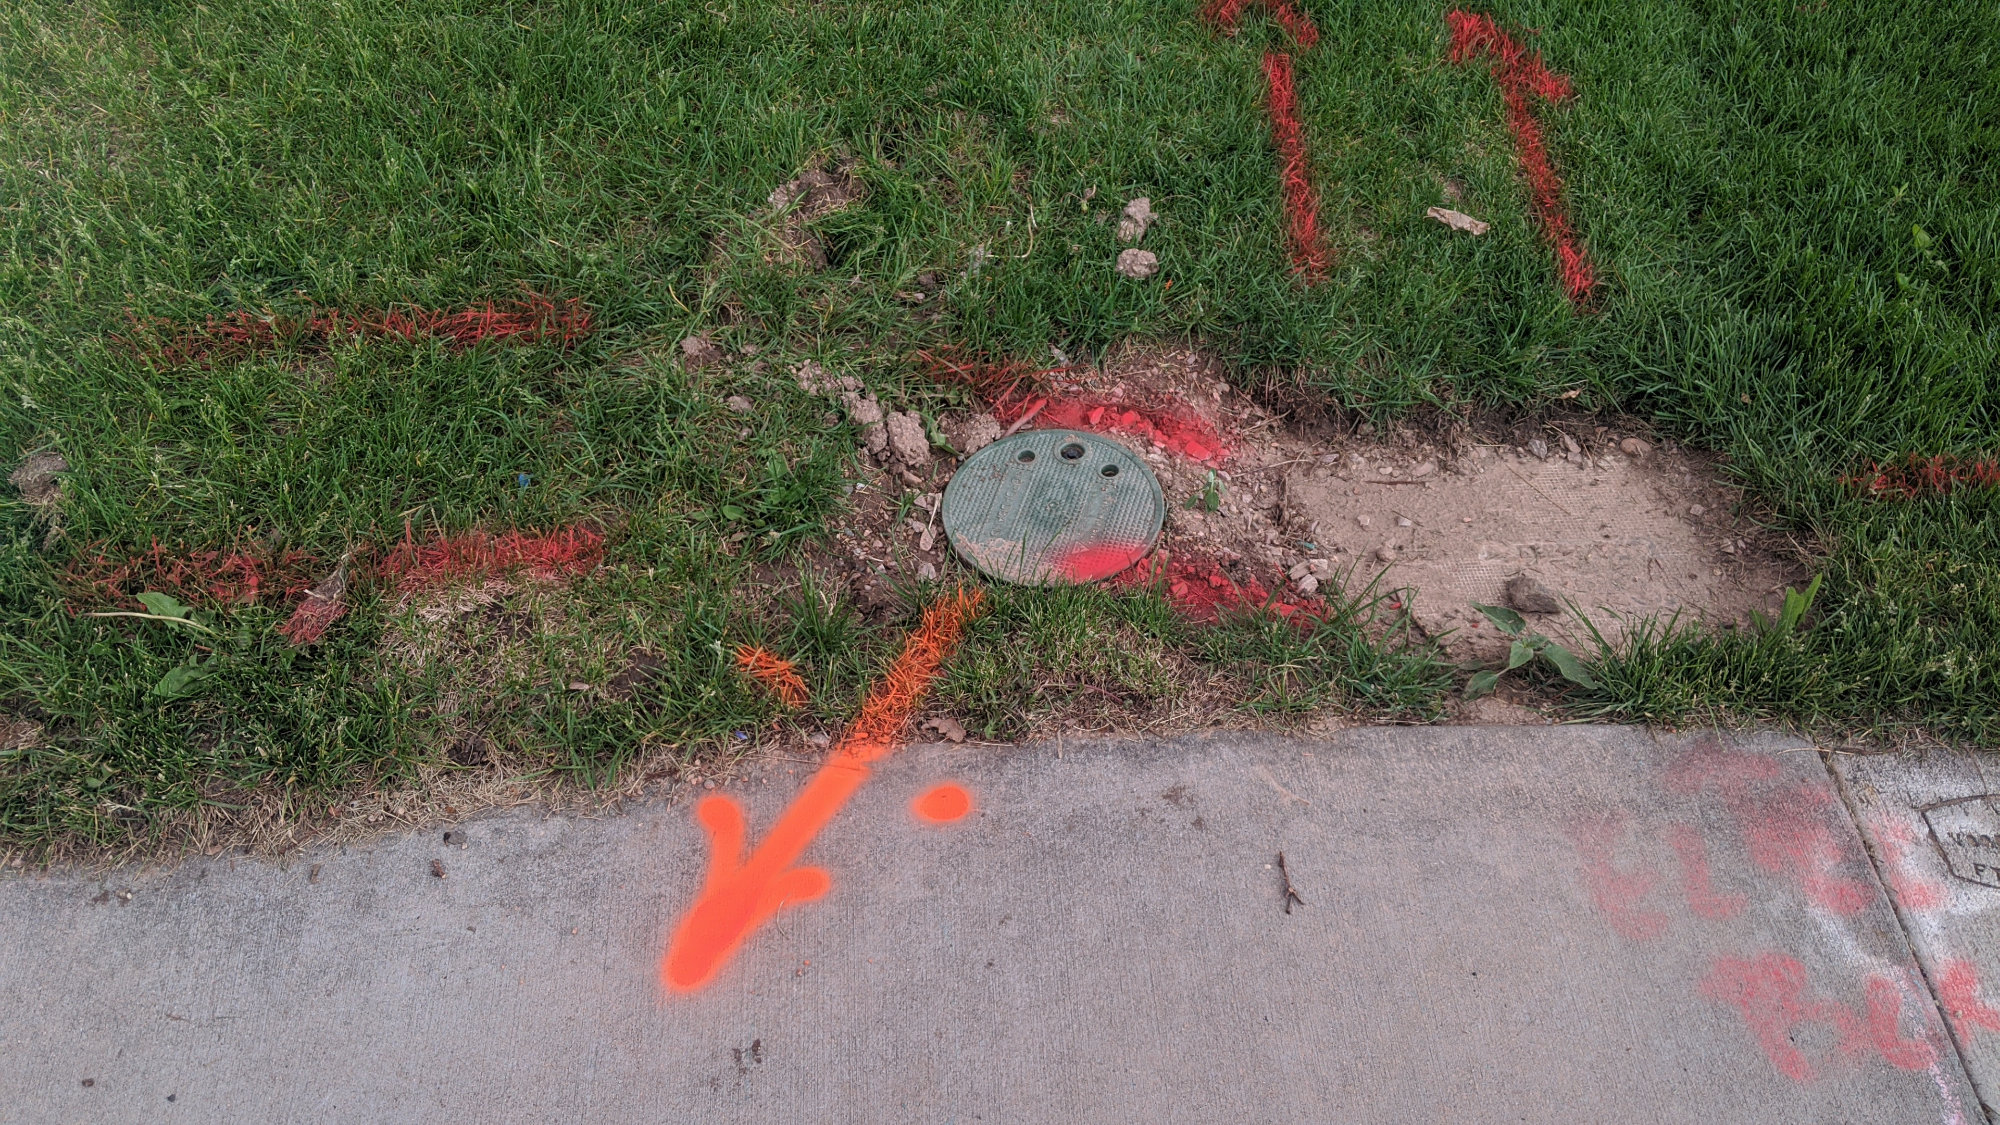
March 2, 2020 – Fiber Locates
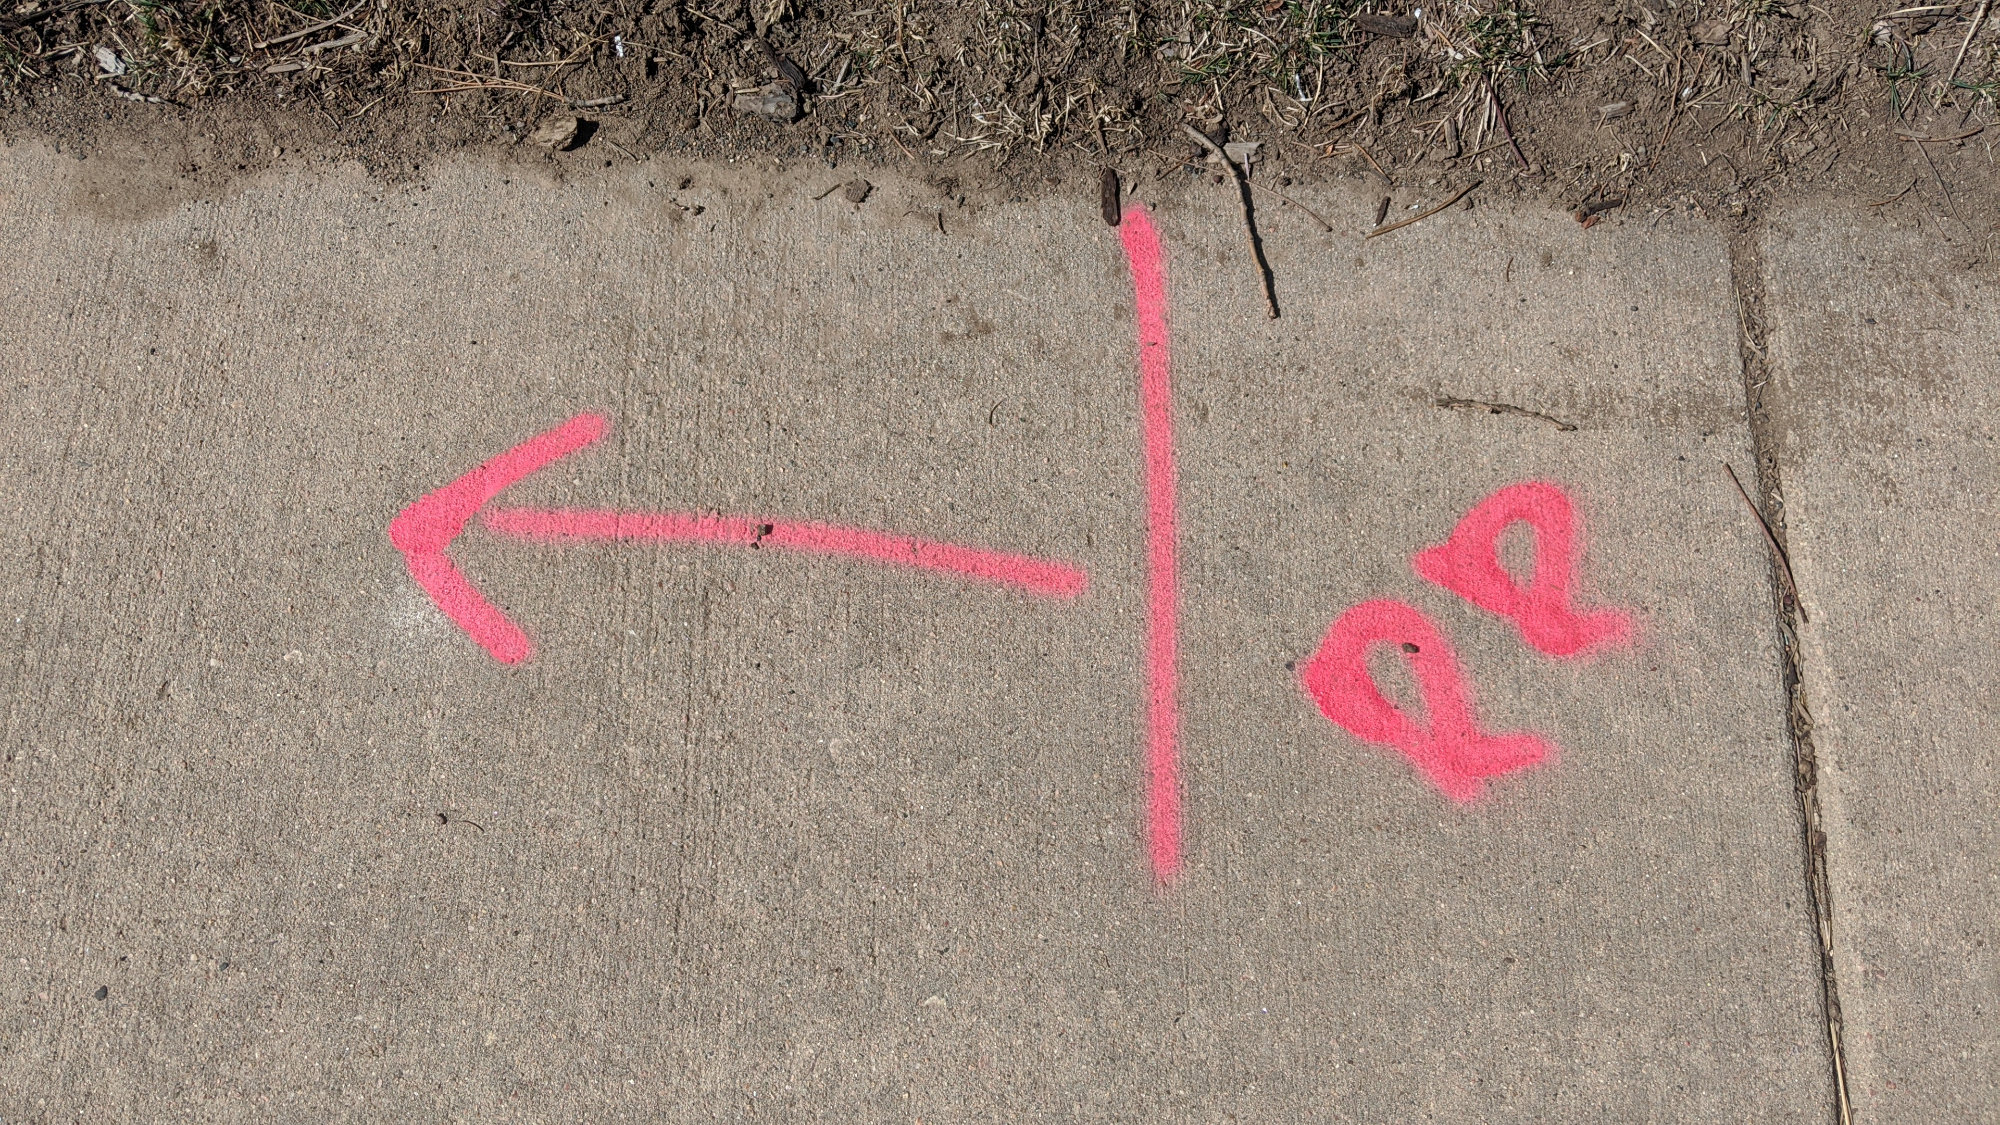
Oops. Looks like they misplaced or forgot to install some conduit.
Earlier this week someone painted hot pink lines along one of the fiber routes on my street then today a technician showed up to locate the existing conduit and fiber. It looks like they may have forgotten to run a length of conduit in the neighborhood. To see if they had or not, a technician located the existing fiber and conduit coming out of a splice vault across the street.
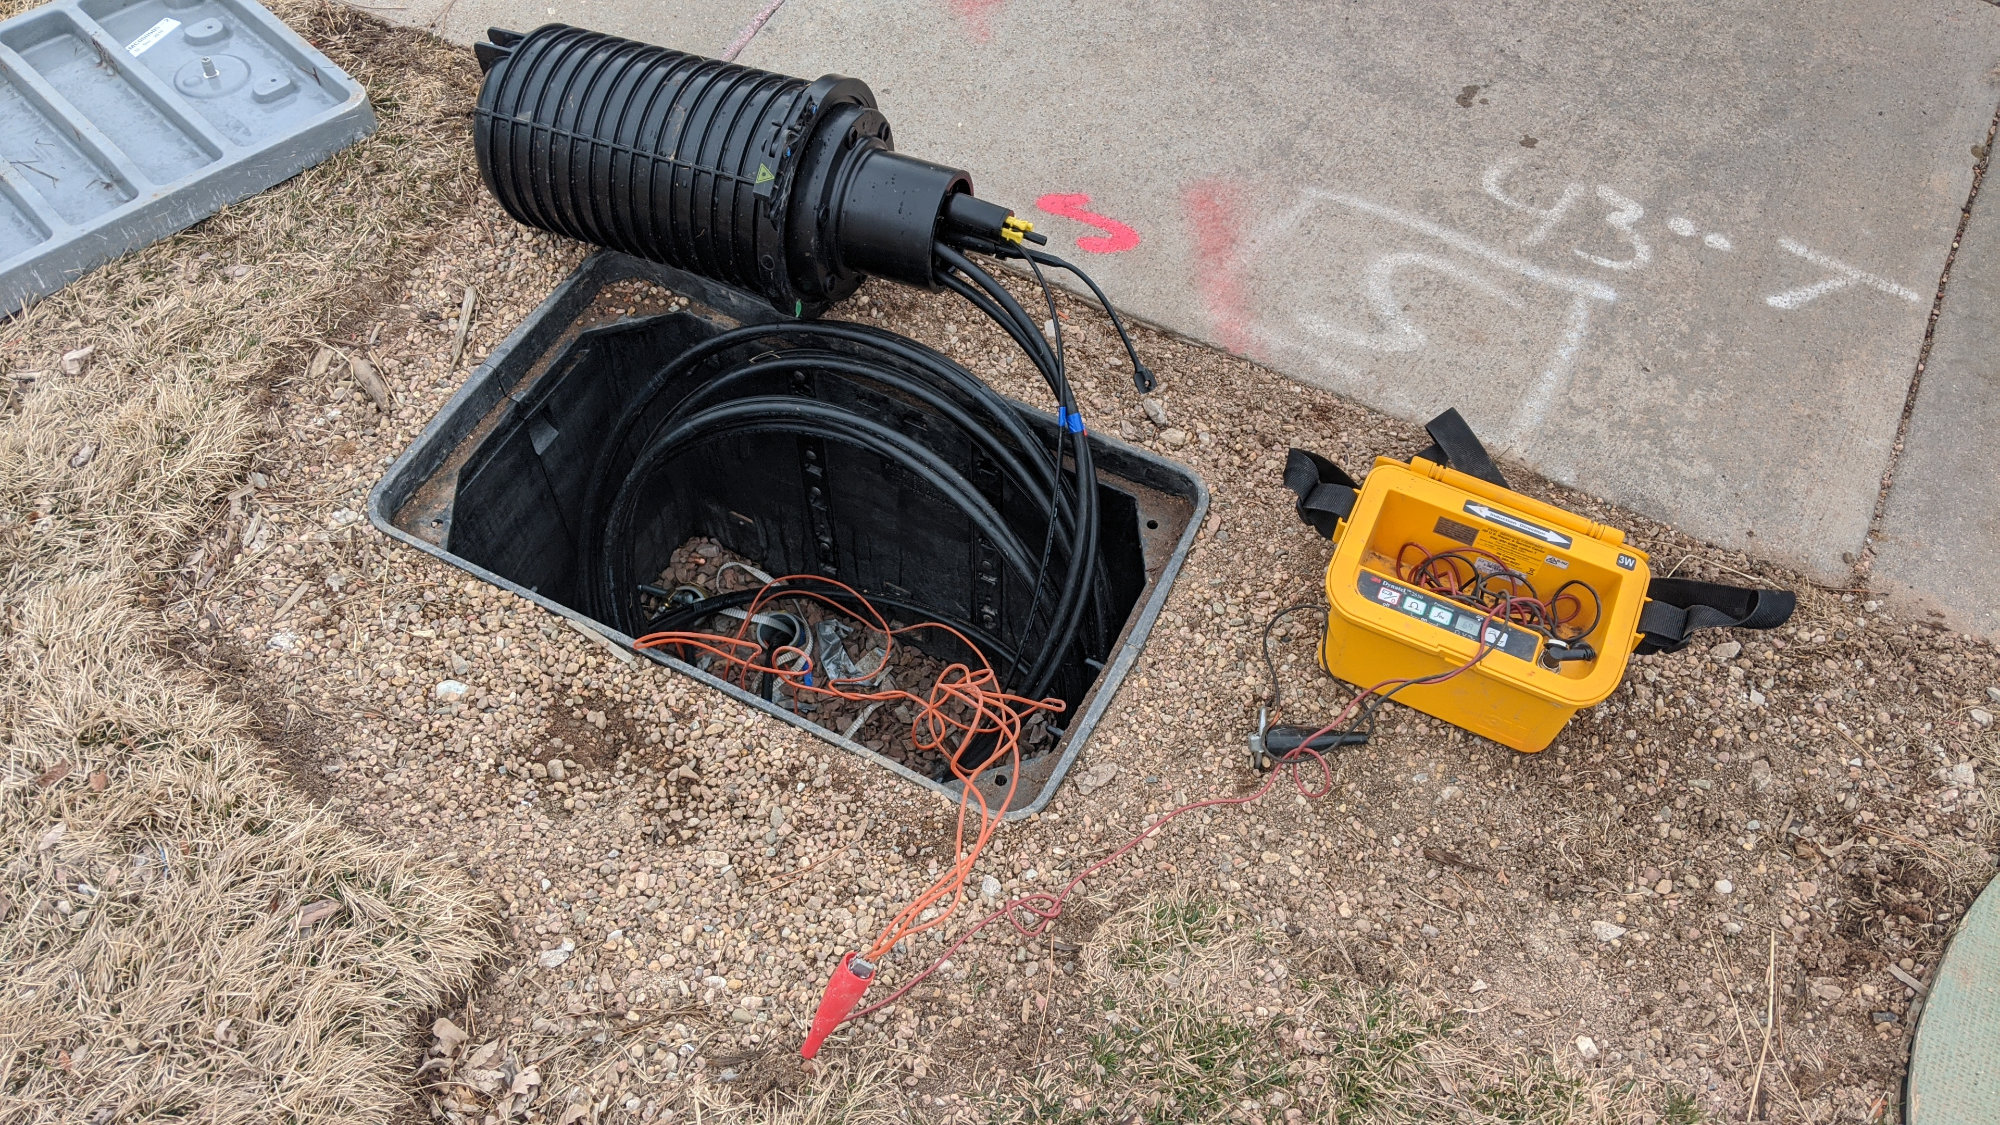
Connecting the signal generator to the tracer wires in the conduit.
To locate the fiber, the technician opened the splice vault and disconnected the tracer wires from the ground rod inside the vault. He then connected the leads from a 3M Dynatel 2550 locator transmitter to the tracer wires and a temporary grounding rod placed next to the vault. In the photo above, the red wire and red clip connects to the orange tracer wires. The black wire and black clip connect to the temporary grounding rod which is mostly buried in the dirt and gravel.
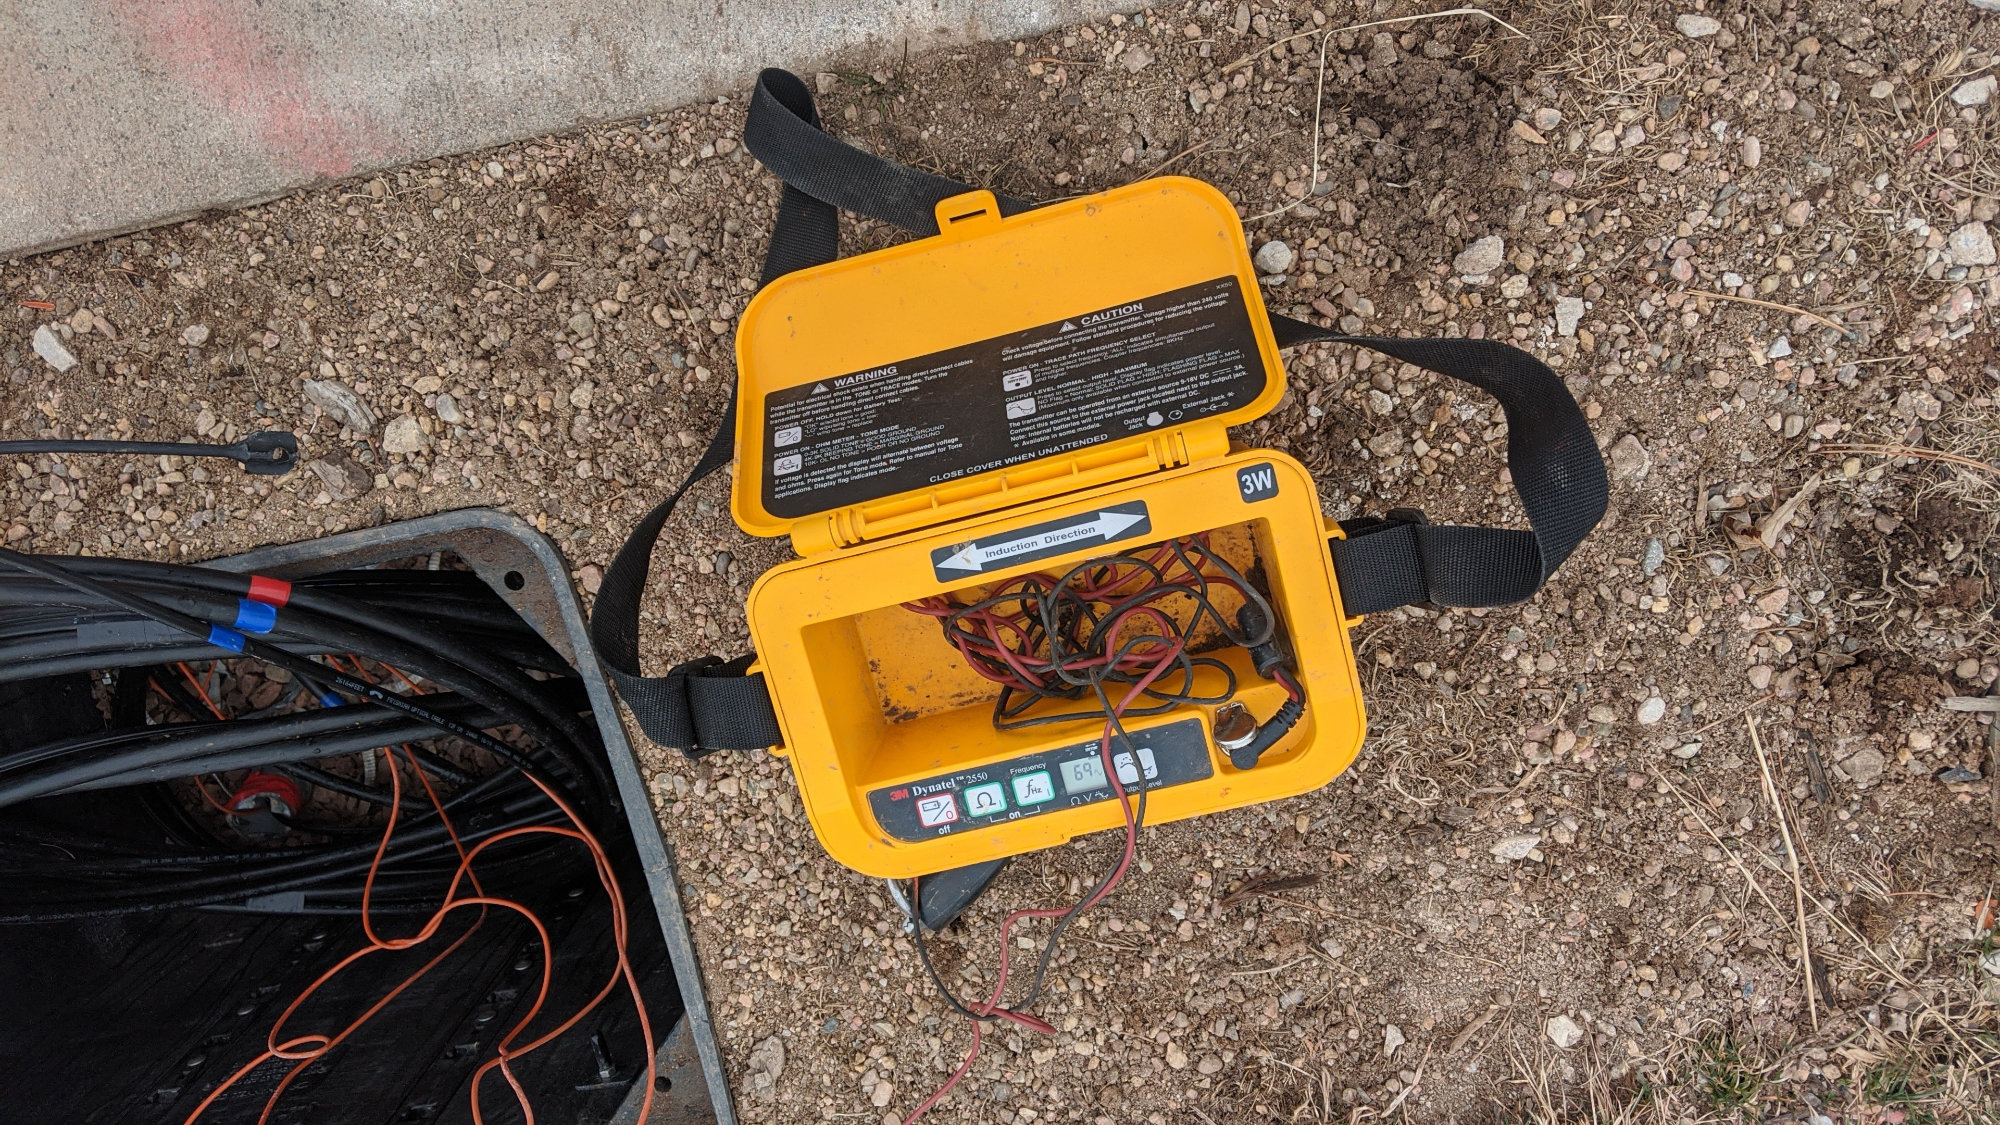
Close up of the 3M Dynatel 2550 locator.
The transmitter injects a radio signal on to the tracer wires. The radio signal can then be picked up using a radio receiver carried by the technician. The radio receiver has a highly directional antenna that can determine the precise location of the tracer wire underground and by extension, the location of the buried conduit it is inside. The locator radio receiver looks very similar to the beacon receiver for the Ditch Witch directional drilling equipment.
Using the radio receiver to locate the tracer wire and, by extension, the conduit and fiber.
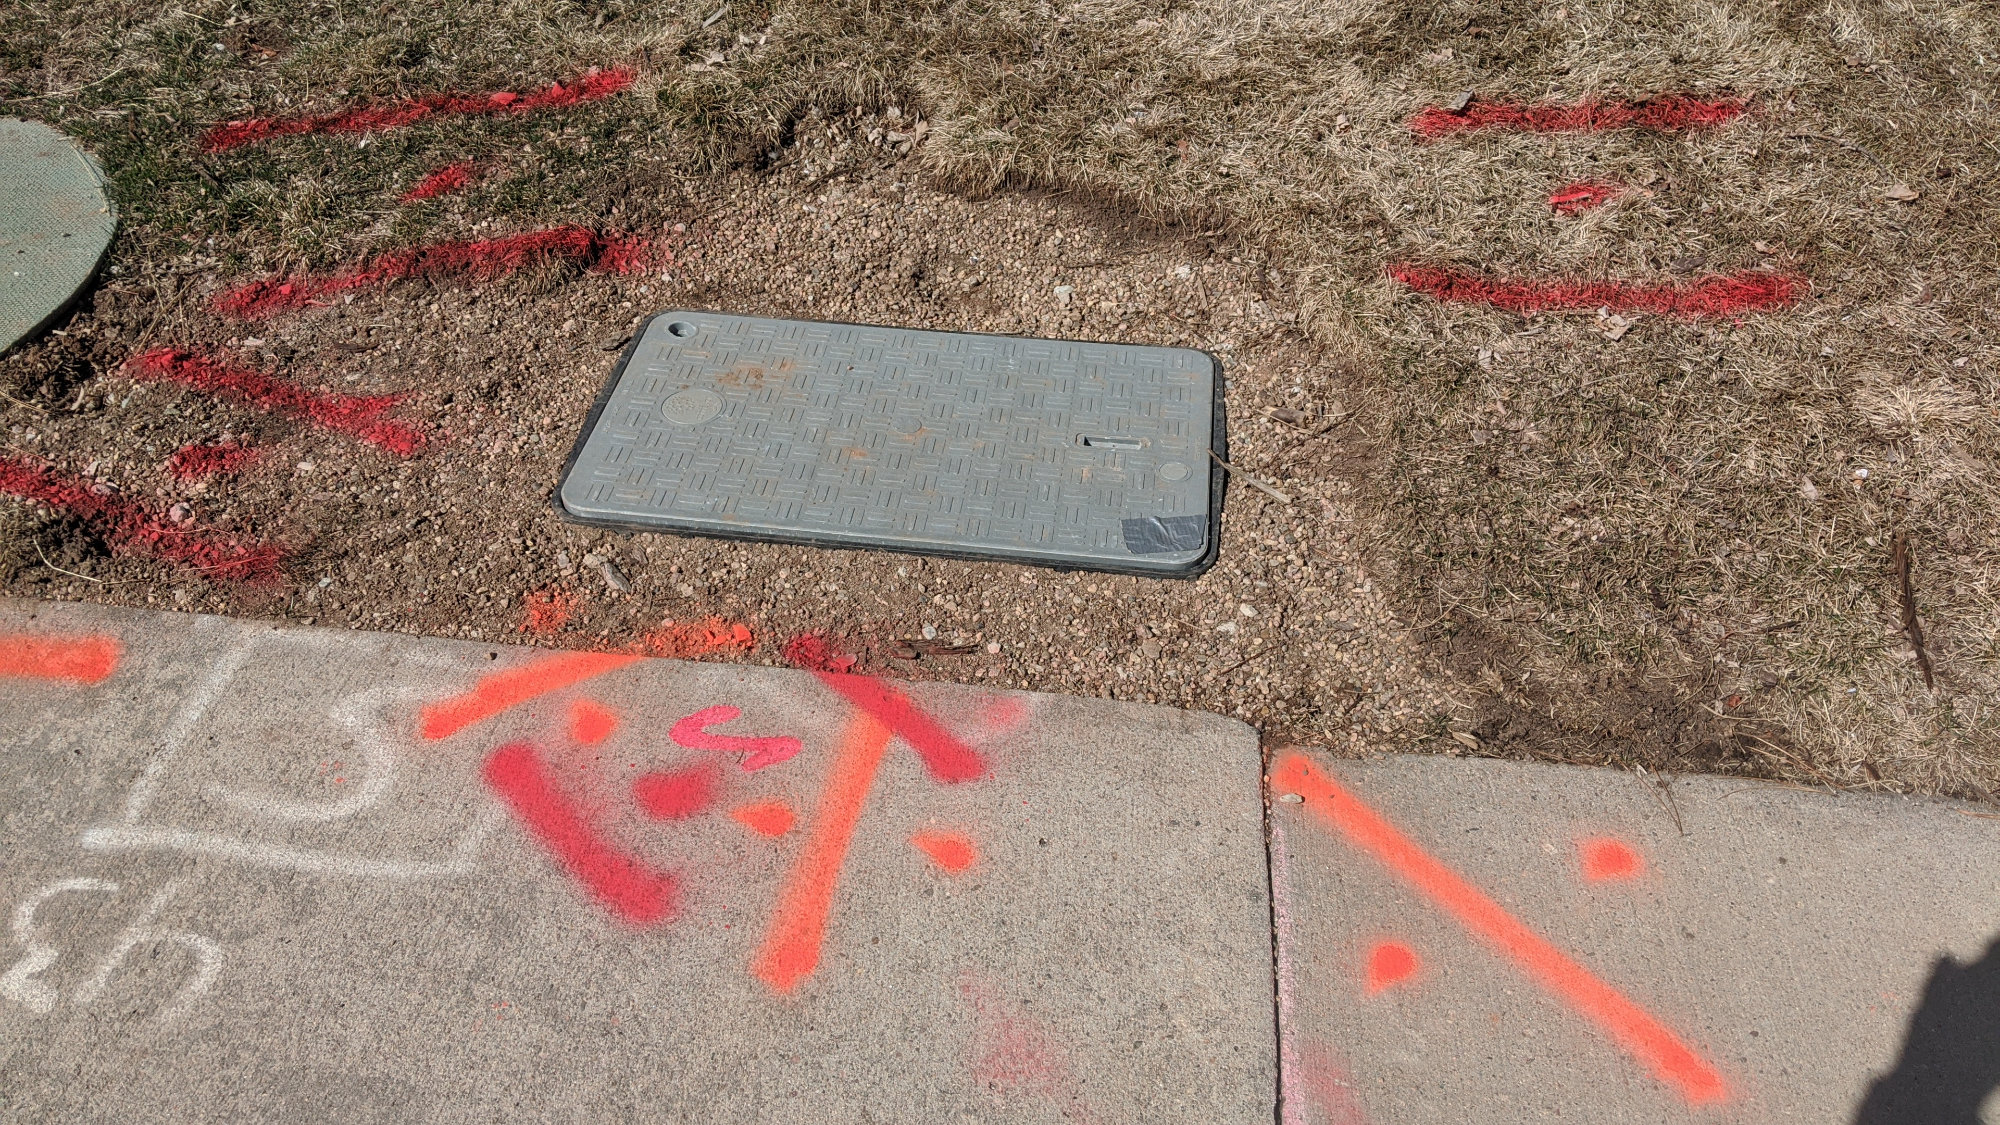
The technician starts at the fiber vault then works his way outward for each one of the conduits. He slow moves the receiver over the area where the conduti is located. Every time the radio receiver records a peak signal, he marks the ground with orange paint. In the world of utility locates, orange paint is used to mark communication cables. If you look closely at the photo, this technician does a lot of communications utility locates because his boots are orange.
March 3, 2020 – More Locates
Fort Collins Utilities did some electrical and water locates around the vault today. Looks like their could be more drilling on our street.
Fort Collins Utilities showed up today and marked the location of the electrical and water lines in the vicinity of the vault across the street. This is the same location where the hot pink lines were painted and fiber locates where done earlier in the week. My guess is we’ll see some directional drilling work and some additional conduit put in the ground this week or the next.
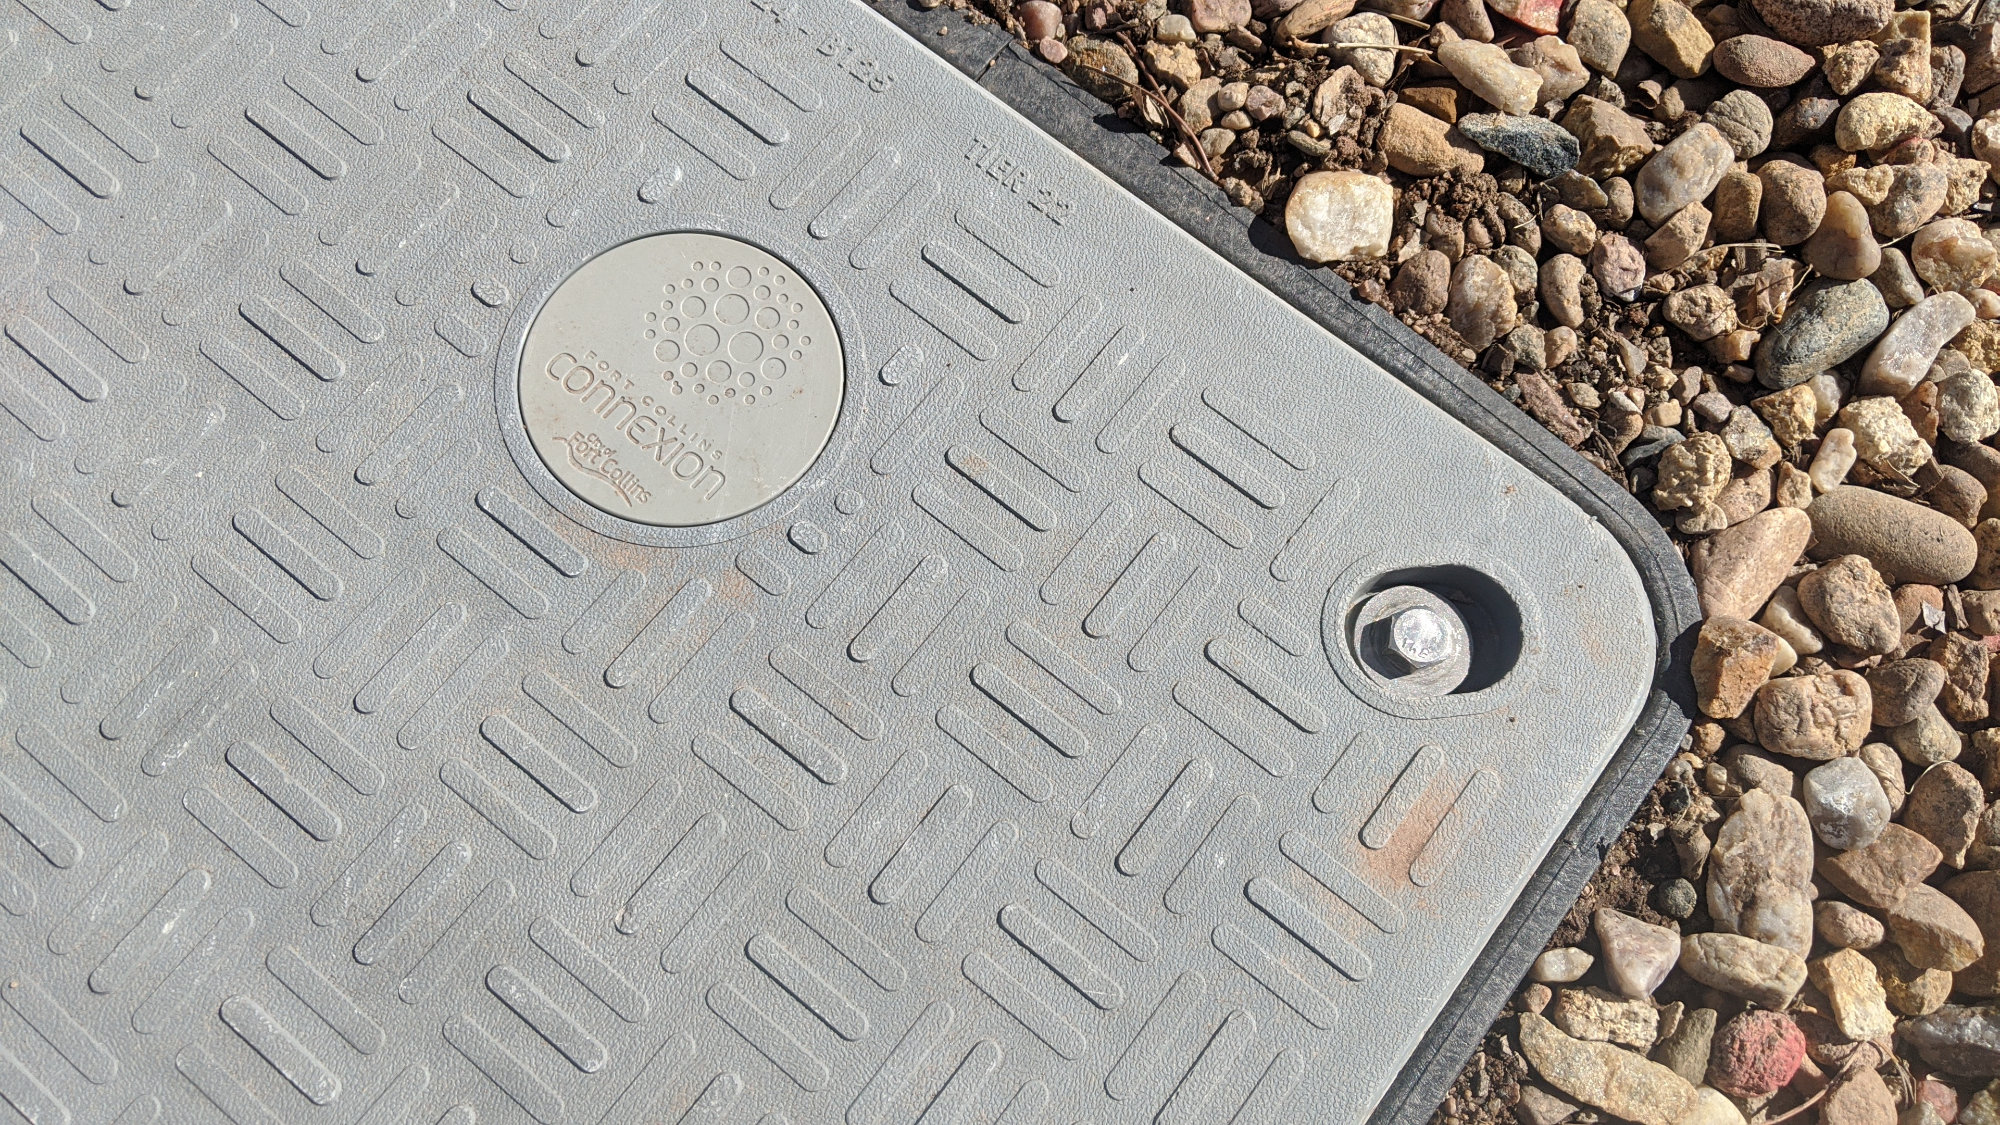
Someone came around and installed bolts in the corners of the other vaults in the neighborhood.
On another note, they’ve finally installed bolts to secure the lids of the splice vaults.
March 4, 2020 – More Directional Boring
Yep, sure enough. Crews came back out on Wednesday and installed another piece of conduit on the north side of Michener Drive between Dixon Creek and Beaver Ct. With the new conduit, they’ll need to pull more fiber and redo some of the earlier splice work. In theory, construction in our neighborhood was finished on January 31, 2020. Given the current slow rate of subscriber additions and the number of neighborhoods in line for service ahead of us, I don’t think the additional work will delay when service is offered to our houses.
March 17, 2020 – A Splice Truck is Back
Today they patched in the fiber they initially forgot to install late last year.
Today a technician in a splice truck showed up and spliced the new fiber in the new conduit into the network. There should now be two 144 strand cables and two 24 strand cables spliced together in the splice enclosure. I didn’t get close enough to confirm given the state of the world today.
March 19, 2020 – Snow and a Tent

Technicians use a small popup tent while they work on the fiber in the fiber vault across the street.
Technicians came back again today to do more work on the fiber and splice enclosure in the vault across the street. This time they brought a small popup tent to let them work more easily in the cold, wet snow.
March 25, 2020 – City Inspectors and Asphalt Repairs

City employees were driving around the neighborhood inspecting the fiber installation today. Unlike most of the other trucks and equipment I’ve seen in my neighborhood in the past, these vans are owned by the city.
Today, city employees (not contractors) were driving around the neighborhood inspecting the fiber installation and doing their final quality control checks. This is the last step before the city accepts ownership of this portion of the network. The city employees also said this fiber is lit which means it is, in fact, connected all the way back to the OLT’s in the fiber hut at the substation.

Finished asphalt repair of a handhole dug four months ago.
Also this week, contractors were going around the neighborhood doing final repairs to the handholes crews had drilled in the road and sidewalks over the past few months. The photo above shows a completed repair to a handhole dug in the asphalt in front of my drive way.
May 6, 2020 – Live Service on the West Side of Town
On May 6, 2020, I received an anonymous tip that the “This home is gig powered” yard signs were starting to show up in the area around Rocky Mountain High School. If true, these would be the some of the first houses on the west side of town to receive service. Up until this point, all the houses with live service have been located northeast of Riverside Dr out toward the northeast city limits.
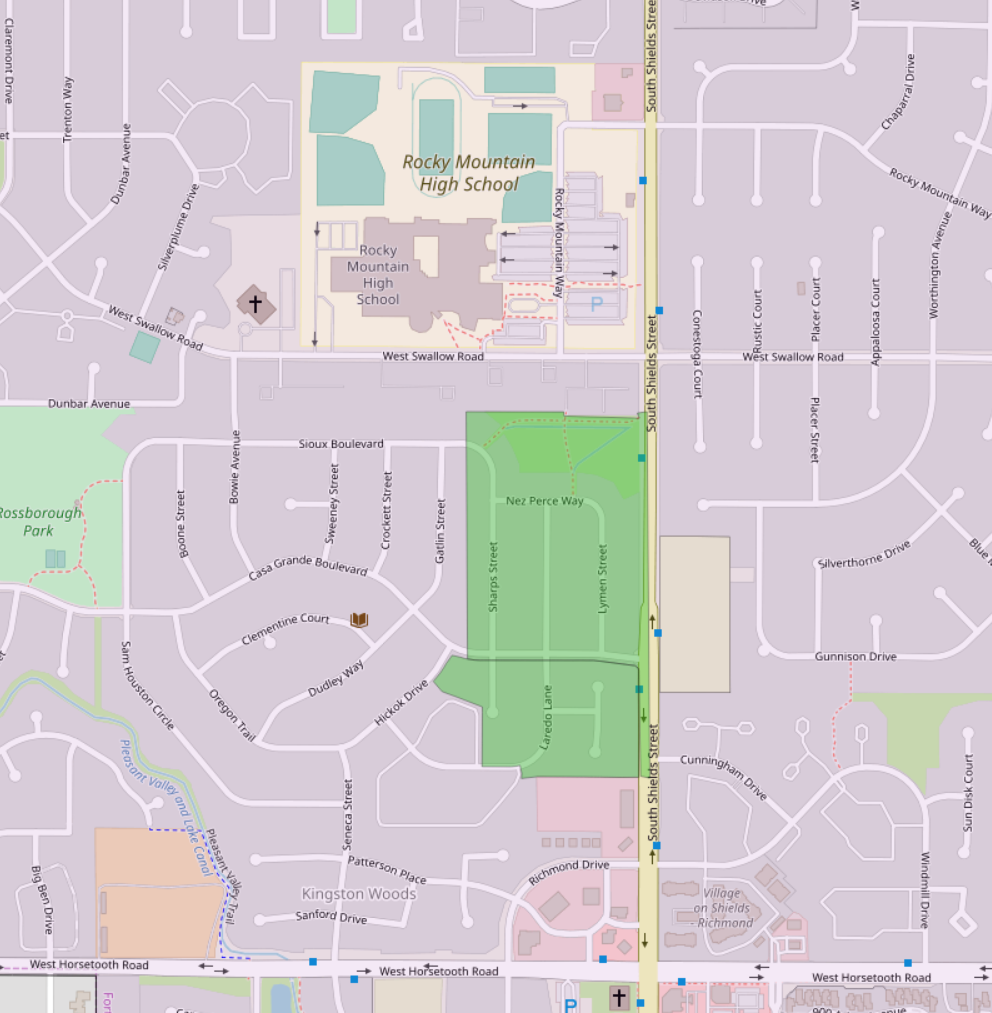
Approximate live service area near the Chaparral neighborhood on the west side of town.
I rode my bike along the streets near Rocky Mountain High School and discovered two yard signs. Also several more houses had the Primex network interface devices that Connexion uses mounted on the outside of their homes. The area where I observed the boxes and yard signs is roughly highlighted in dark green on the map above. The light green areas are parks and open spaces.
May 12, 2020 – Live Service Hang Tags on Doors in the West Rossborough Area
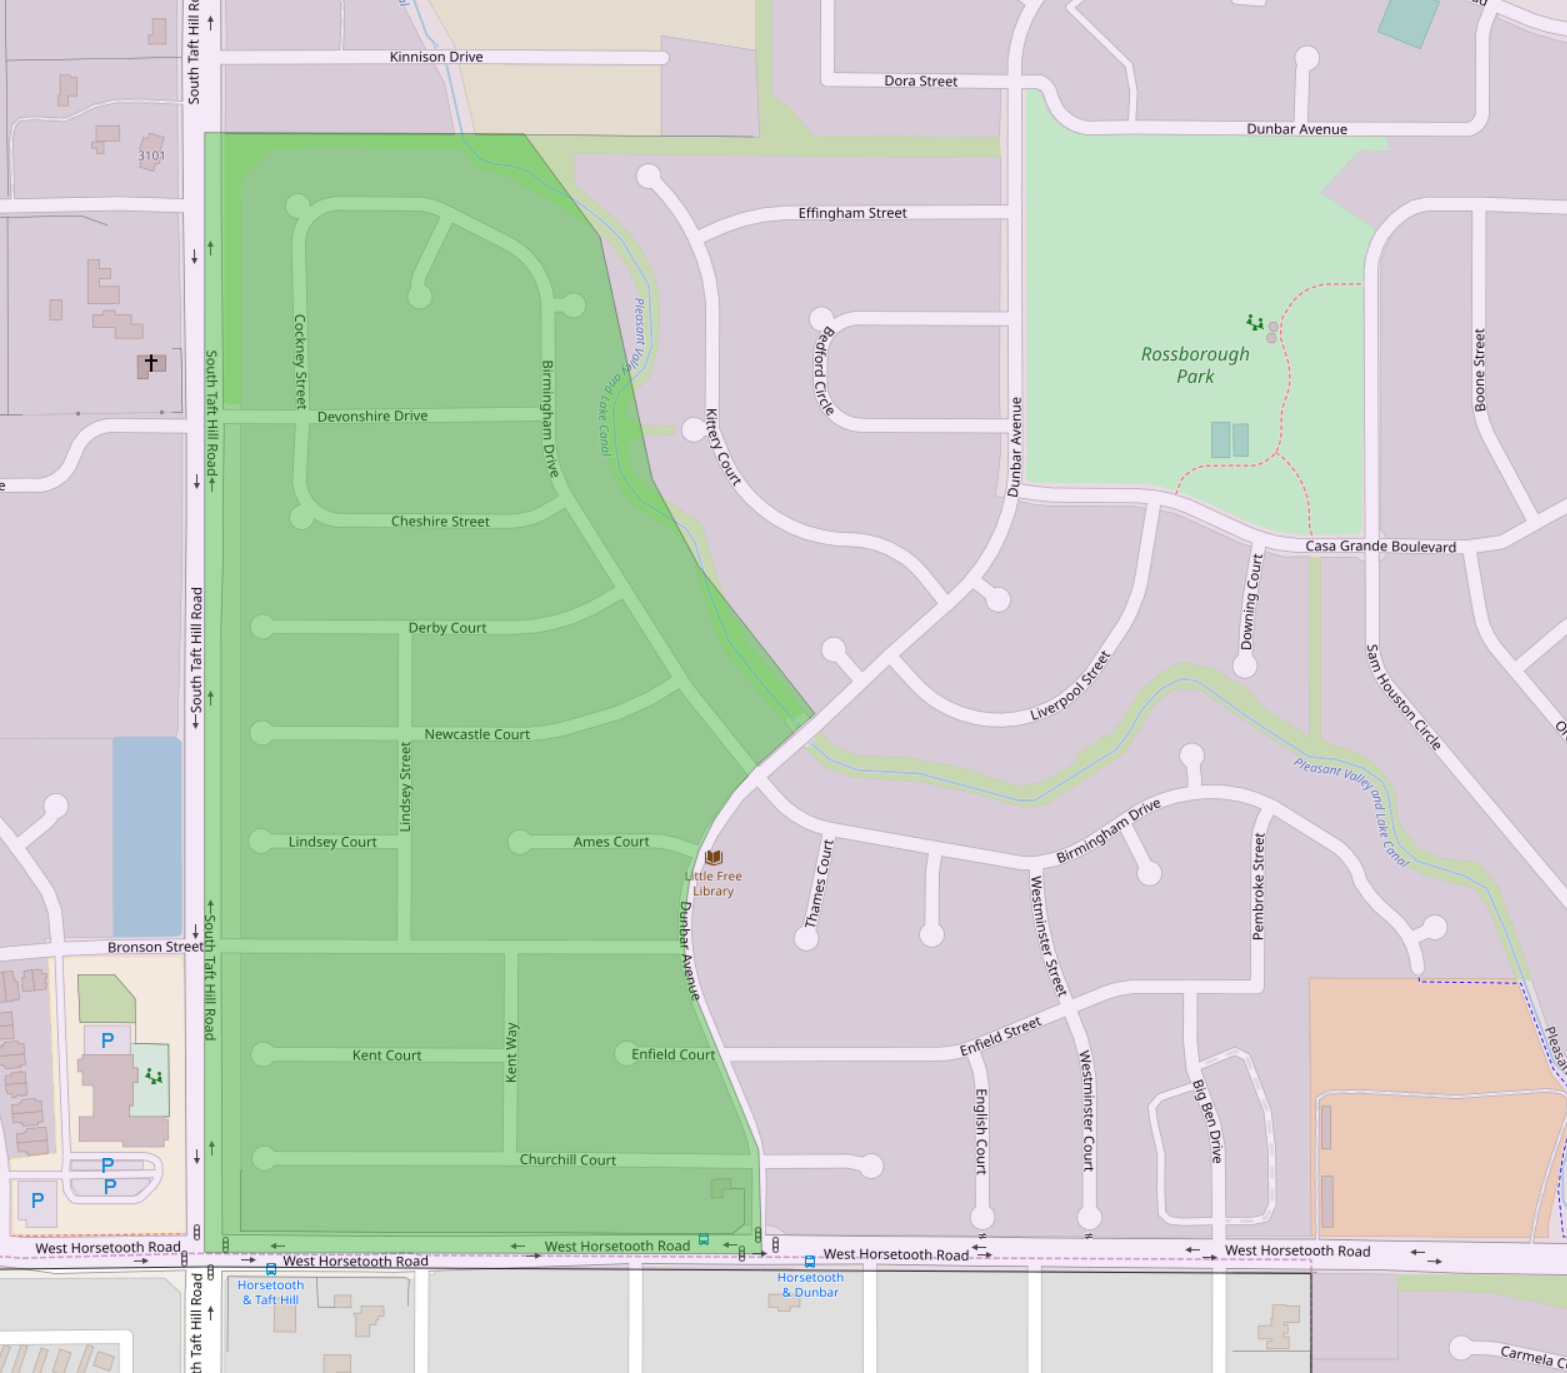
Area where live service hang tags were hung on doors on Tuesday, May 12, 2020.
On May 12, 2020, I received a tip that door tags had been hung on doors around the northeast corner of the intersection of Horsetooth and Taft Hill Roads. This tip was still “fresh”, and, curious about how many homes receive a hang tag at once, I headed out on my bike and checked out the area.
I found hang tags on a rather large number of homes in the West Rossborough and west edge of the Rossborough neighborhoods as shown on the map above. 270 homes are located in this 1/10 square mile area. This seems like a lot of homes to go live at once but the average fiber distribution hub (FDH) serve about 225 homes so 270 homes going live at once is inline with my understanding that they offer new service on a hub-by-hub basis.
Friday, May 22, 2020 – Service is Available at my Address!!!
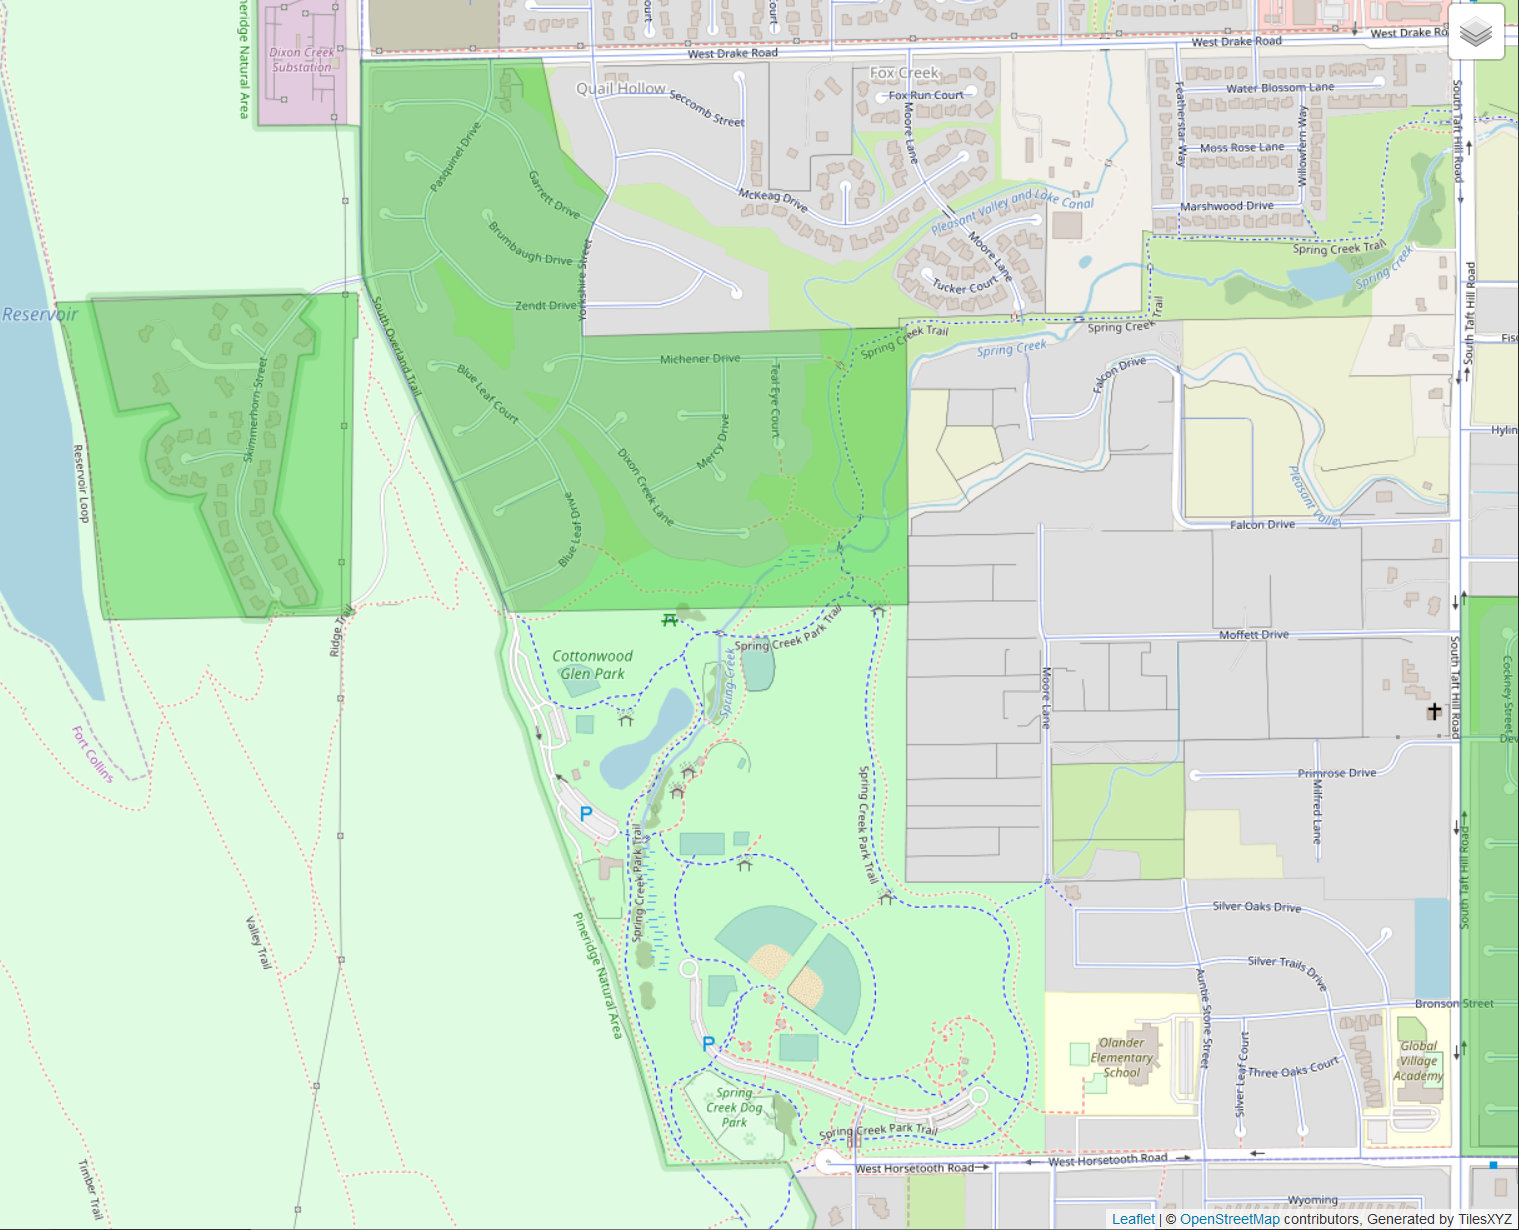
My best estimate of where service went live in Quail Hollow based on door flyers, new utility locates, and reports from friends. (dark green–light green is open space and parks).
On Friday, May 22, 2020, I received an email from the city letting me know service was available at my address. I immediately called the phone number and signed up for service. They verified my address and electric utilities account information then set up a new account for Connexion and scheduled my installation date for Friday, May 29.
After scheduling the installation date, I talked to tech support about getting the single-port ONT instead of the normal four-port ONT and making sure my ONT was configured in bridge mode since I’ll be using my own firewall, routing, and wireless equipment.
As luck would have it, John Robbins, the broadband network manager for Connexion and a former Nokia sales representative answered the phone. If you need to talk about MPLS or BGP or network architecture or PON standards, John’s the person to talk to. I had previously met John at an IEEE meeting in late 2019 where he did a presentation on Connexion’s core network architecture.
After catching up a bit, John explained the differences between the two ONT’s and signed me up for the single-port ONT in bridge mode. In short, both ONTs support all the GPON standards and bridge mode, but the four-port ONT also supports voice and wireless capabilities that the single-port ONT does not. I’ll write more about the differences between the two ONT’s and my experience with the single-port ONT after the service is installed next week.
Tuesday, May 26, 2020 – Utility Locates
Utility locates completed! The orange indicates the location of the existing conduit.
On Tuesday, May 26, a crew from Fort Collins Utilities came out and marked the existing water and electric lines. Later that day, a crew from Fort Collins Connexion came out and marked the existing fiber and conduit in orange. The next day, a crew from Stake Center came out and marked the locations of the Xcel gas lines.
Thursday, May 28, 2020 – Outside Install Completed
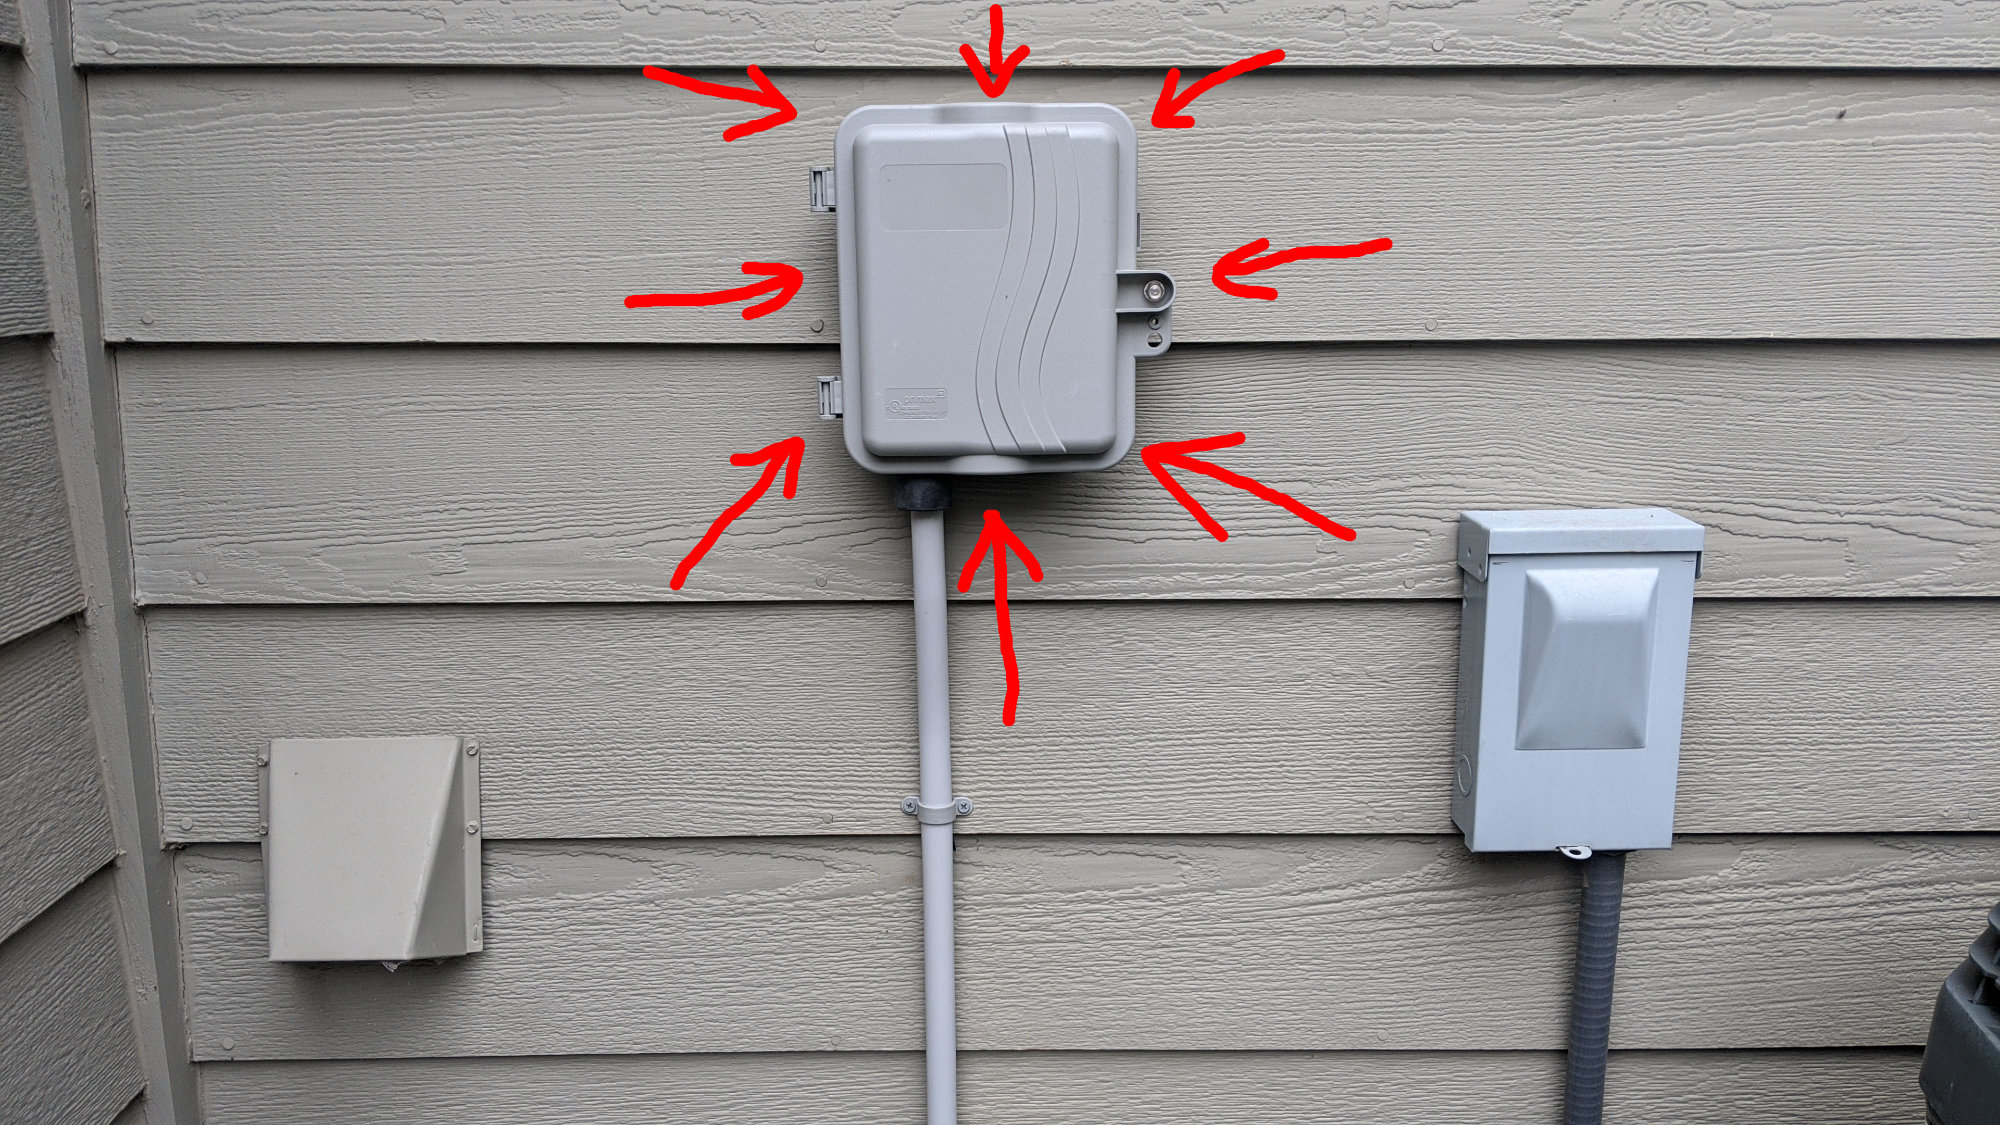
The Primex P700 OSP enclosure mounted on the outside of the house.
On the morning of Thursday, May 28, a crew came out to run fiber from the vault on the corner of my cul-de-sac to the side of my house. I asked the crew if they could mount the network interface device further back on the side of the house so that fiber would come into the house through the basement rather than through the garage. They were more than accommodating and trenched the extra 20 feet or so to get around the garage and into the backyard where the basement begins.
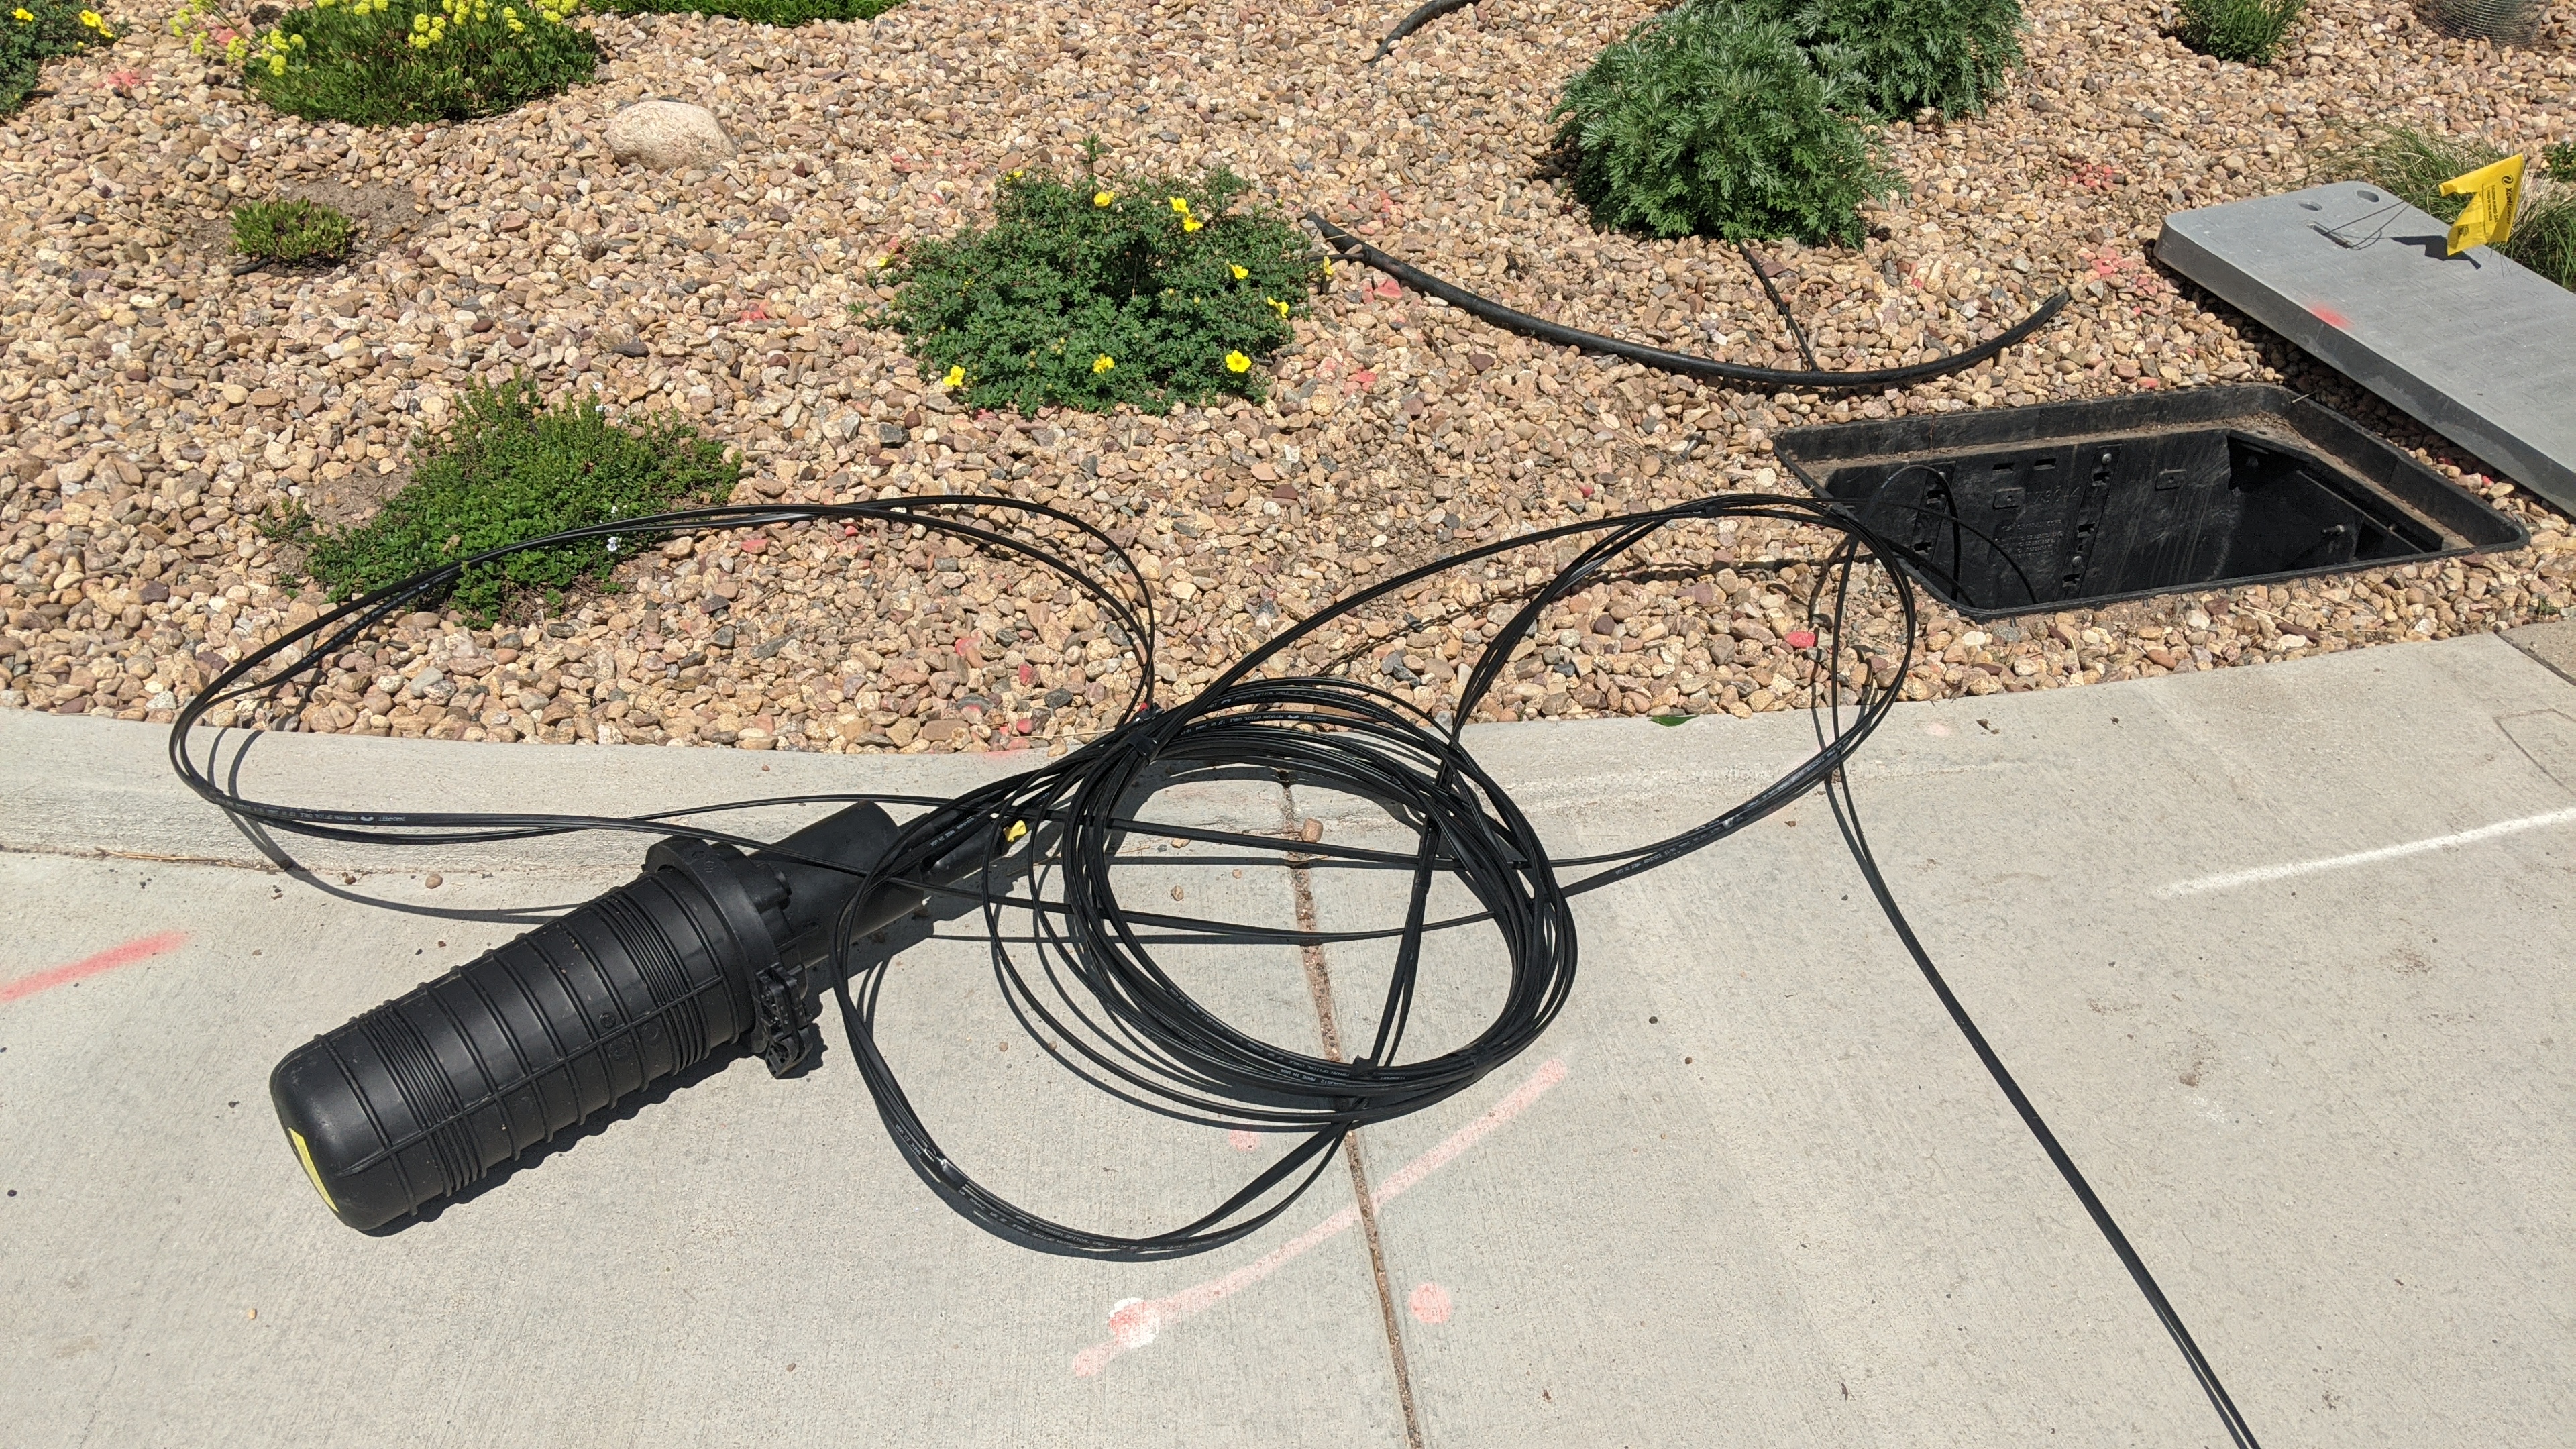
The splice enclosure containing the splices between the 24 fiber count distribution cable and the 2 fiber count drop cable.
The crew unrolled a length of fiber and fed the fiber through the orange conduit they placed last year. The fiber ran from the vault, through the conduit to a first flower pot, then through some more conduit to a second flower pot that was located in my front yard. They pulled a length of fiber up out of the second flower pot and through the yard up to the side of my house.
The crew used a spade to dig a narrow trench and bury the fiber from the flower pot up to the side of my house. A second crew fusion spliced the drop fiber to the distribution fiber inside the vault. The splices are protected inside the large black plastic enclosure in the photo above.
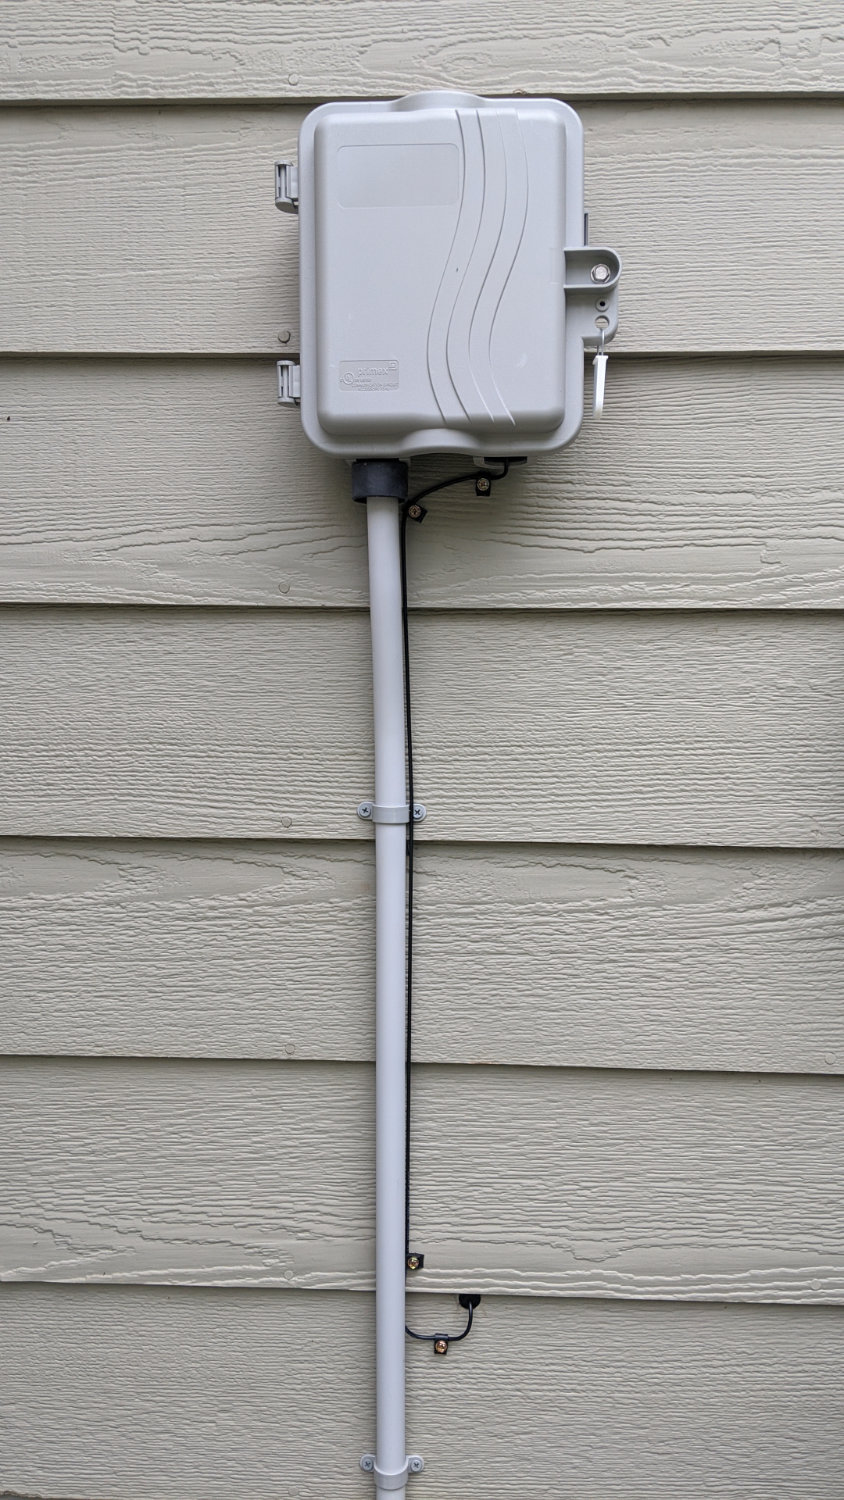
Once the fiber was buried, it was run up through a gray plastic tube to a Primex P700 OSP enclosure, aka, the network interface device. The crew fusion spliced an SC optical connector onto the end of the fiber from the vault and rolled the extra fiber up onto a spool inside the network interface device. They used an optical power meter to verify the signal from the network was good. -14 dBm was easily within spec.

The repaired grass as it looked on Sunday. Just a small break running through the center of the grass in the photo.
After the install was complete, they repaired the grass and reminded me to water it frequently.
Friday, May 29, 2020 – Inside Install
Friday, May 29, was the big day! A two person crew from Connexion came out to finish the install. I had met one of the two people back in January when he completed Colin’s inside install.
We talked briefly about the location of the network interface device on the outside of the house, about how I needed the fiber jack and ONT placed in the center of my unfinished basement underneath the stairwell, and about possible routes to run the fiber. I also offered them the use of my ladder and step stool which were already in the basement. After that, I got out of their way.
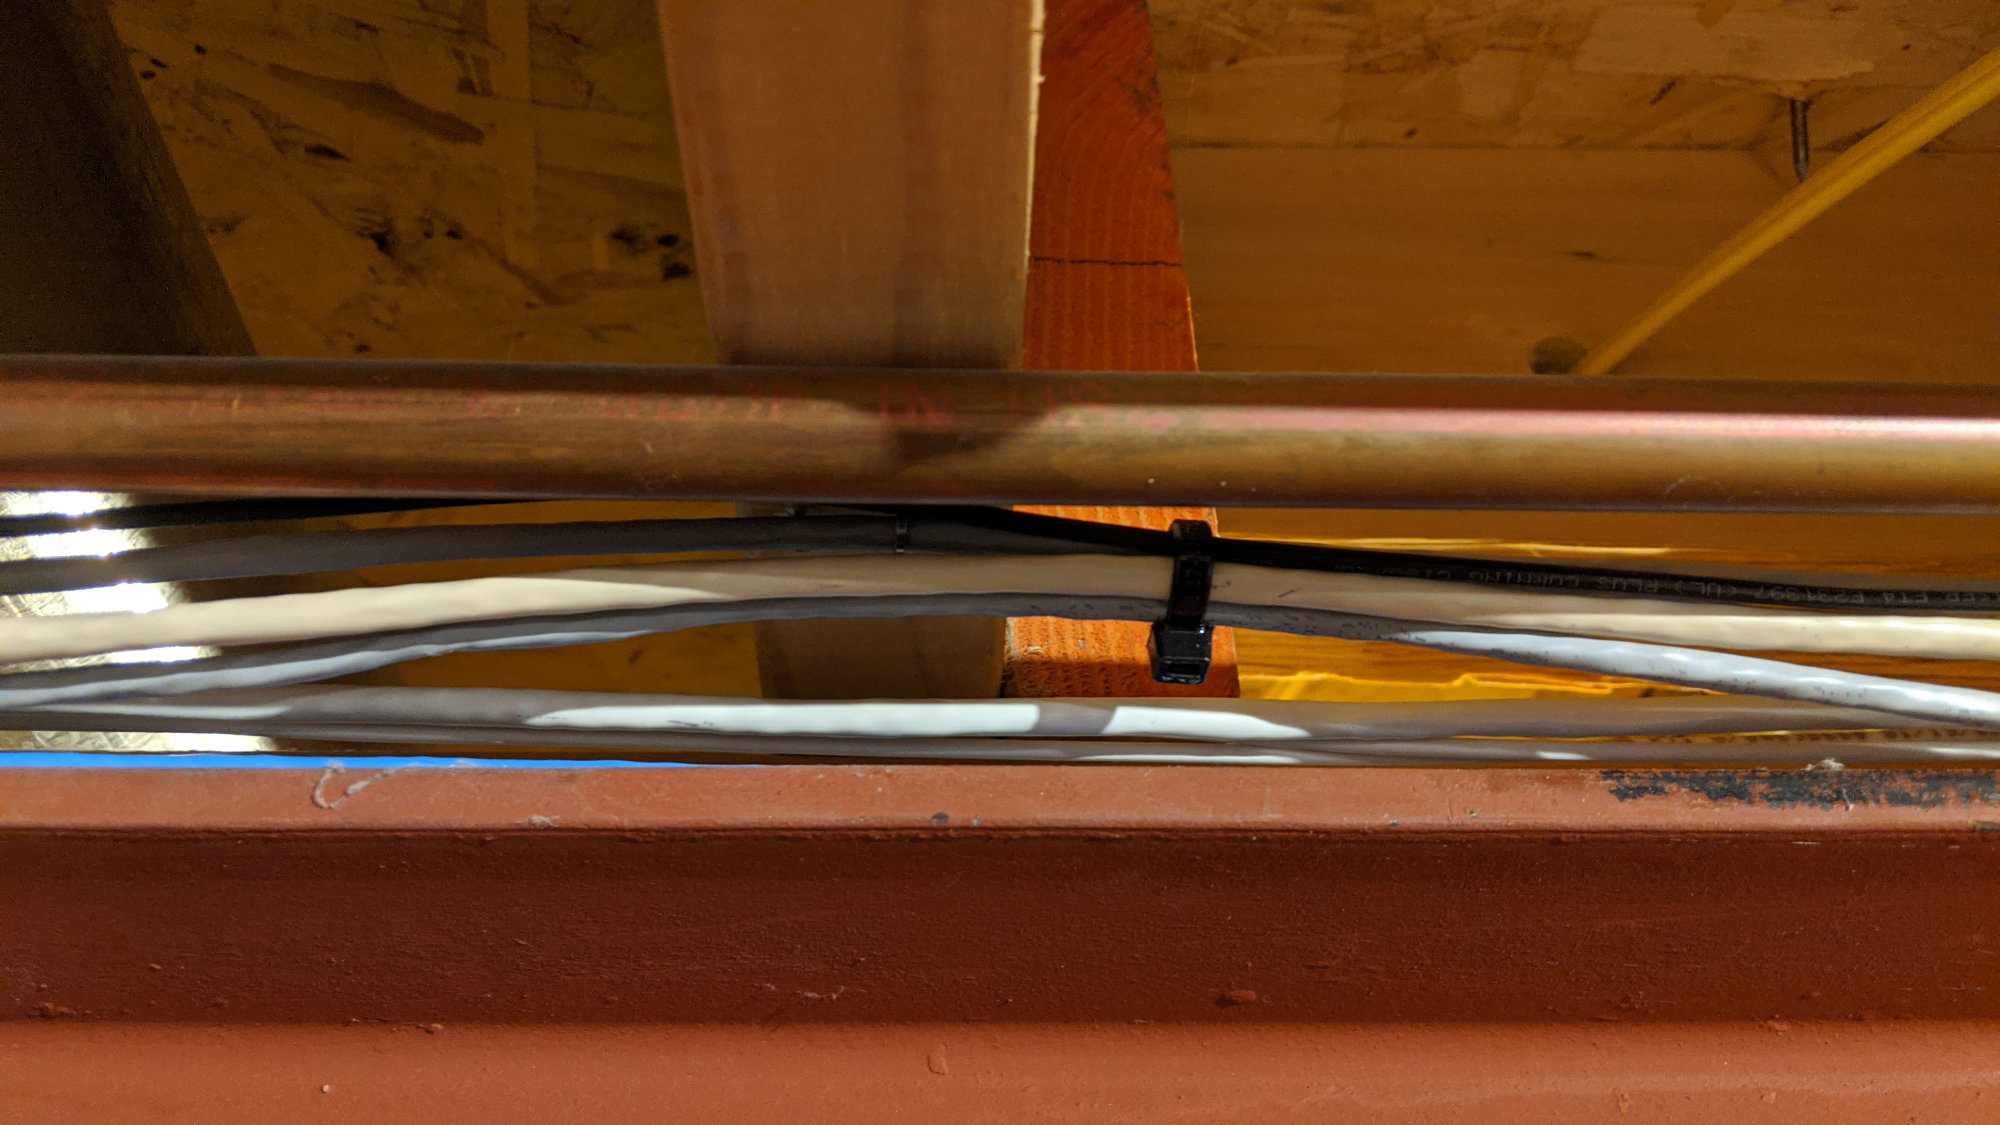
The black fiber runs from the optical coupler inside the network interface device to the fiber jack inside my basement.
They installed the fiber jack in the location of my choosing then ran a fiber from the network interface device outside the house to the newly-installed fiber jack. The fiber was routed down from the NID to a drip loop then through a sealed grommet into the inside of the house. The drip loop lets water drip off the bottom of the fiber so that it doesn’t run down the side of the fiber and inside the house.
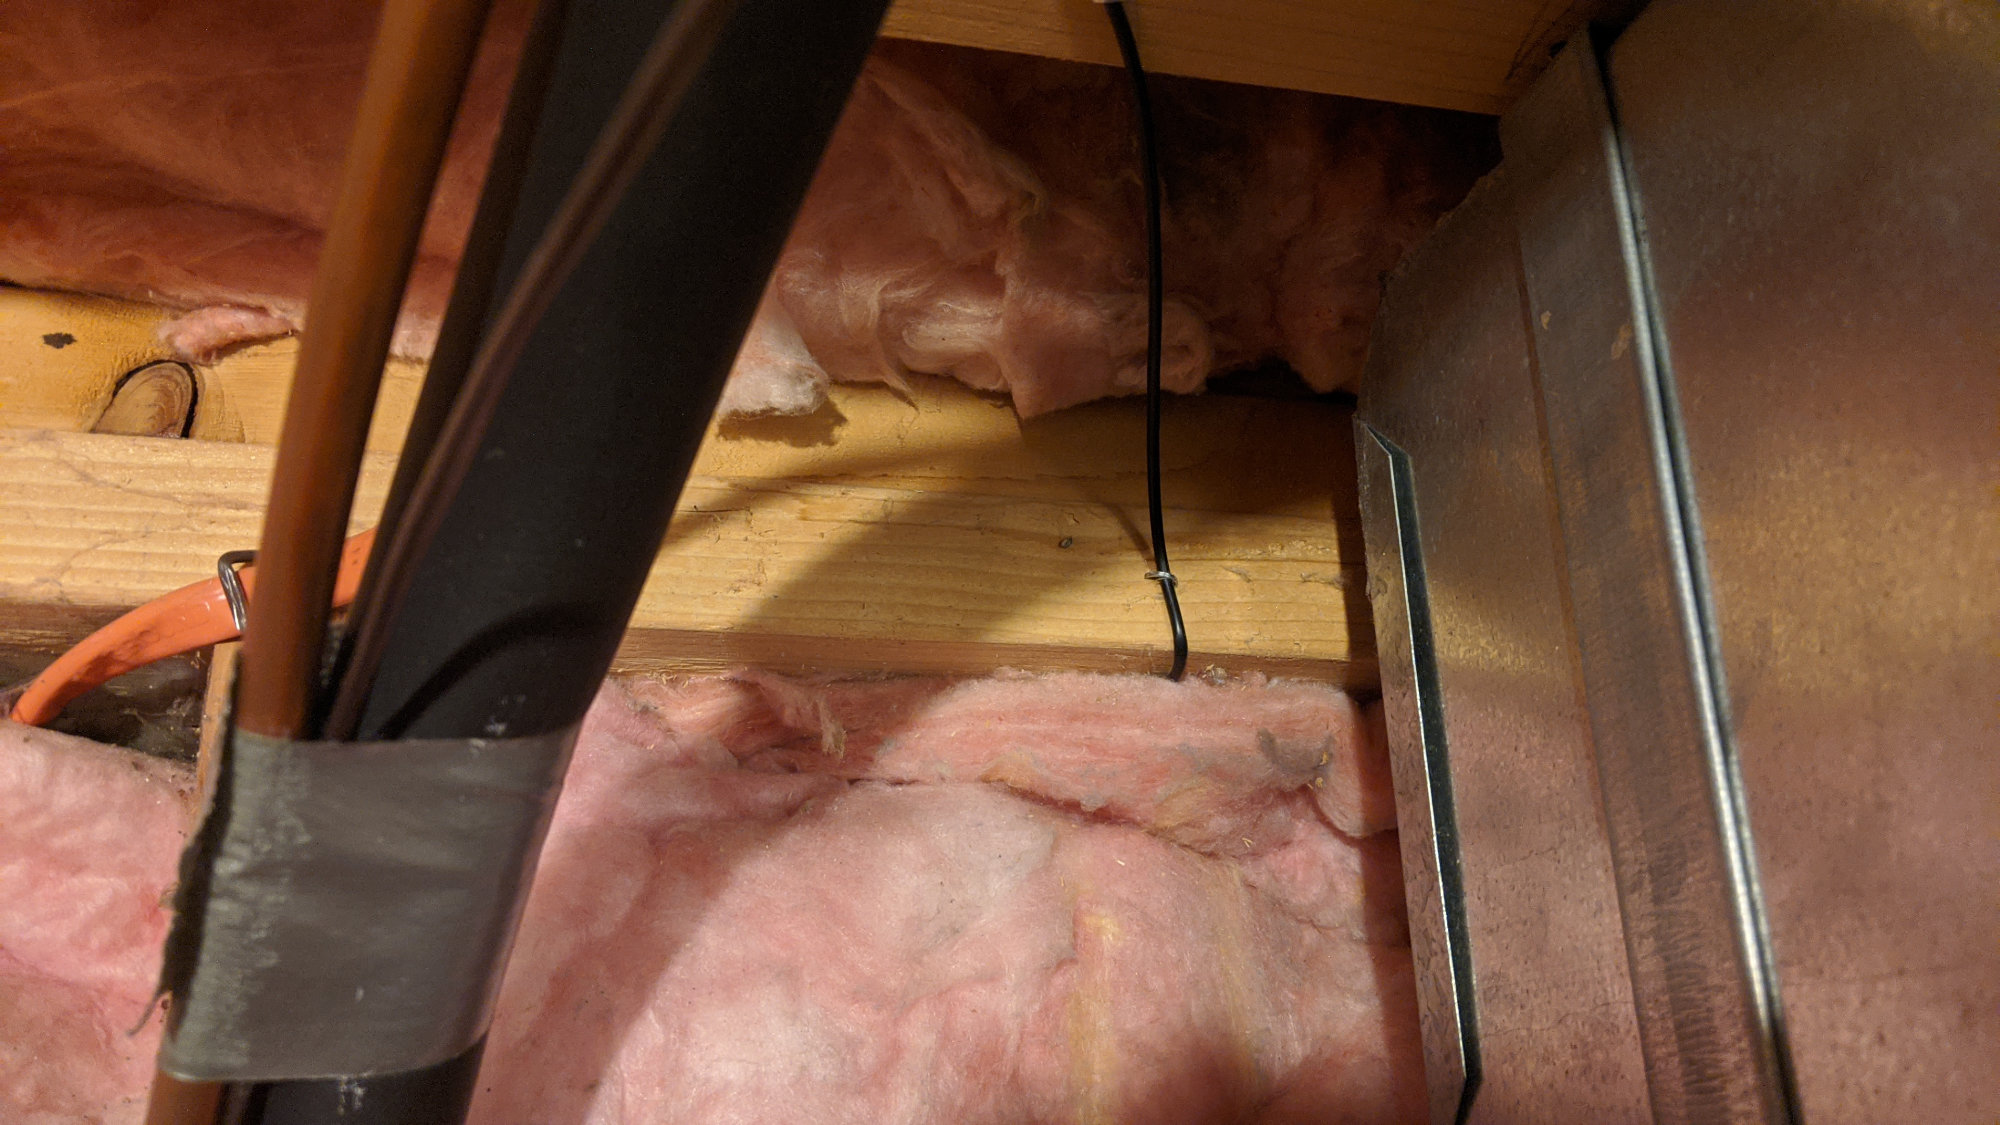
The fiber enters the house behind the fiberglass insulation then is routed up to studs or joists and secured with staples.
Inside the basement they pulled the fiber through the hole from outside of the house and ran it underneath the existing fiberglass insulation and up to the ceiling.
I had some existing low voltage cabling running along the fiber route so they lashed their fiber to my existing cabling.
After a while, the fiber joined a bunch of existing low voltage cabling that already ran to the network closet. Along this portion of the route, they lashed the fiber to the existing low-voltage cabling or stapled it to the floor joists to keep it in place.
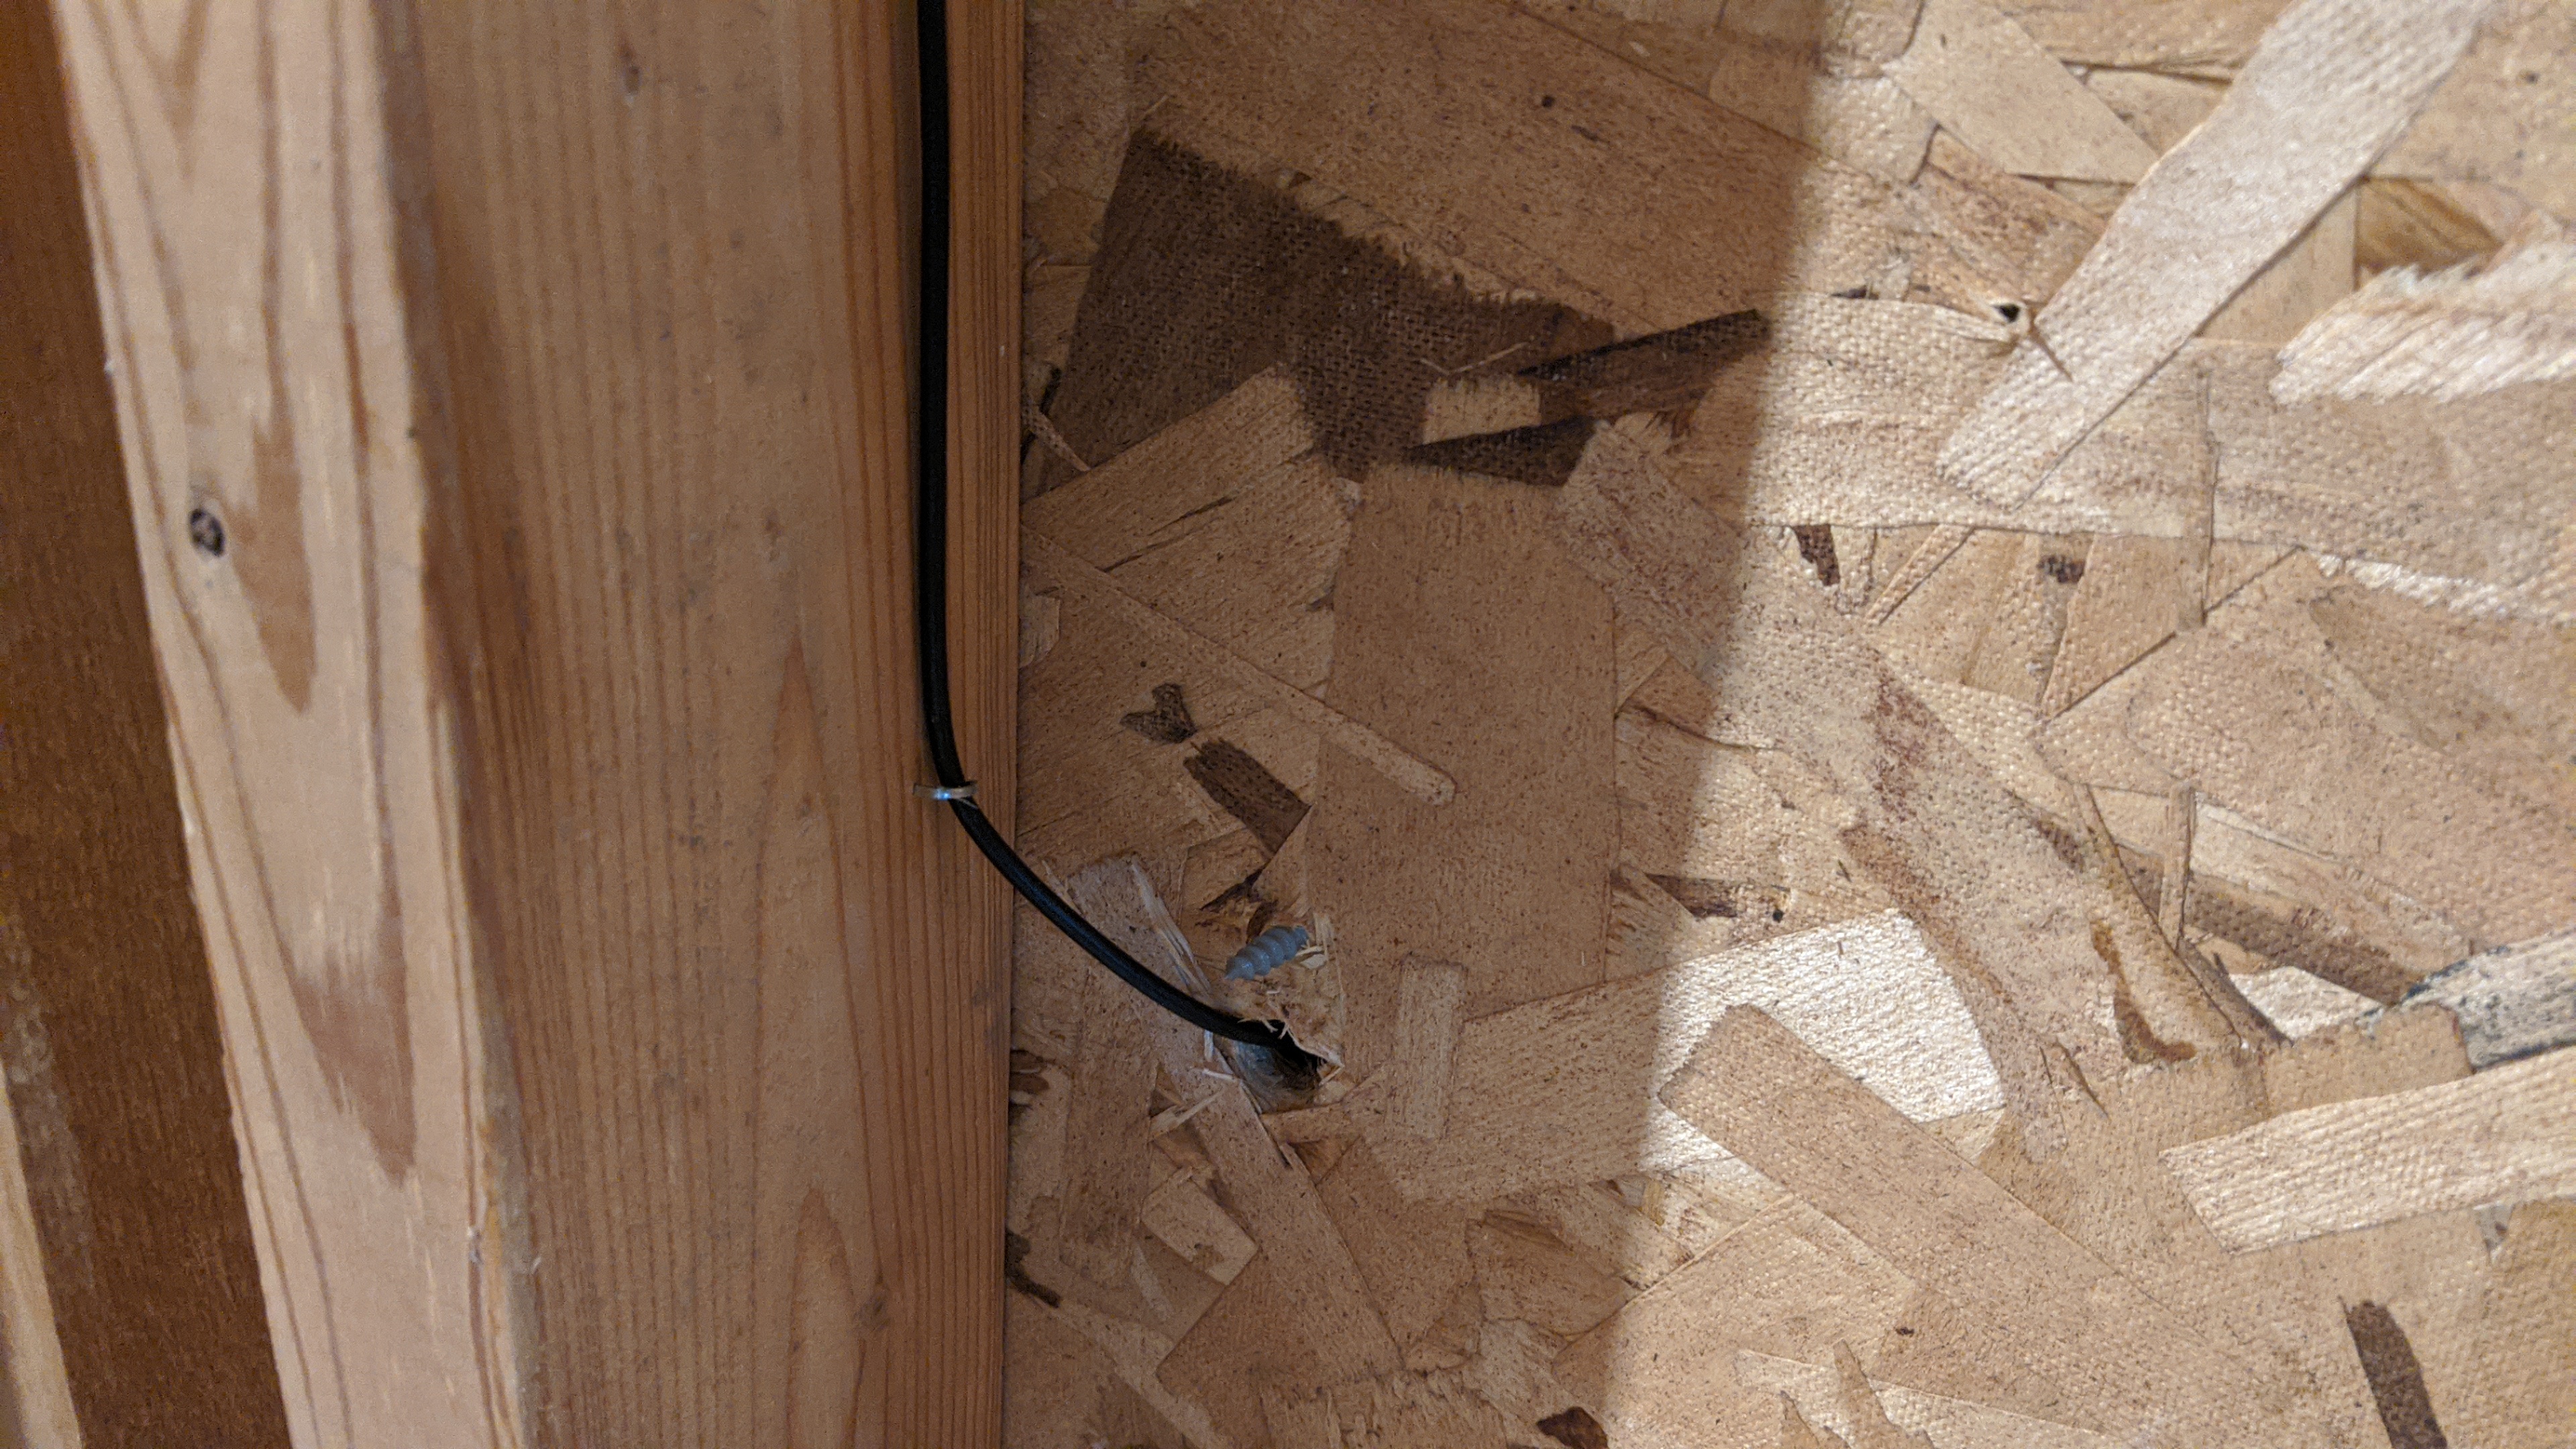
The fiber runs down along a stud to a piece of particle board then into the network closet.
The walls of the network “closet” are lined with particle board to mount patch panels and other network equipment. The fiber was run down a stud to a hole in the particle board and into the inside of the closet.
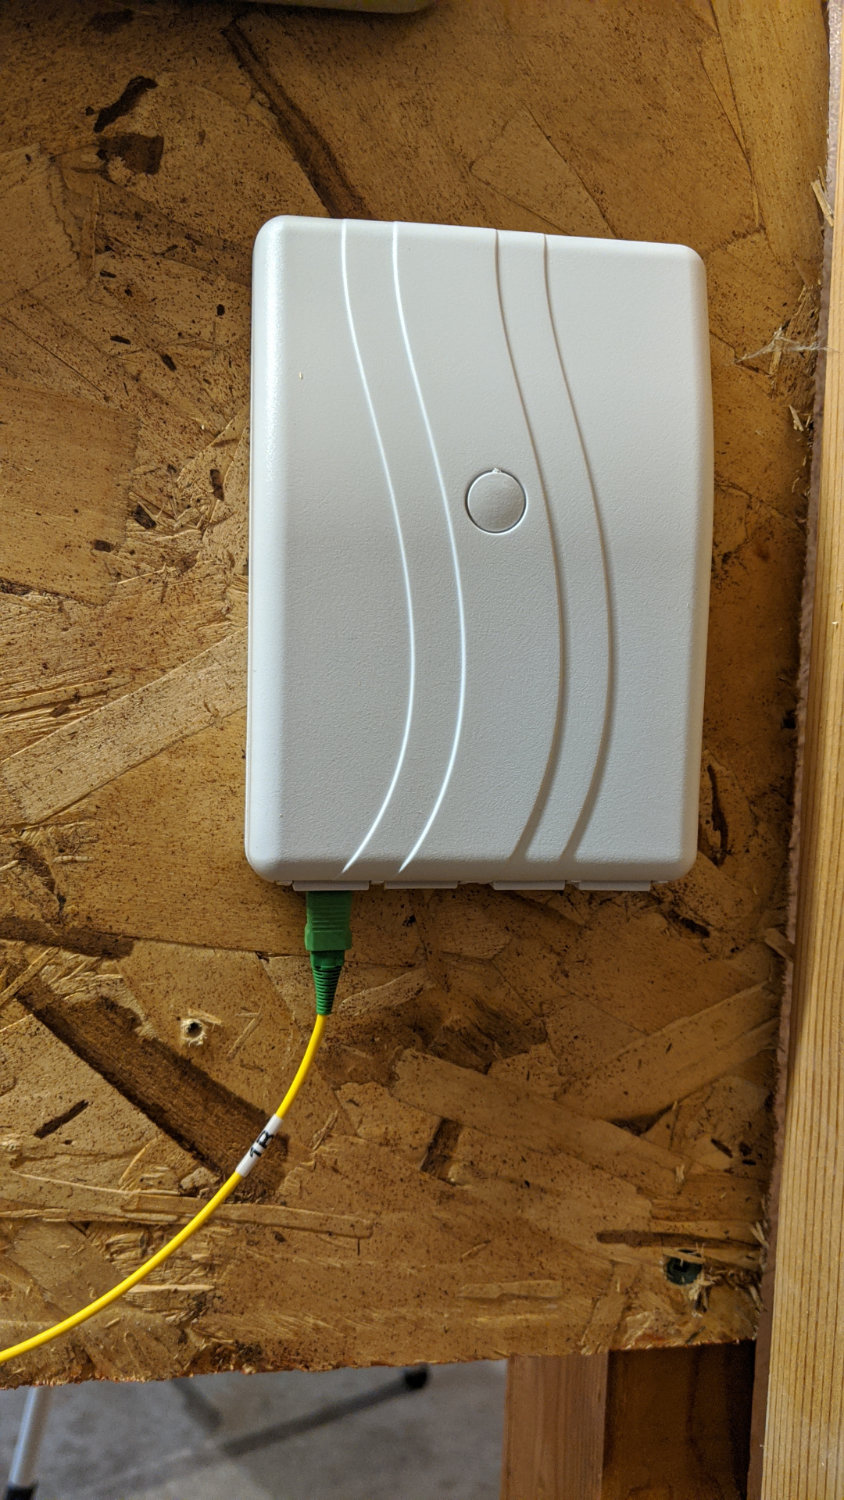
The fiber jack inside the network “closet.”
The fiber jack was mounted on the other side of the particle board down low and out of the way.
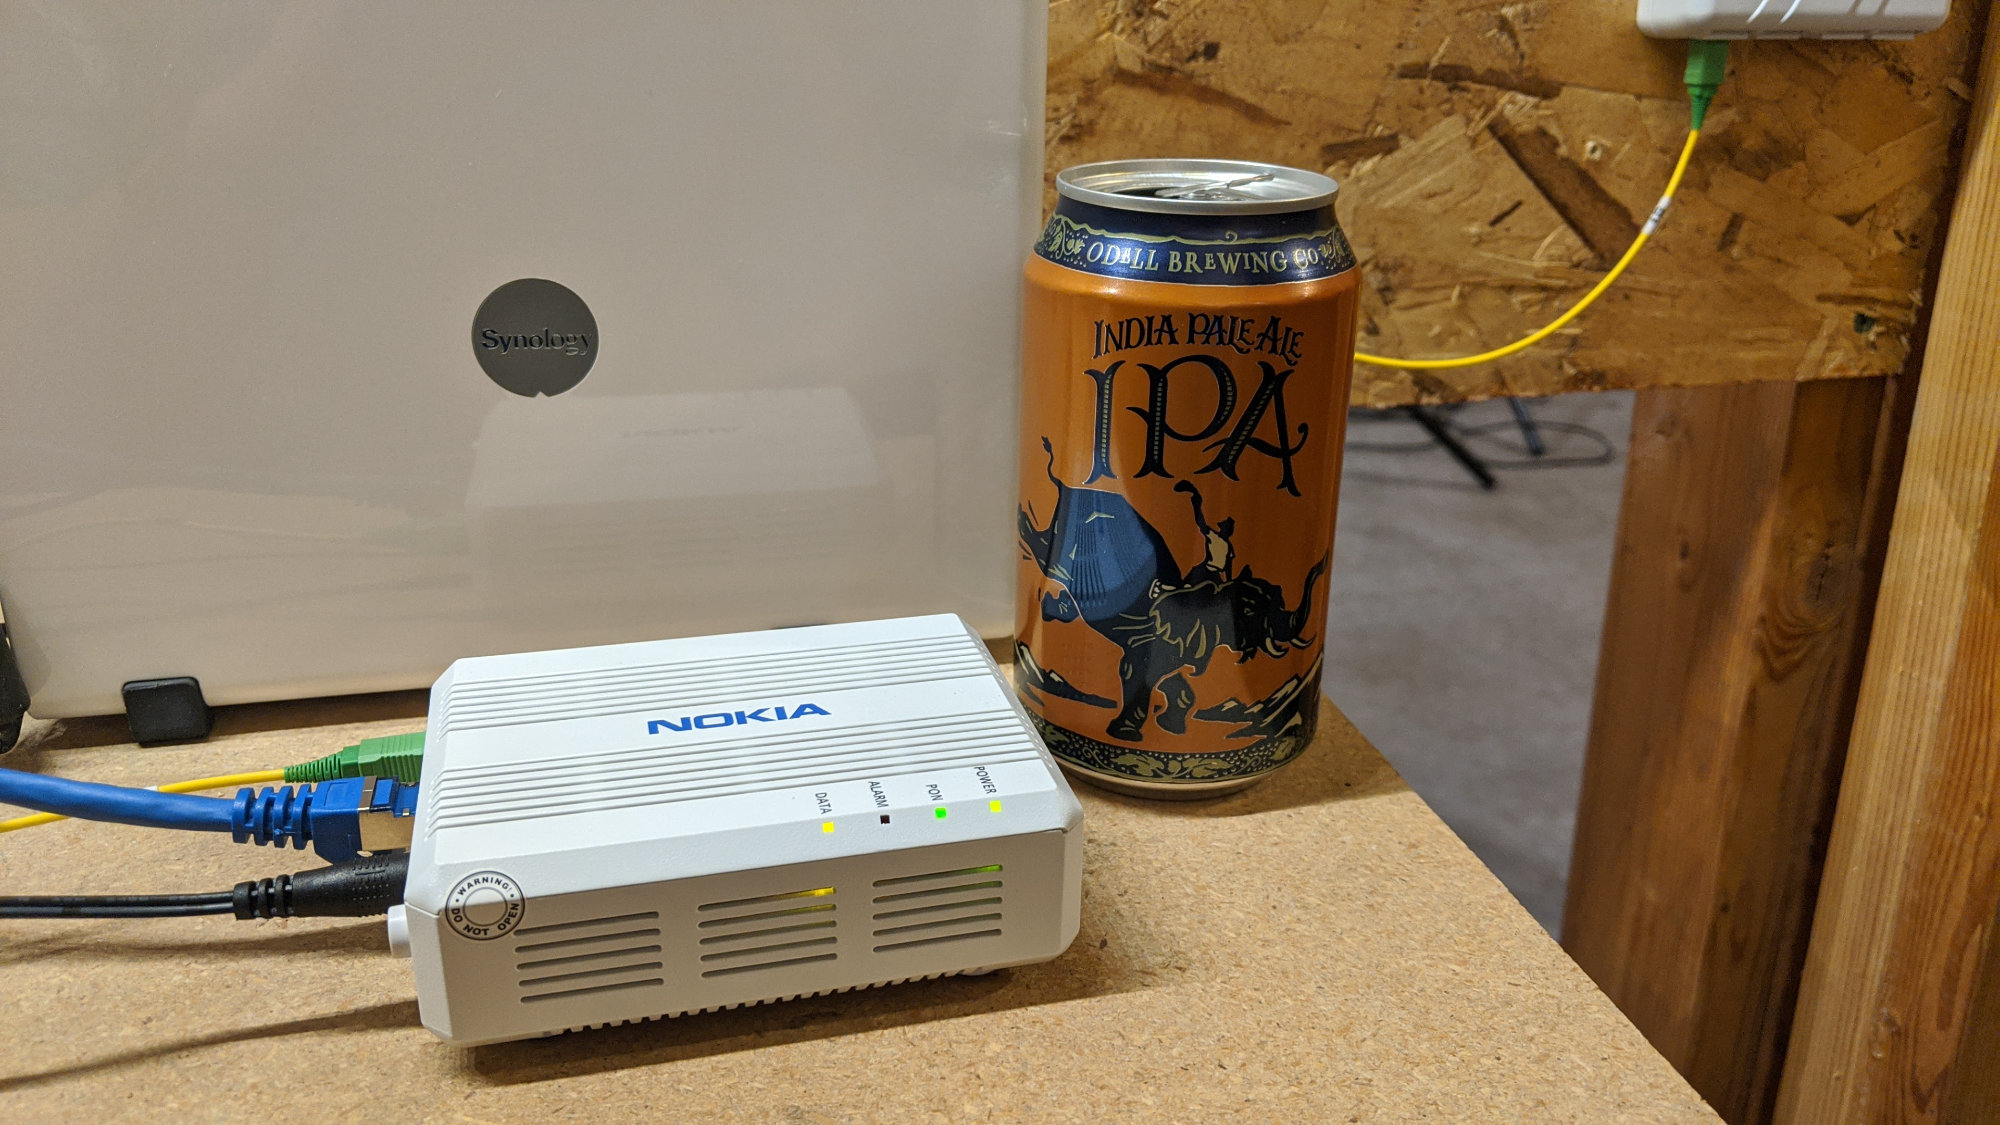
The single-port ONT next to a 12 oz beer can. It’s quite a bit smaller than the four-port ONT which is closer in size to a crowler or Nalgene bottle.
Finally, a piece of yellow fiber runs from the jack to the single-port Nokia ONT. The single-port ONT is quite a bit smaller and simpler than the four-port Nokia ONT. It’s closer in size to a 12 oz aluminum can whereas the four-port Nokia ONT is closer in size to a 32 oz can or a Nalgene bottle.
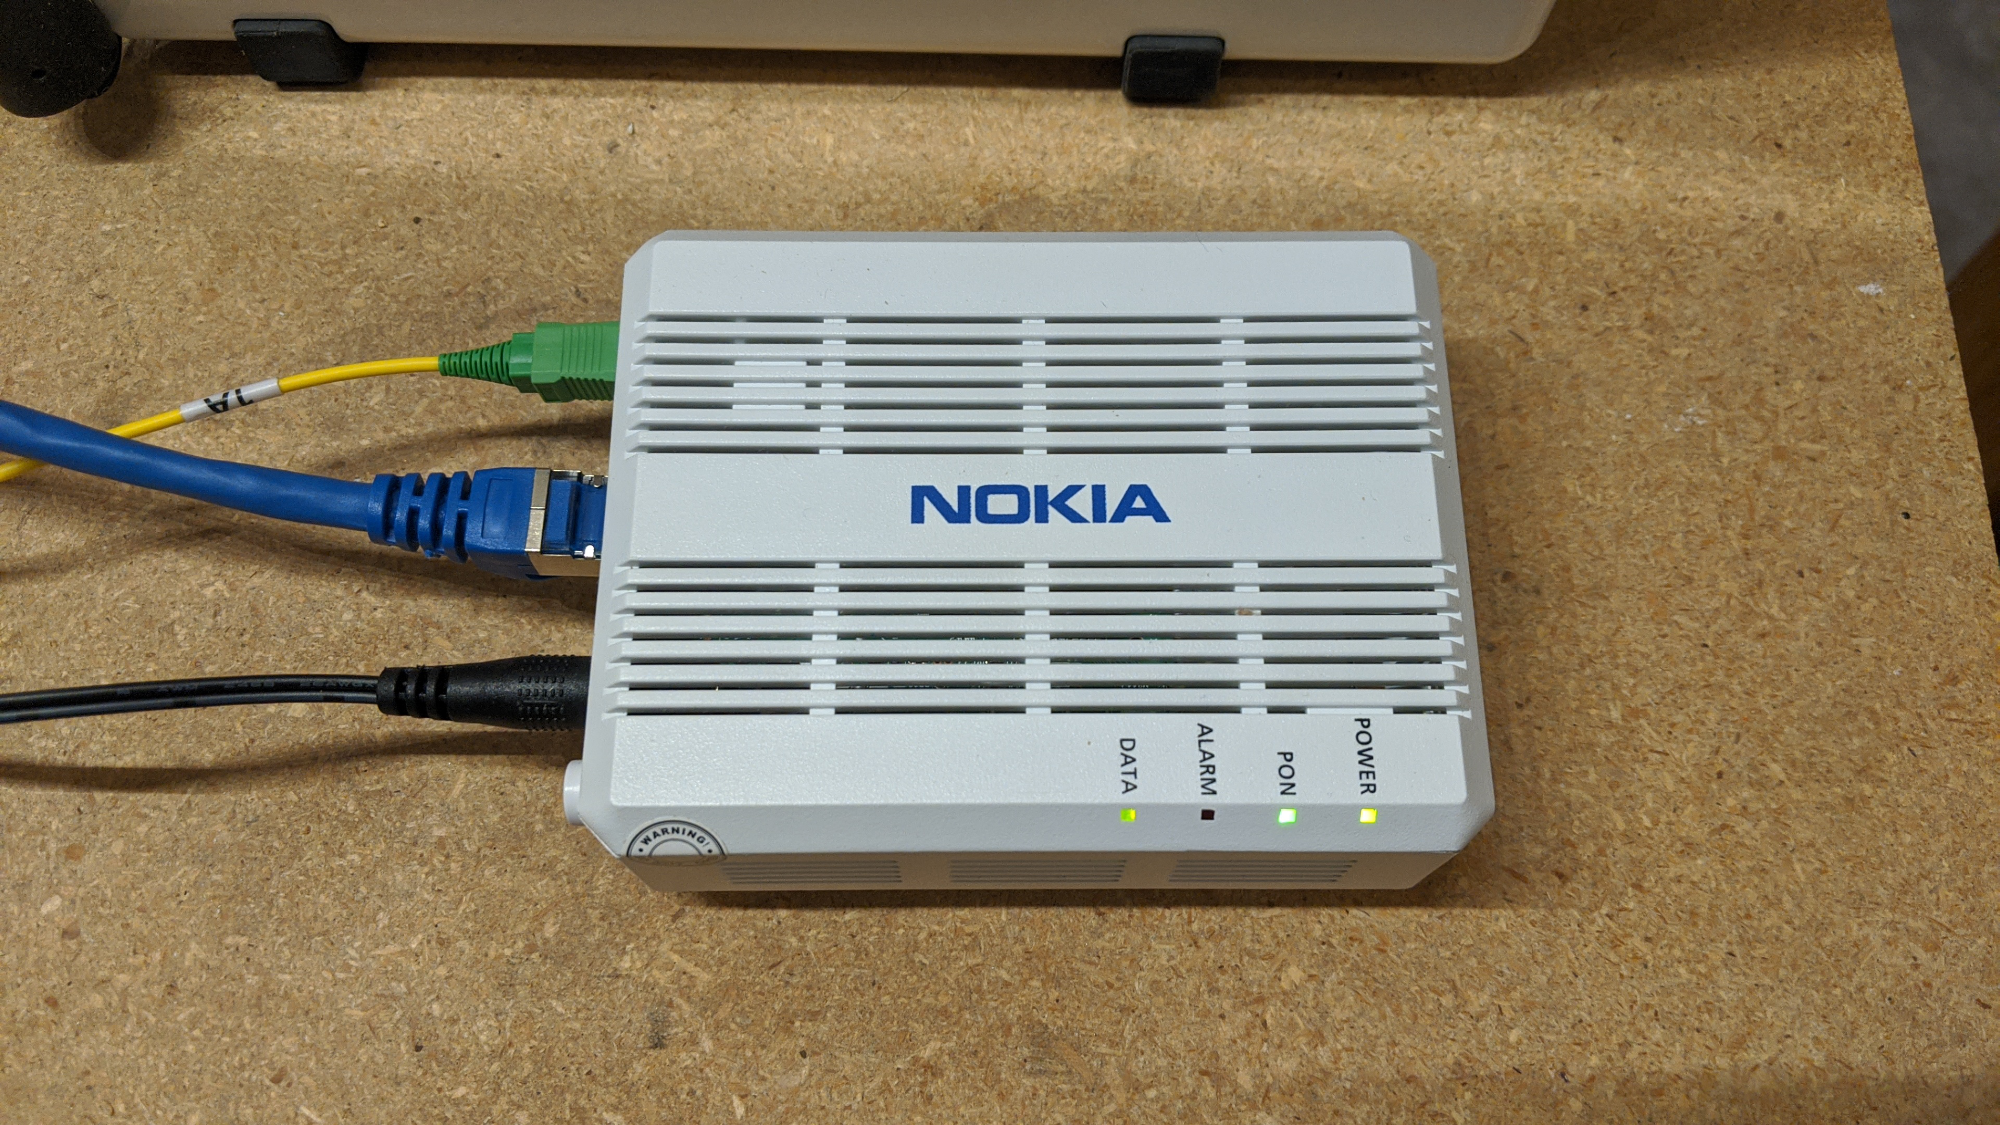
A close up of the single-port ONT. The yellow cable with the green connector is the fiber from the fiber jack. The blue cable is a shielded Cat6 Ethernet cable that connects to my router. The black cable is the power cable.
The single-port ONT lacks several features of the four-port ONT. The four-port ONT supports Wi-Fi and telephone service for those who choose to subscribe to either. The single-port ONT does not. Both can function as a router or operate in bridge mode for those who supply their own routers. The four-port ONT is also far sexier than the single-port ONT.
Connexion by default supplies the four-port ONT to customers, and, for most customers, I’d recommend getting the four-port ONT too. With the four-port ONT, it’s just a phone call to add voice or the city’s Wi-Fi service to your account. Adding these services to your account with the single-port ONT requires sending technicians out to your house to replace the ONT with the four-port ONT. Finally, for most people, the four-port ONT is more likely to blend in with your home decor.
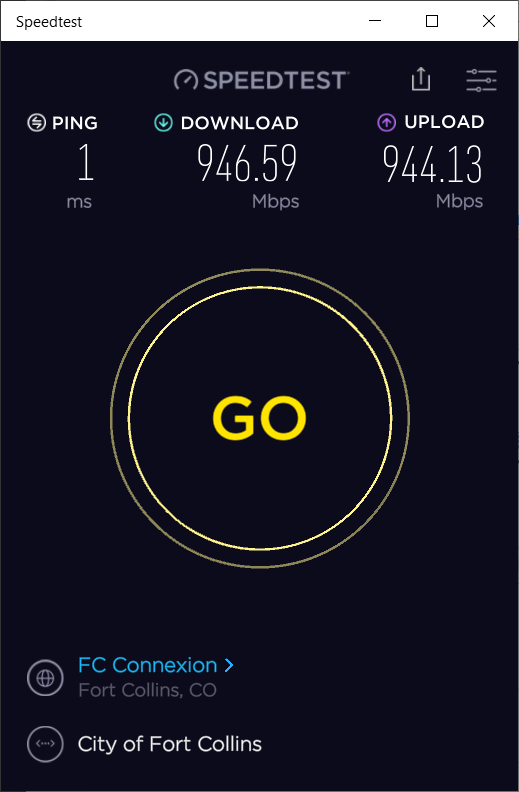
The very first speed test that I ran using my router and desktop PC over a wired connection.
After the crew verified the signal levels and ran a speed test on their laptop, it was time to connect my router and a run a speed test on my desktop computer. I connected the cable and waited for my router to indicate the network was up. Once it was, I clicked the GO button on the Ookla Speedtest app and let ‘er rip. The screenshot above is from the very first run of the Speedtest app with my new Connexion service. Not too bad for my very first attempt at connecting my desktop computer to a symmetric gigabit fiber connection!