
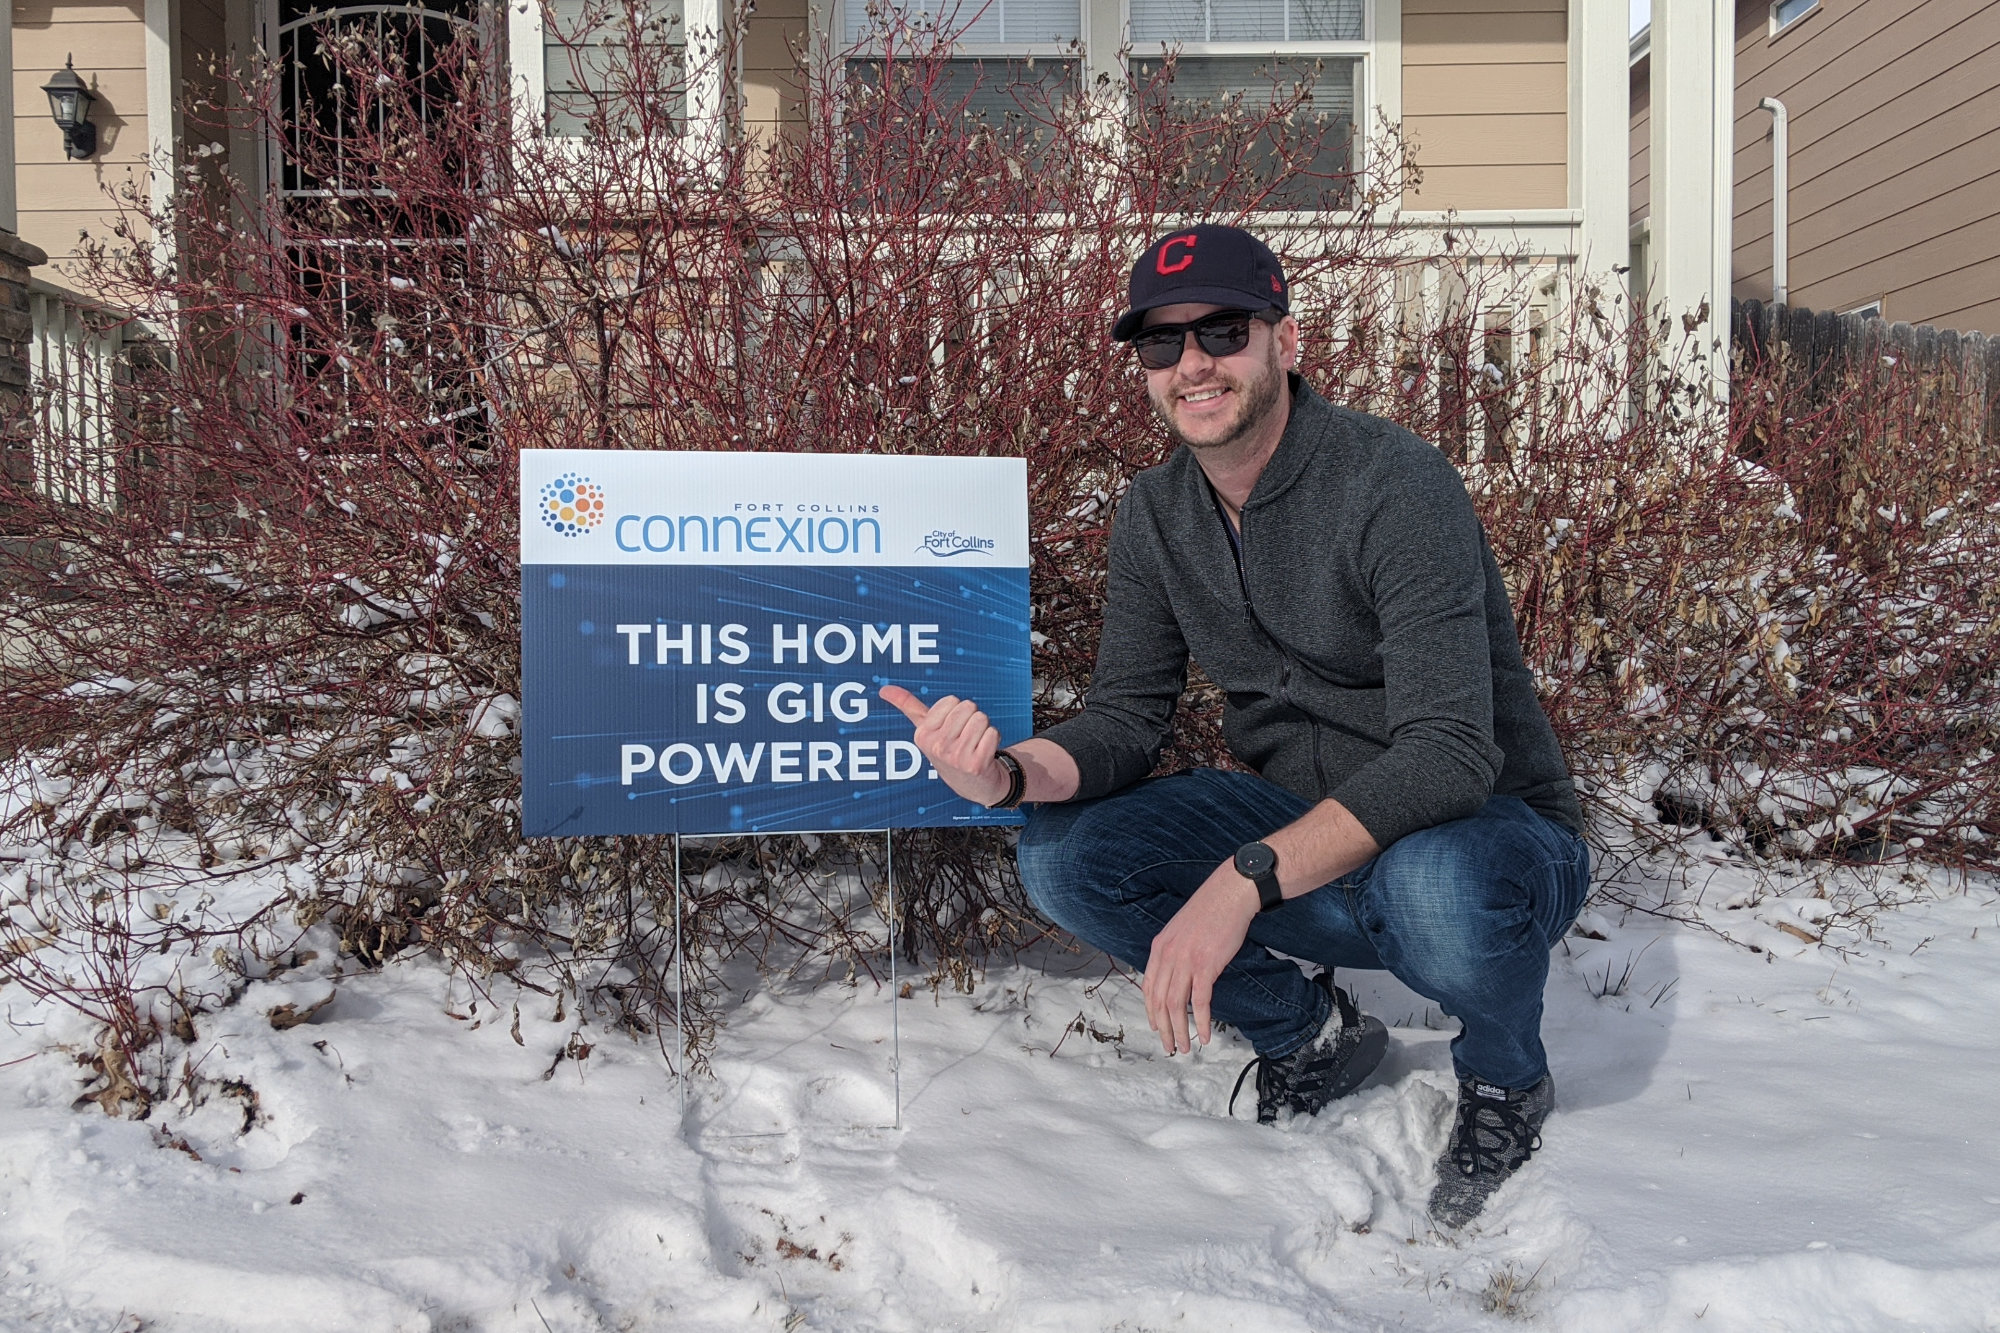
After four years of hard work, hundreds of hours of volunteer time, and taking on and winning against one of the largest and most powerful corporations in the world, Colin got his Fort Collins Connexion gigabit fiber service installed today! Congratulations, Colin!
Note: if you missed my first two posts on the Connexion construction process, here are links to part one and part two. Things have been pretty quiet in my neighborhood this past month and a half. The only activity since fiber was pulled in late December has been a few technicians digging around in vaults. In northeast Fort Collins neighborhoods, however, service is going live. Let’s take a closer look at having service installed.
As luck would have it, my friend Colin, who led the ballot issue campaign that authorized the city to build Connexion, lives in one of those neighborhoods. For the next few updates, we’re going to turn our attention to my friend Colin’s experiences in his neighborhood, what the Connexion installation process looks like, and what sort of performance you can expect from the service.
January 7, 2020 – Door Flyer Announcing Service Availability
The Connexion service available flyer that Colin received on January 7, 2020.
On January 7, 2020, Colin found a flyer announcing the availability of Connexion at his address in his neighborhood on the northeast side of town. He called the Connexion customer service number and scheduled an install for the afternoon of January 27, 2020.
They explained to him that the install would occur in two parts. The first part was the outside install and he did not need to be home for the outside install. It would occur a few days before the scheduled installation appointment. During the outside install, crews locate the existing underground utilities, run a piece of fiber from the side of the house to the flowerpot on the street, and prepare to hang a network interface device (NID) on the side of the house. The NID is typically located where the rest of the utilities are already brought into the house.
The second part of the install was the inside install which was scheduled for January 27. During the inside install, he would need to be home. A technician would install the NID then fish a piece of fiber through the walls from the NID on the outside of the house to a fiber jack at the location of his choosing on the inside of the house.
After installing the fiber jack, the technician would connect the fiber “modem” which is called an optical network terminal (ONT) to the fiber jack, connect Colin’s computer or existing home network to the ONT, and verify the connection. If Colin had signed up for the city’s $9.95 / month extra Wi-Fi service, the technician would connect all Colin’s wireless devices to the ONT’s Wi-Fi and verify their connection too.
January 23, 2020 – Oops. Outside Install Fail
Newly run fiber from the street on the side of Coliln’s house. Technicians didn’t manage to get the duct protecting the fiber anywhere near plumb.
On January 23, Colin received news that his install would be delayed by two weeks while they pulled permits. This was odd news because several houses in his neighborhood already had service and none of the other houses required new permits to be pulled.
A tech did come to his house that day because there was a piece of duct with a small loop of fiber hanging out of it. The duct was also very visibly at an angle rather than installed straight up and down. In addition, there was a loop of fiber and a few orange cones on the street in front of his house.
Whoops! No flower pot to connect the new fiber to the network. This should have been spotted and fixed before scheduling the inside install.
Still curious as to why the city needed to pull a permit, Colin did some querying and came to find out his house is what Connexion calls a “hanging third home.” Generally there’s a flower pot between every two houses but on cul-de-sacs and near the end of a fiber run there can be a hanging third home without a flowerpot. To save costs Connexion skipped installing these flowerpots with the understanding they would install them as needed as part of the drop installs when connecting service to the house.
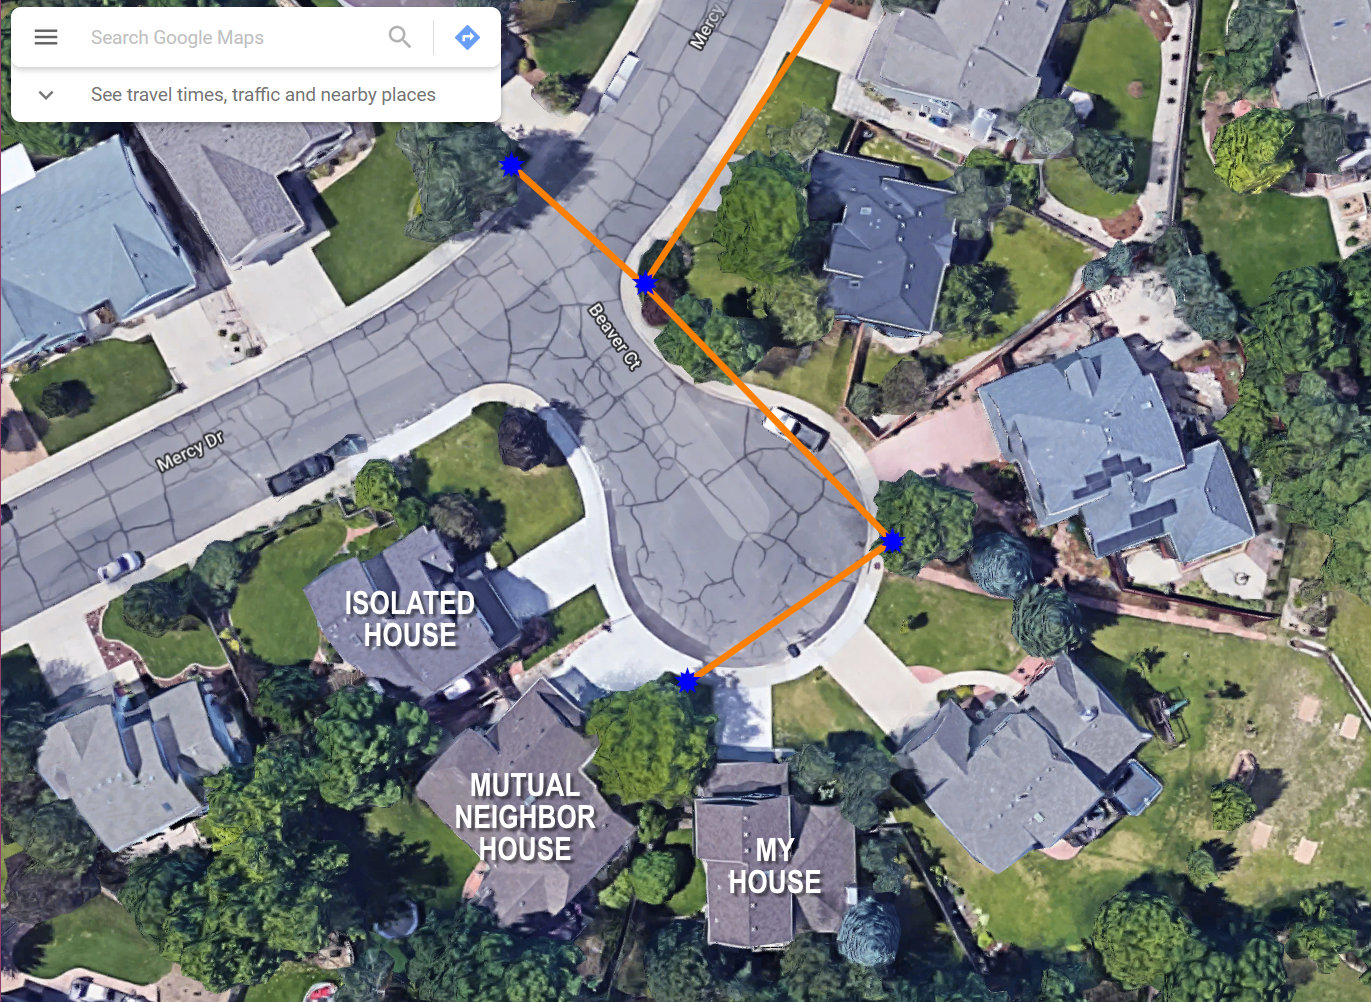
In this image, the conduit route is an orange line and the splice vaults and flower pots that provide access to the conduit are blue stars. They can reach every house on the cul-de-sac without going underneath a sidewalk or driveway except the house on the northwest corner that is labeled as the isolated house. We’ve since learned Connexion calls this a “hanging third house.” (Satellite imagery from Google Maps.)
A hanging third home exists in my neighborhood. It’s labeled as the isolated house in the illustration above. The blue stars are flowerpots. There’s a flowerpot between my house and our mutual neighbor’s house but there isn’t one at the isolated house. When the isolated house signs up for service, a crew will have to pull a piece of conduit and fiber under our mutual neighbor’s driveway and install a flowerpot between the two driveways.
Colin’s install highlights a flaw in Connexion’s installation process that needs to be fixed. Connexion should have pulled their fiber maps, noticed his house was a hanging third home, pulled permits, and scheduled the installation of the additional flowerpot when he signed up for service rather than relying on a technician to notice the problem two business days before the scheduled inside installation appointment.
January 29, 2020 – Outside Install Completed
As expected, they installed a flower pot just for Colin’s house.
On January 29, as predicted, a crew installed a flowerpot in Colin’s front yard so they could complete his outside install. They used missile boring to bore a channel under his driveway between the new flowerpot and an existing older flowerpot. Once the channel was bored, they installed a piece of conduit between the two flowerpots.
The crew then pulled the drop fiber from the trench in his yard, into the new flowerpot, through the new conduit, into the existing flowerpot, through an existing piece of conduit, and finally to a splice vault. Inside the splice vault, a crew will open the splice enclosure and use a fusion splicer to connect Colin’s drop fiber to the distribution fiber from the network. This could possibly have happened today but it is more likely to occur as part of the inside install.
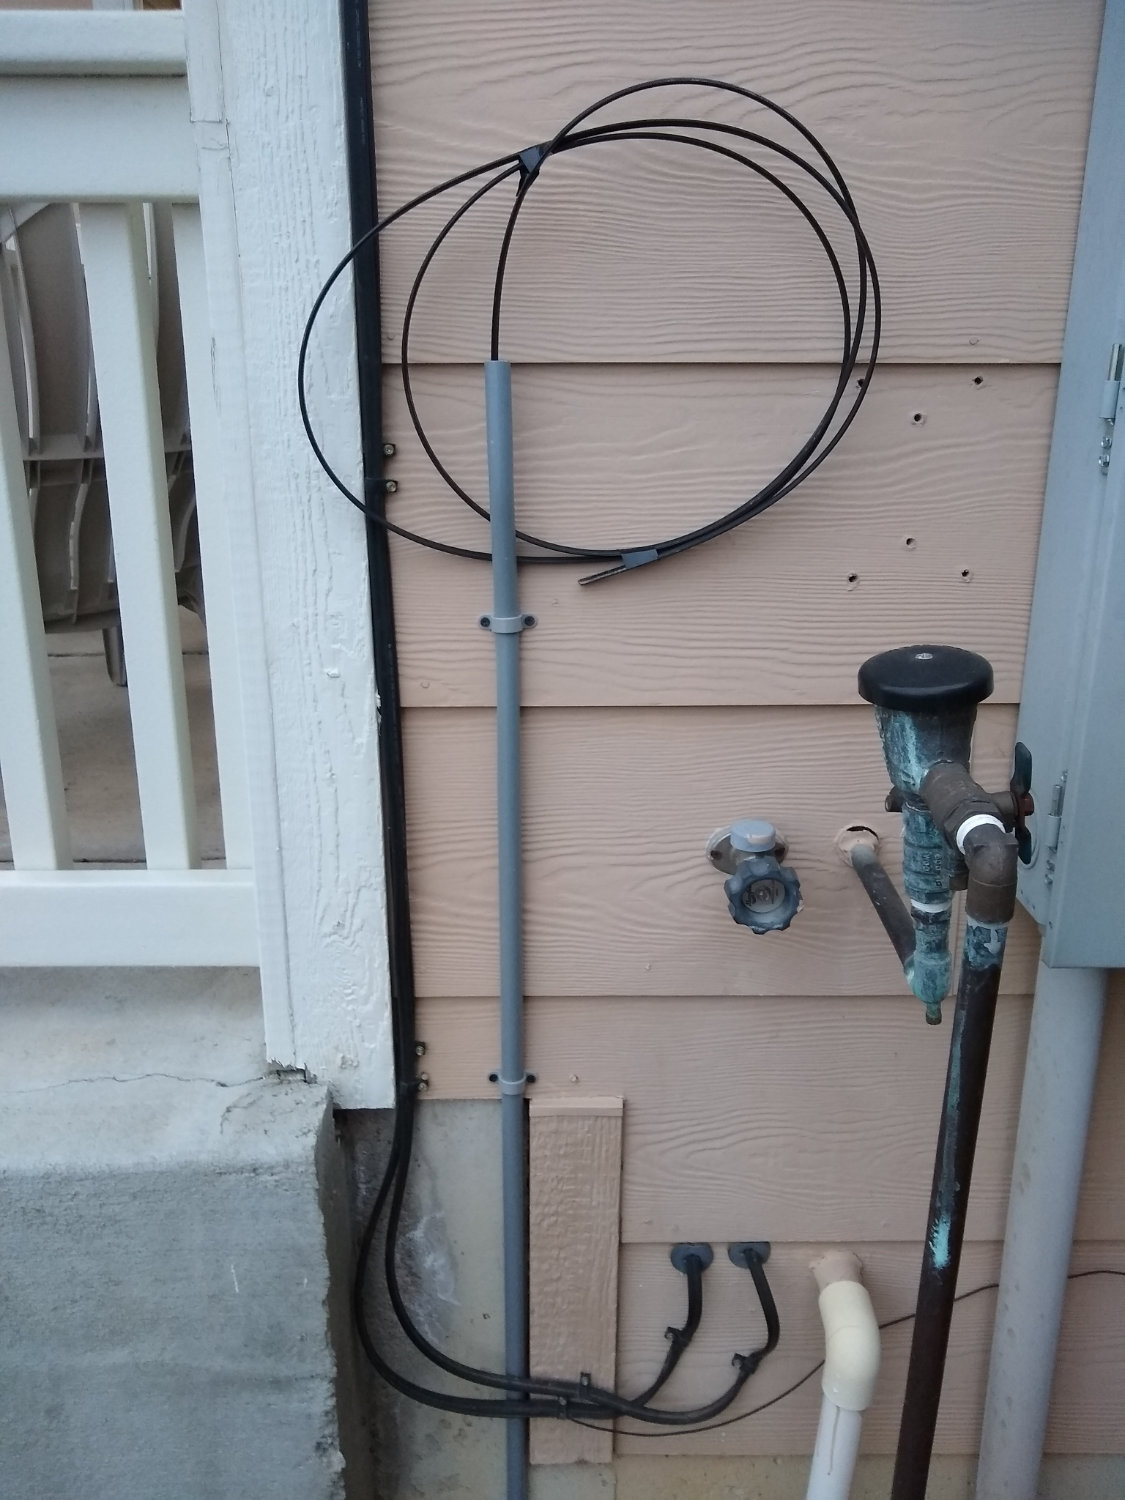
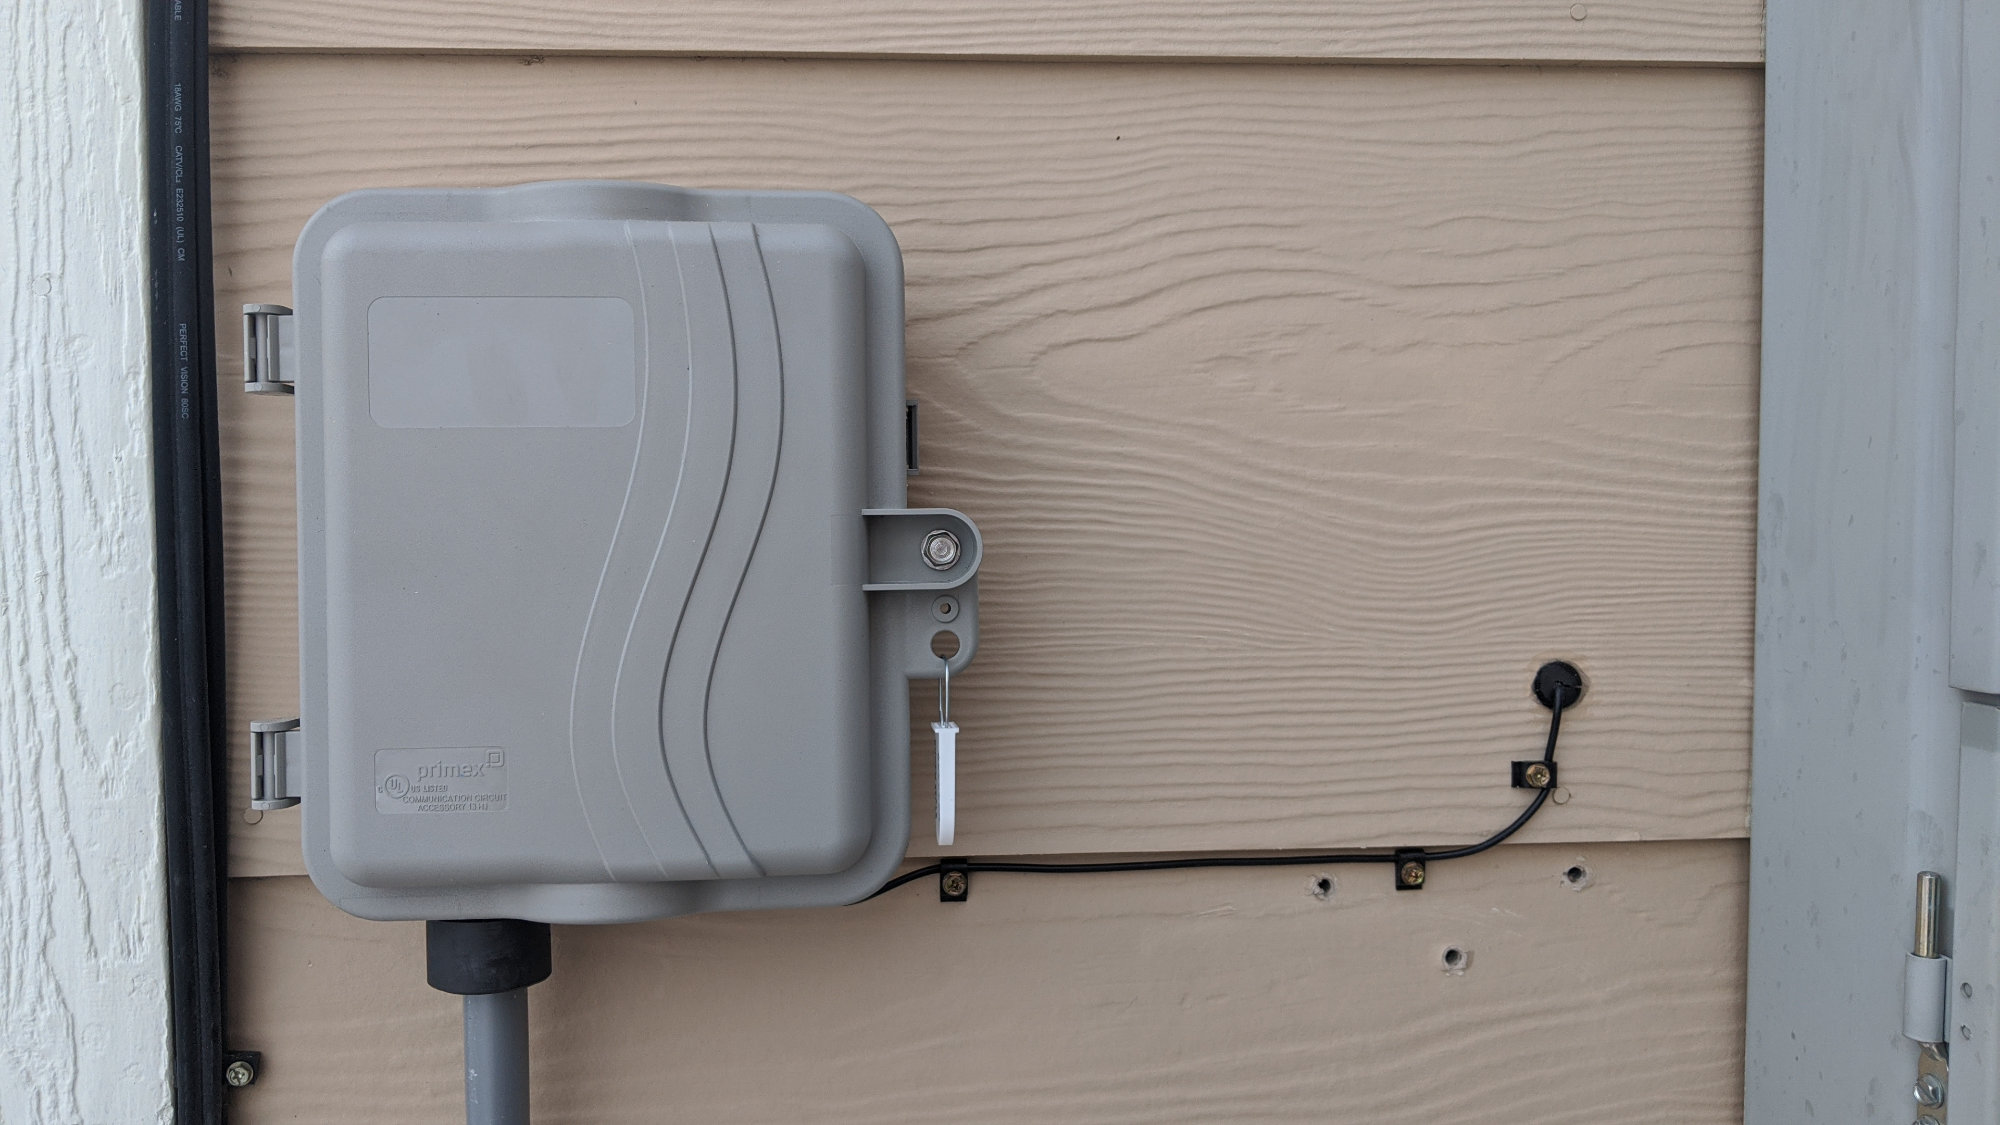
The outside install crew also straightened the duct and fiber on the side of the house. Still no NID.
Back on the outside of Colin’s house, the outside crew straightened the duct but they did not install a network interface device.
February 4, 2020 – Network Interface Device (NID) Install
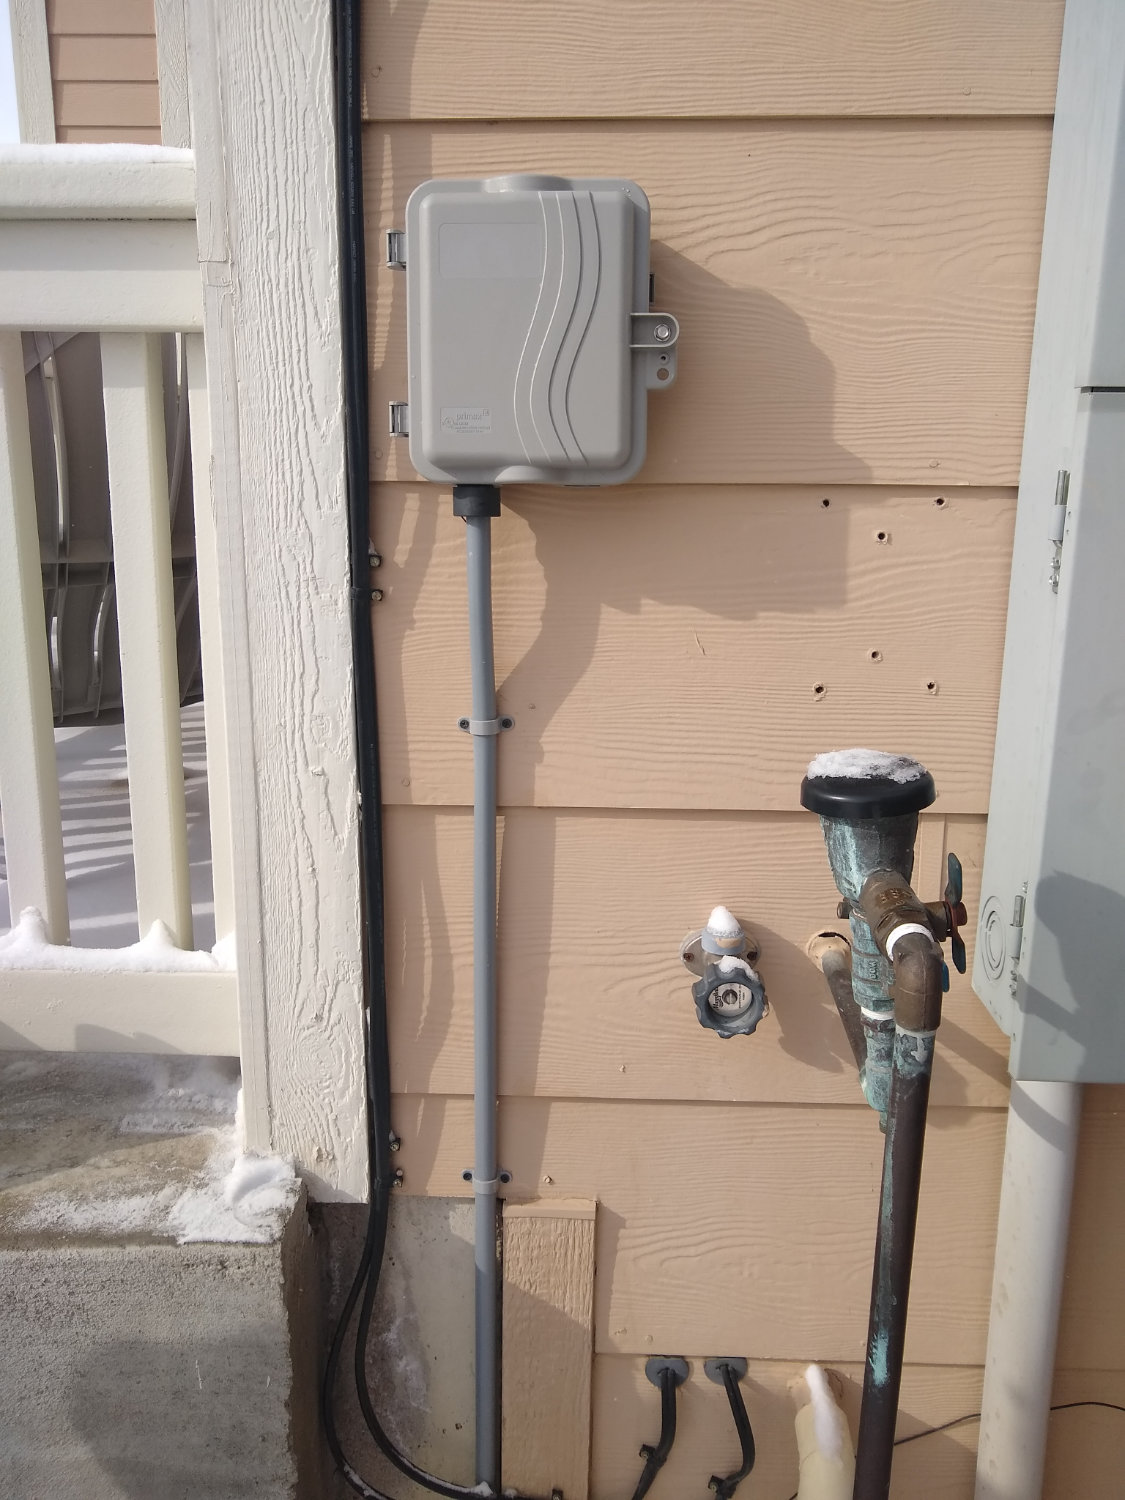
The completed network interface device (NID) installation.
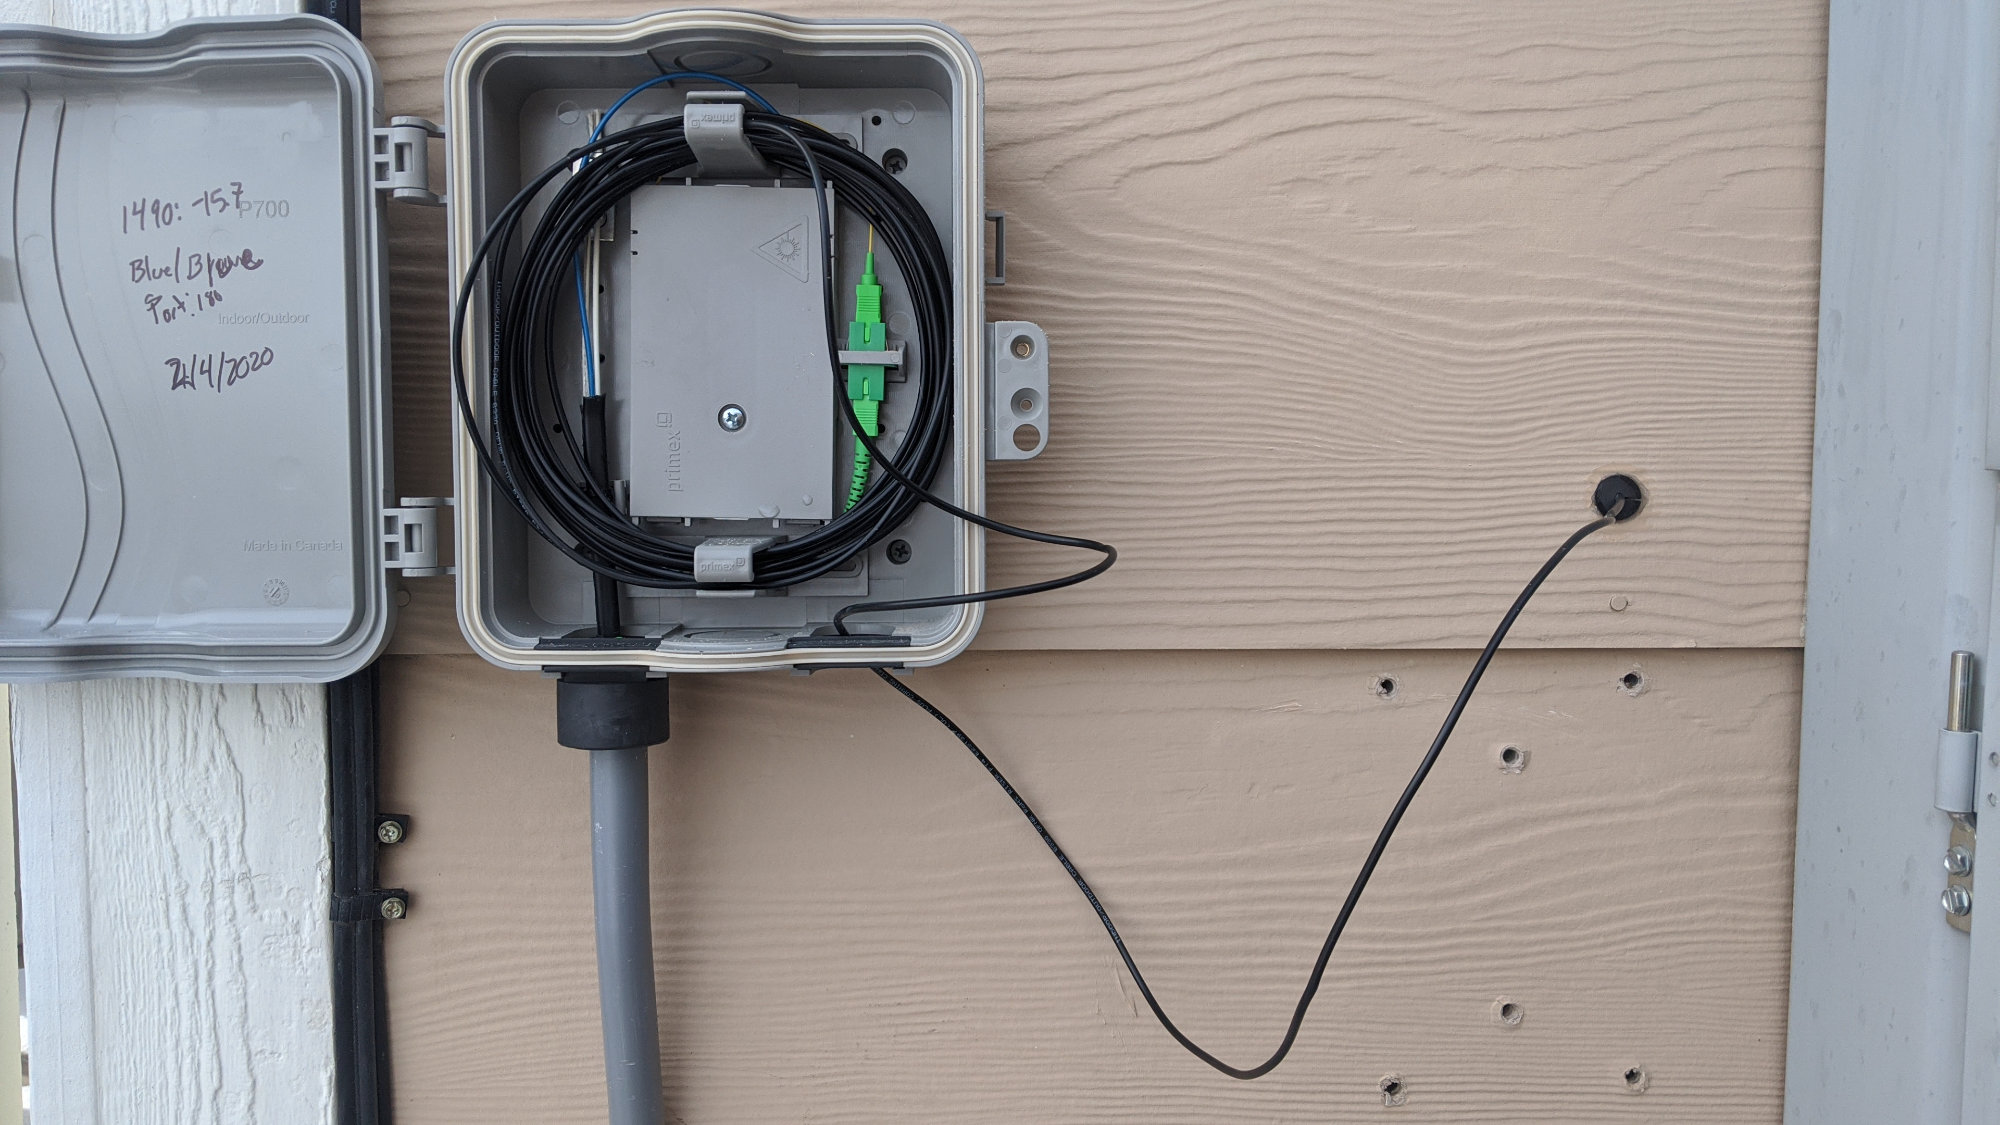
About two and a half hours before Colin’s scheduled inside install appointment, a Connexion supervisor from the City of Fort Collins showed up and installed the network interface device (NID). The network interface device was mounted on the side of the house and the fiber from the street was pulled up and into the NID. The network interface device is a Primex P700FSC-CHG1SA.
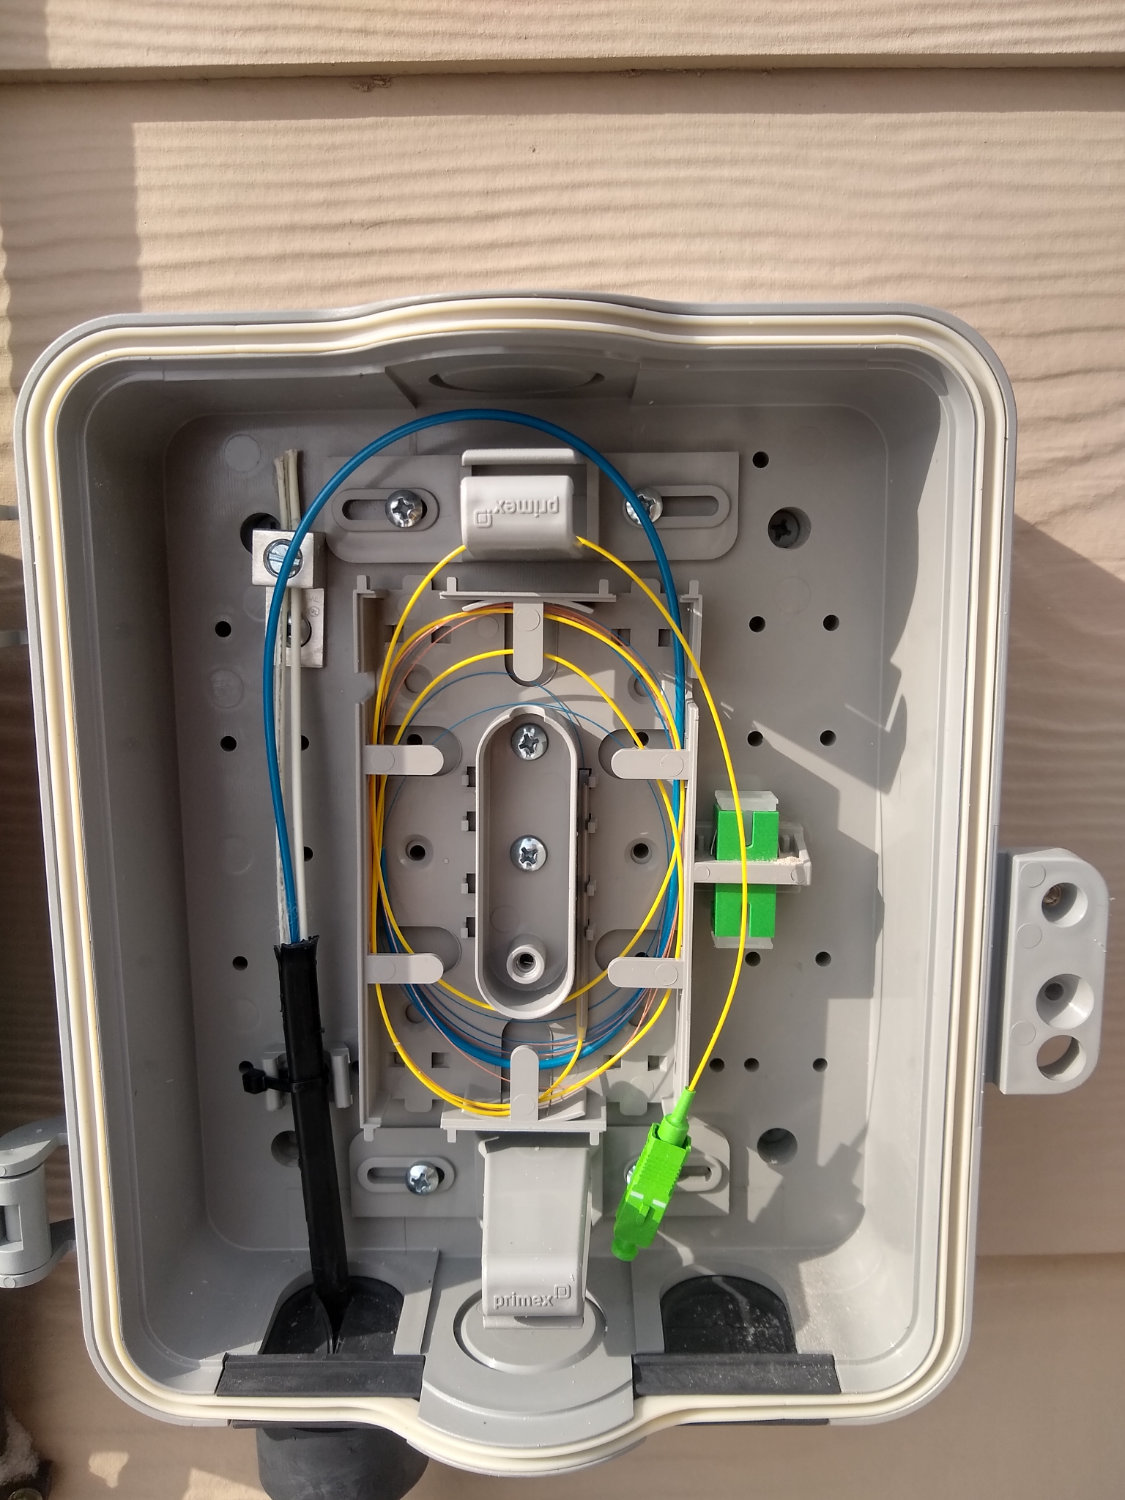
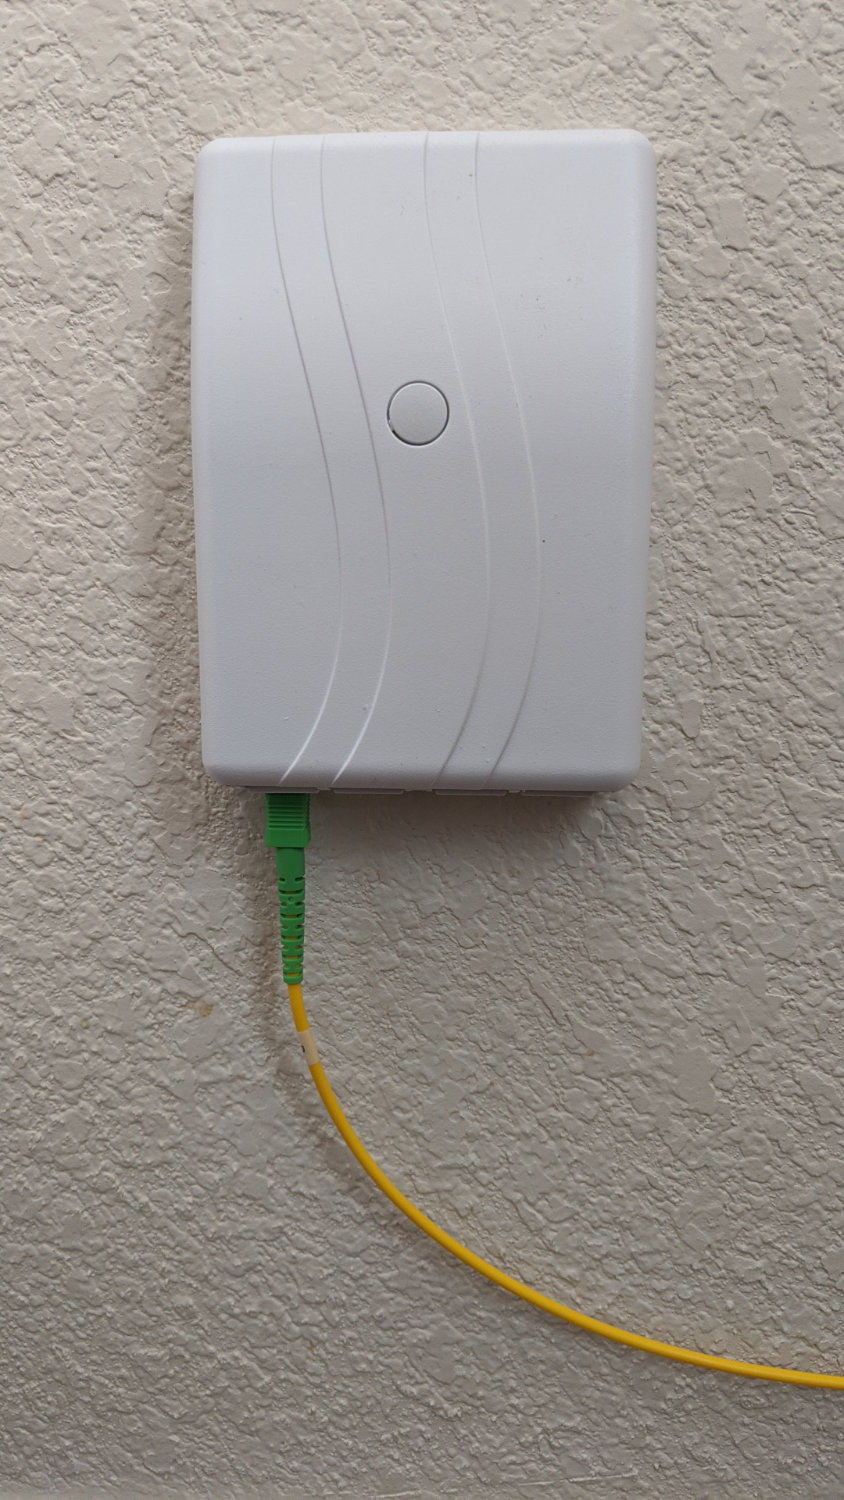
Inside the Primex network interface device (NID). The splice between the very thin blue jacketed fiber and the yellow jacketed fiber with the connector can be seen just to the right bottom outside edge of the innermost oval.
The fiber from the street is inside the dark thick cable on the left. This is secured inside the NID and a portion of the outer jacket is removed. The white members on either side of the blue inner sheath provide support and strength to the fiber.
The thick blue sheath makes a few loops around the raceway then its removed revealing the very fine fiber protected by a very thin blue sheath. This makes a few loops around the raceway before being spliced to the fiber in the thicker yellow jacket with the green connector.
On the outside edge of the dark thick fiber cable is a ground conductor. At the street this ground conductor is connected to the grounding rod inside the splice vault. At the NID, the ground conductor is not connected. Because the fiber running from the NID to the inside of the house is entirely non-conductive and the NID contains no electrical conductors, the National Electrical Code does not require the ground to be connected at the house.
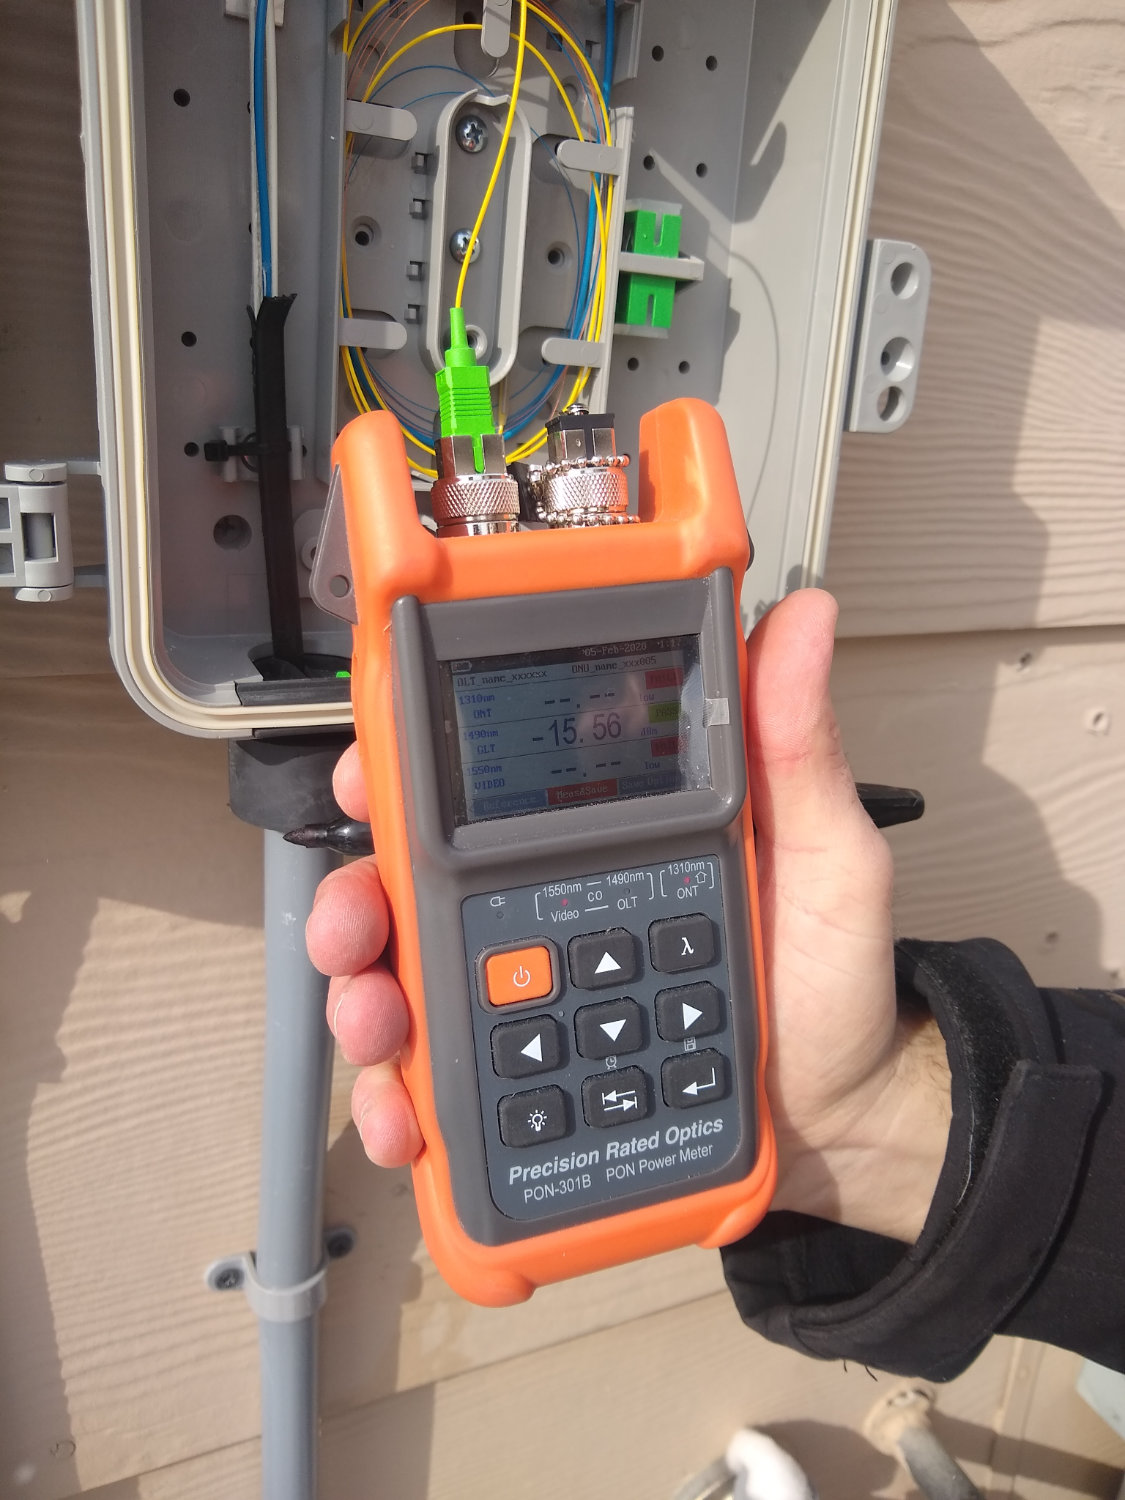
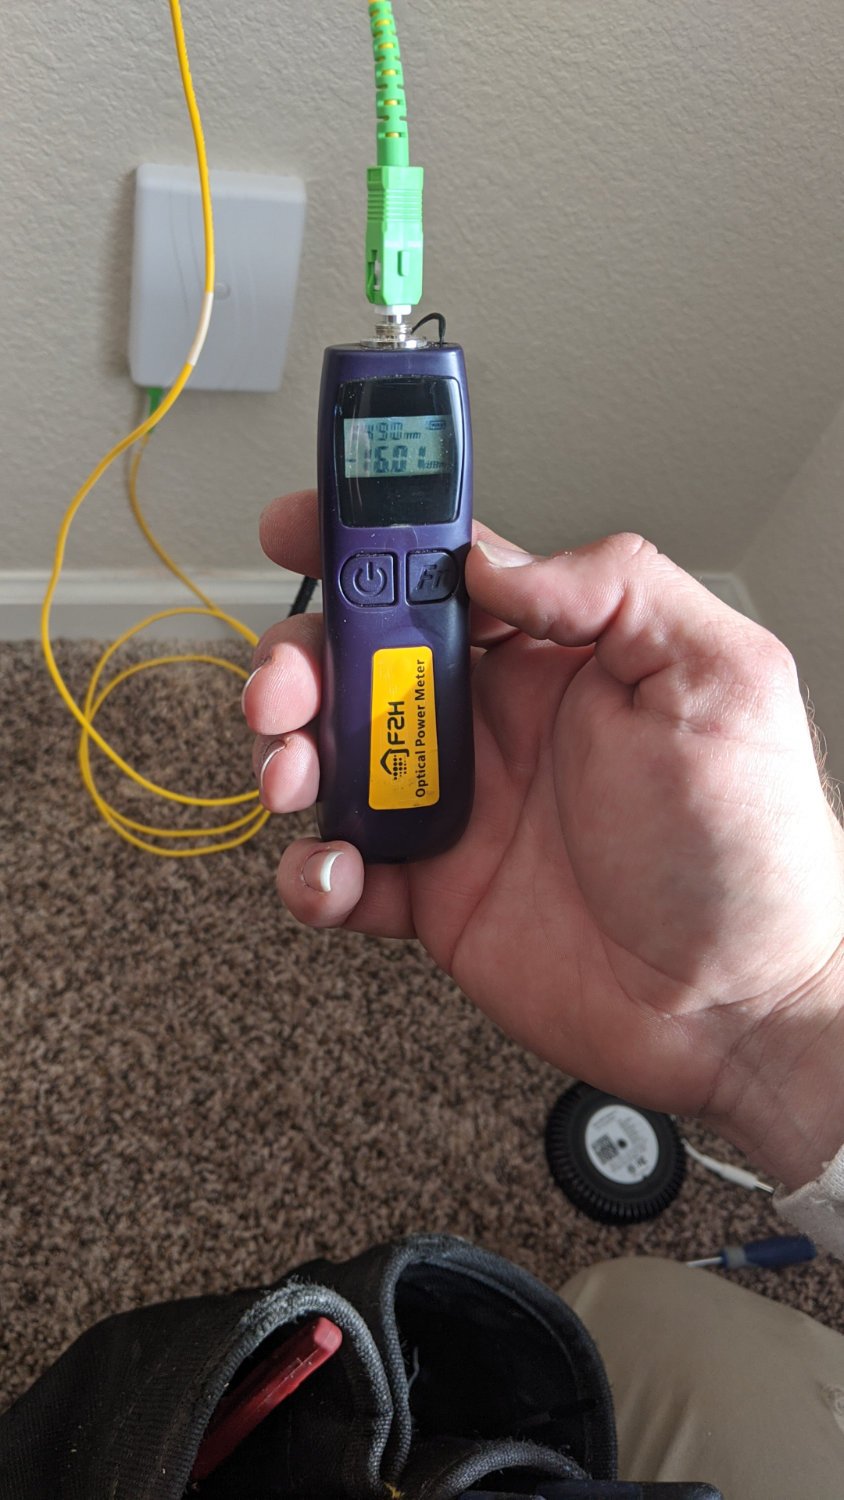
nid-test
The final step when installing the NID is verify the fiber is lit and the signal level is within tolerances for the ONT to operate properly. In this case, the signal level is -15.56 dBm or 28 microwatts. The acceptable level at the ONT is usually around -8 dBm to -28 dBm.
February 4, 2020 – Inside Install
Two technicians arrived promptly at the scheduled installation time to complete the installation. They were both employees of On Trac Incorporated who is the inside installation contractor for Connexion.
Colin described the layout of his house and where his computer and other equipment was located. The technicans and Colin did a brief walk around the interior of his house then decided to locate the ONT just on the other side of the wall from the NID. ONT stands for optical network terminal and is the fiber equivalent of a modem.
Outside Work
Installing the cable between the NID on the outside of the house and the fiber jack on the inside of the house.
One of the two technicians drilled a hole from the inside wall through the outside wall. The second connection opened the NID and connected a fiber cable with preinstalled connectors to the connector inside the NID then fed the other end of the cable and connector into the house through the new hole.
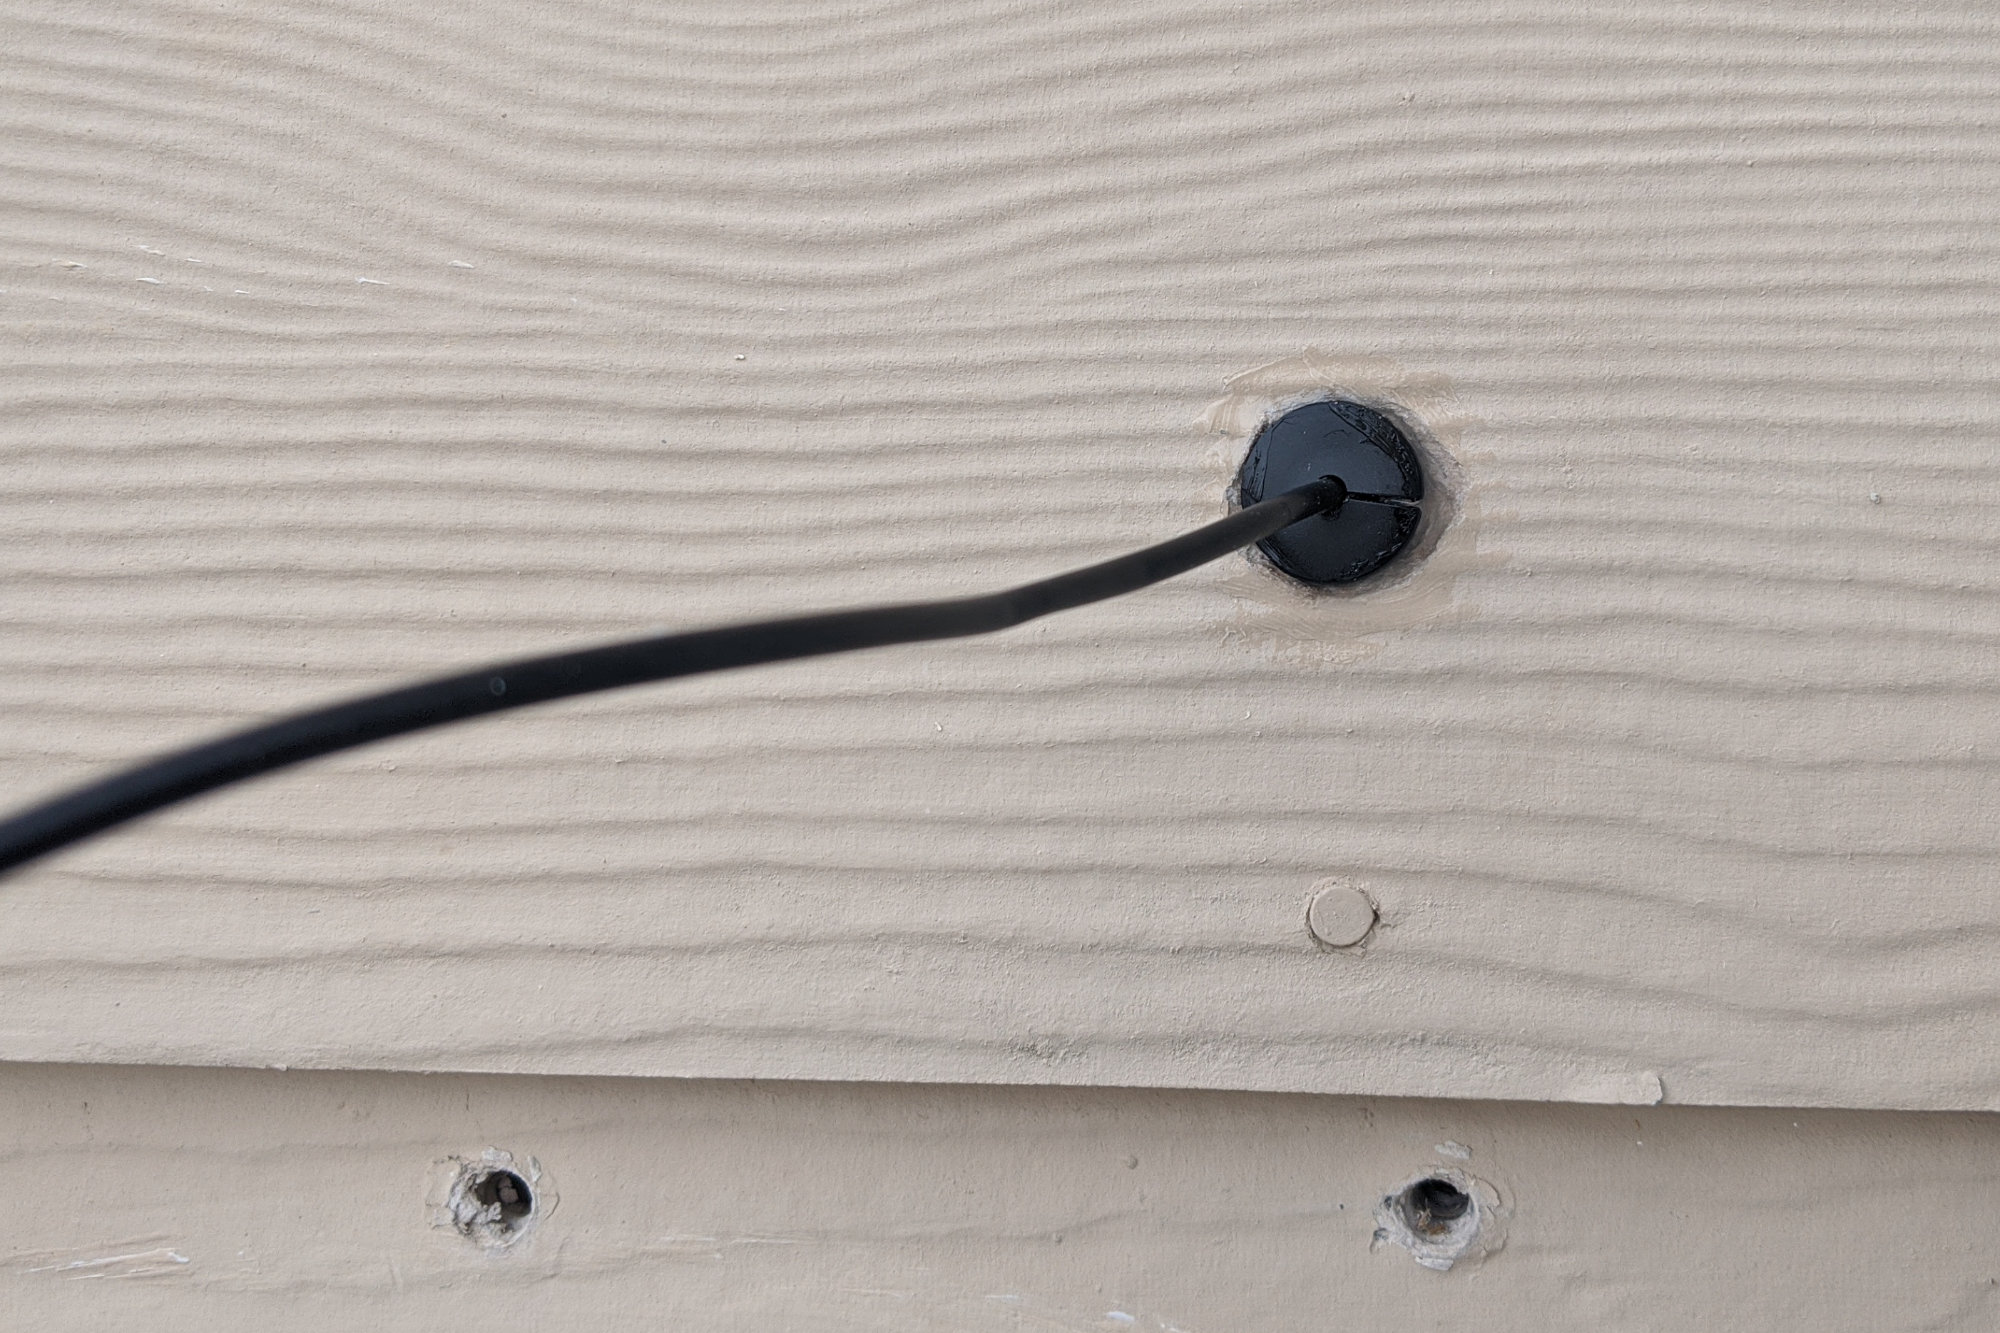
Plug and sealant around the fiber cable going into the house.
The second technician installed a plug around the fiber cable and sealed the hole with sealant.
All sealed up and ready to go.
Finally, the excess cable was coiled inside the NID and the cable between the NID and the plug was secured using some cable clamps. That completes the work on the outside of the house.
Inside Work
The fiber jack.
Meanwhile on the inside wall, the first technician installed the fiber jack. It’s the same size as a normal wall outlet but about a half inch thick to accommodate coiling the excess fiber behind the jack.
The fiber jacks are Primex CPO4 customer premises outlets. They contain a raceway for spooling the excess fiber and can accommodate up to four different keystone jacks. Connexion installs a single fiber bulkhead connector that connects the fiber from outside the house to the fiber inside the house.
One last check of the signal levels before installing the ONT.
The technician connected a short cable to the fiber jack then verified the signal levels inside the house.
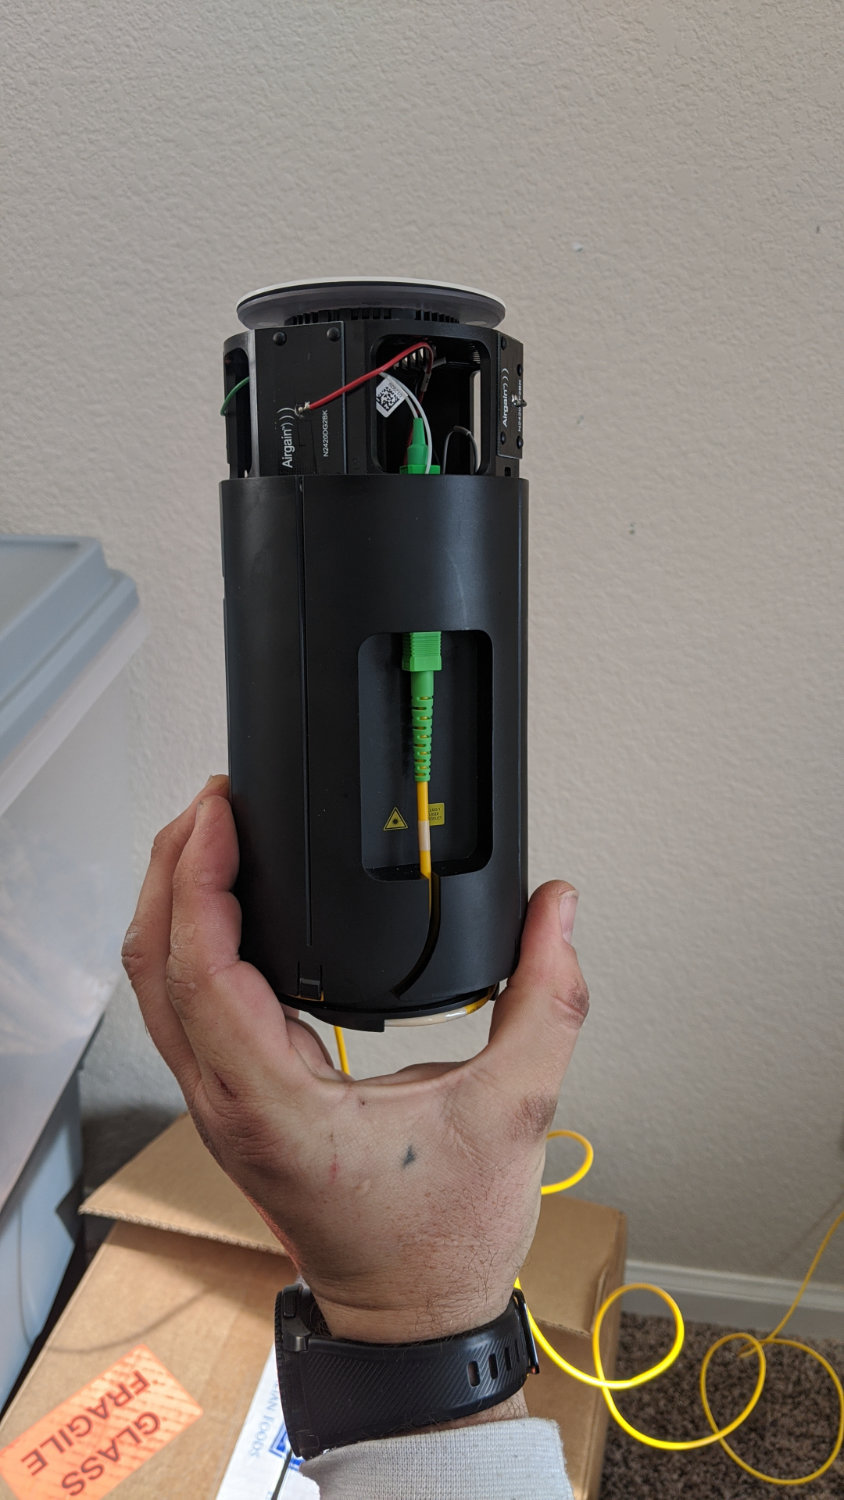
The connector for the fiber is hidden inside the ONT.
The next step was to connect the fiber to the ONT. The ONT is a Nokia Gateway 3 model G-240W-E. The Nokia website has very little information on the ONT. The best source of information are the FCC certification pages for the ONT.
The bottom unscrews and the top pulls off revealing a fiber jack inside the ONT. The technicians connected the fiber cable to the jack, wrapped a bit of the excess fiber around the raceway on the bottom of the ONT, replaced the top, and screwed the ONT back together.
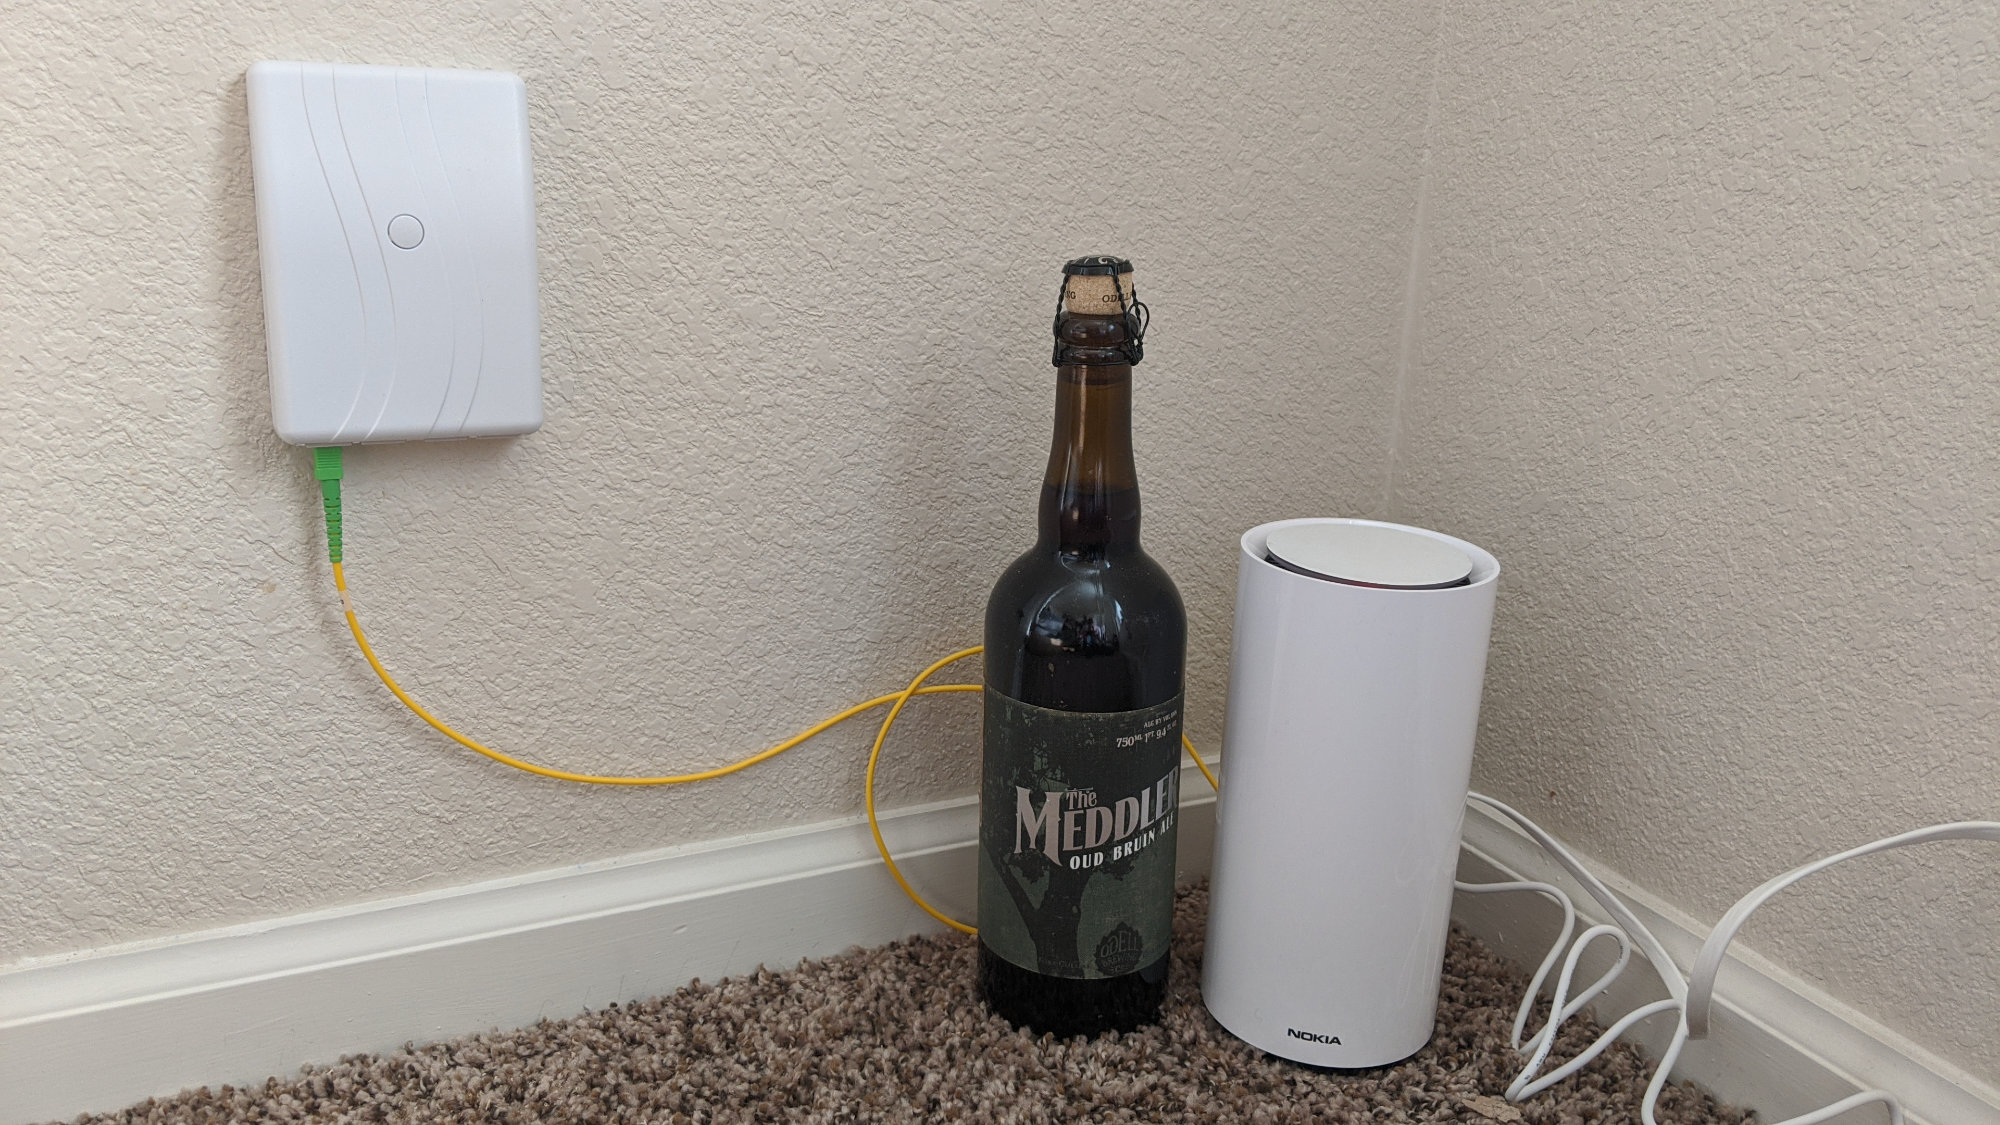
The fiber jack and ONT next to a bomber for size comparison. Colin did start Broadband and Beers after all.
At this point, the technicians used an app and a phone call to provision the router and assign it to Colin’s account. After about five minutes, the ring on top of the ONT changed from red to white then to blue to indicate it was successfully provisioned.
ONT Connections

Glamour shot of the Nokia Gateway 3 ONT from the Nokia website.
The rear of the ONT has a power connector, a backup battery connector, two telephone jacks, and four Ethernet jacks. When the ONT is placed in router mode, the router performs basic firewall and routing functions and all four Ethernet ports are active. When the ONT is placed in bridge mode, data is passed from the optical fiber network to the wired network without performing any routing functions and only the LAN 1 Ethernet port is active.
We started with the ONT in router mode but eventually requested the technicians change it to bridge mode since Colin had his own Ubiquiti Amplifi mesh router setup that he would use for firewall and routing functions.
Speed Test

speed-test
The crucial moment. Would Colin see gigabit speeds after working for four years to get symmetric gigabit fiber to his home? Drum roll, please. The answer is Yes! The photograph of the laptop screen above shows the Ookla Speedtest application running on a Windows 10 laptop using a wired Ethernet connection directly to the ONT. Due to Ethernet packet overhead, these are about the maximum expected speeds out of a gigabit service using wired gigabit Ethernet ports.
ONT Configuration
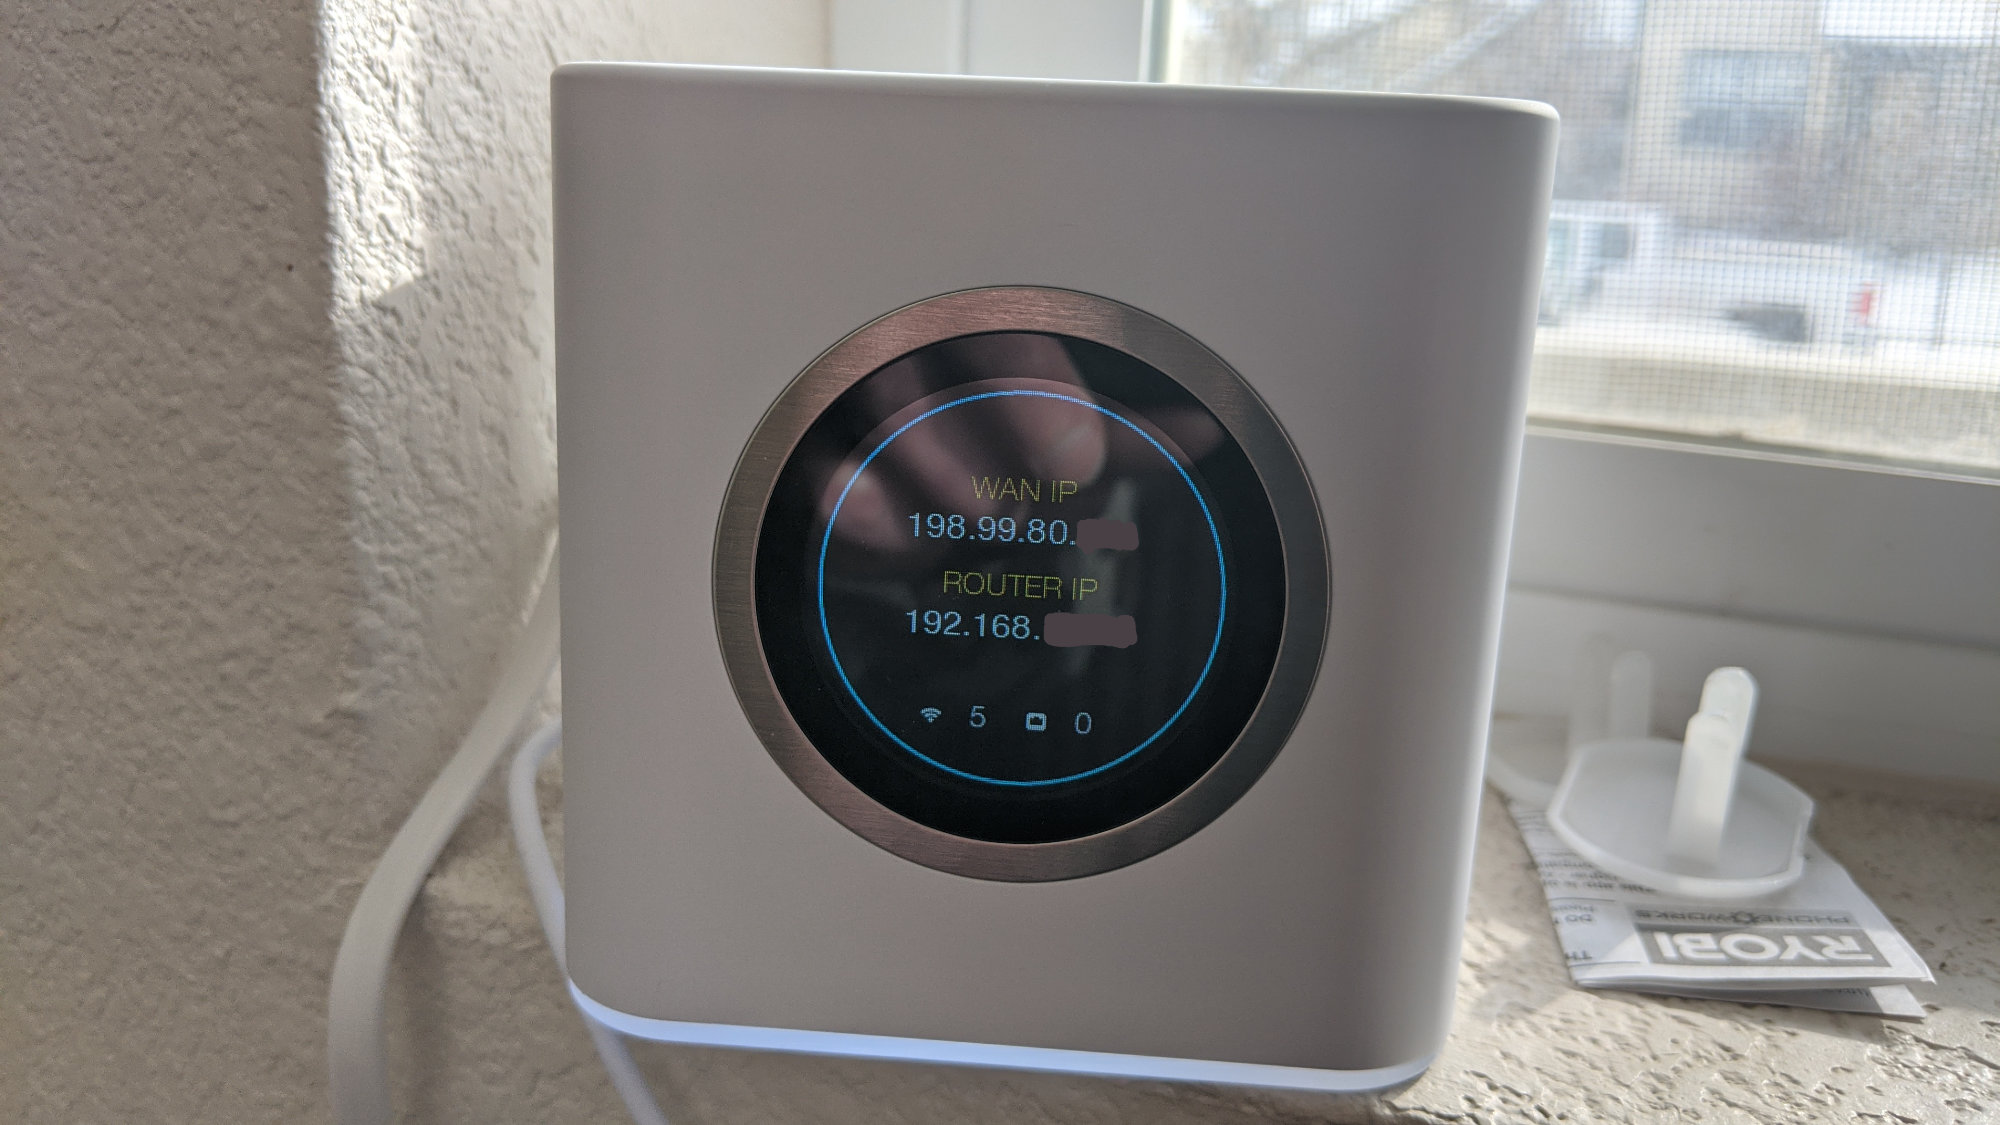
router-ip
The last part of the install was to request and verify that Colin’s ONT was placed in bridge mode so that he could avoid double NAT (network address translation). Double NAT can interfere with gaming, VPN, VoIP, and other interactive applications and increase the overall latency of the connection.
Double NAT occurs when two routers in a row are trying to perform routing and NAT functions. We wanted to disable the NAT and routing functions in the ONT and only have Colin’s Ubiquiti Amplifi mesh router perform NAT and routing functions
Talking to the technicians, they’ve only placed the Nokia Gateway 3 ONT in bridge mode for about three other customers. There is a single port ONT available that is smaller and only operates in bridge mode. The technicians had only installed one of those to date. The single-port ONT is available upon request.

We’re 90% sure this is the single-port ONT.
When the ONT is placed in bridge mode, only the first Ethernet port on the ONT functions. Ethernet ports 2 to 4 and the phone jacks are disabled. If you decide to use bridge mode to avoid double NAT, be sure to connect your router to port 1.
The easiest way to check if the ONT is in routing mode or bridge mode is to check the IP address assigned to the router by the ONT. If the IP address is in the one of the private IP address ranges, 10.x.x.x or 172.16.x.x or 192.168.x.x, the ONT is performing NAT and routing functions. If it’s not in one of these ranges, the ONT is not performing NAT.
Fortunately, Colin’s Ubiquiti Amplifi mesh router has a small display on the front that shows the IP address assigned to the router by the ONT. In Colin’s case, the ONT assigned an IP address in the 198.99.80.x address range. This is not one of the private IP address ranges so he’s receiving a publicly routable IPv4 address.

he-bgp-toolkit
To verify it was indeed a publicly routable IPv4 address, I pulled up the Hurricane Electric BGP Toolkit and looked up Connexion’s ASN. I clicked on the v4 prefixes assigned to Connexion and Colin’s assigned IP address was in one of the ranges belonging to Connexion.
Help and Support
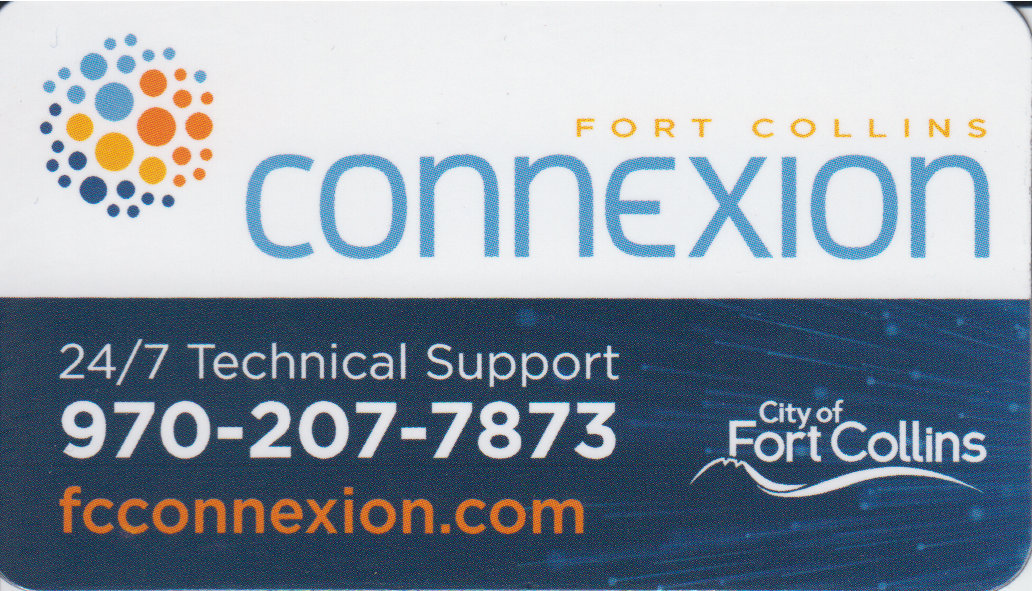
Magnet with customer support phone number. It’s the size of a business card.
The final step in the install was to give Colin a refrigerator magnet with the customer service support number on it and a copy of brochure on how to optimize his gigabit connection. The magnet is reproduced above. Both sides of the brochure are reproduced below.
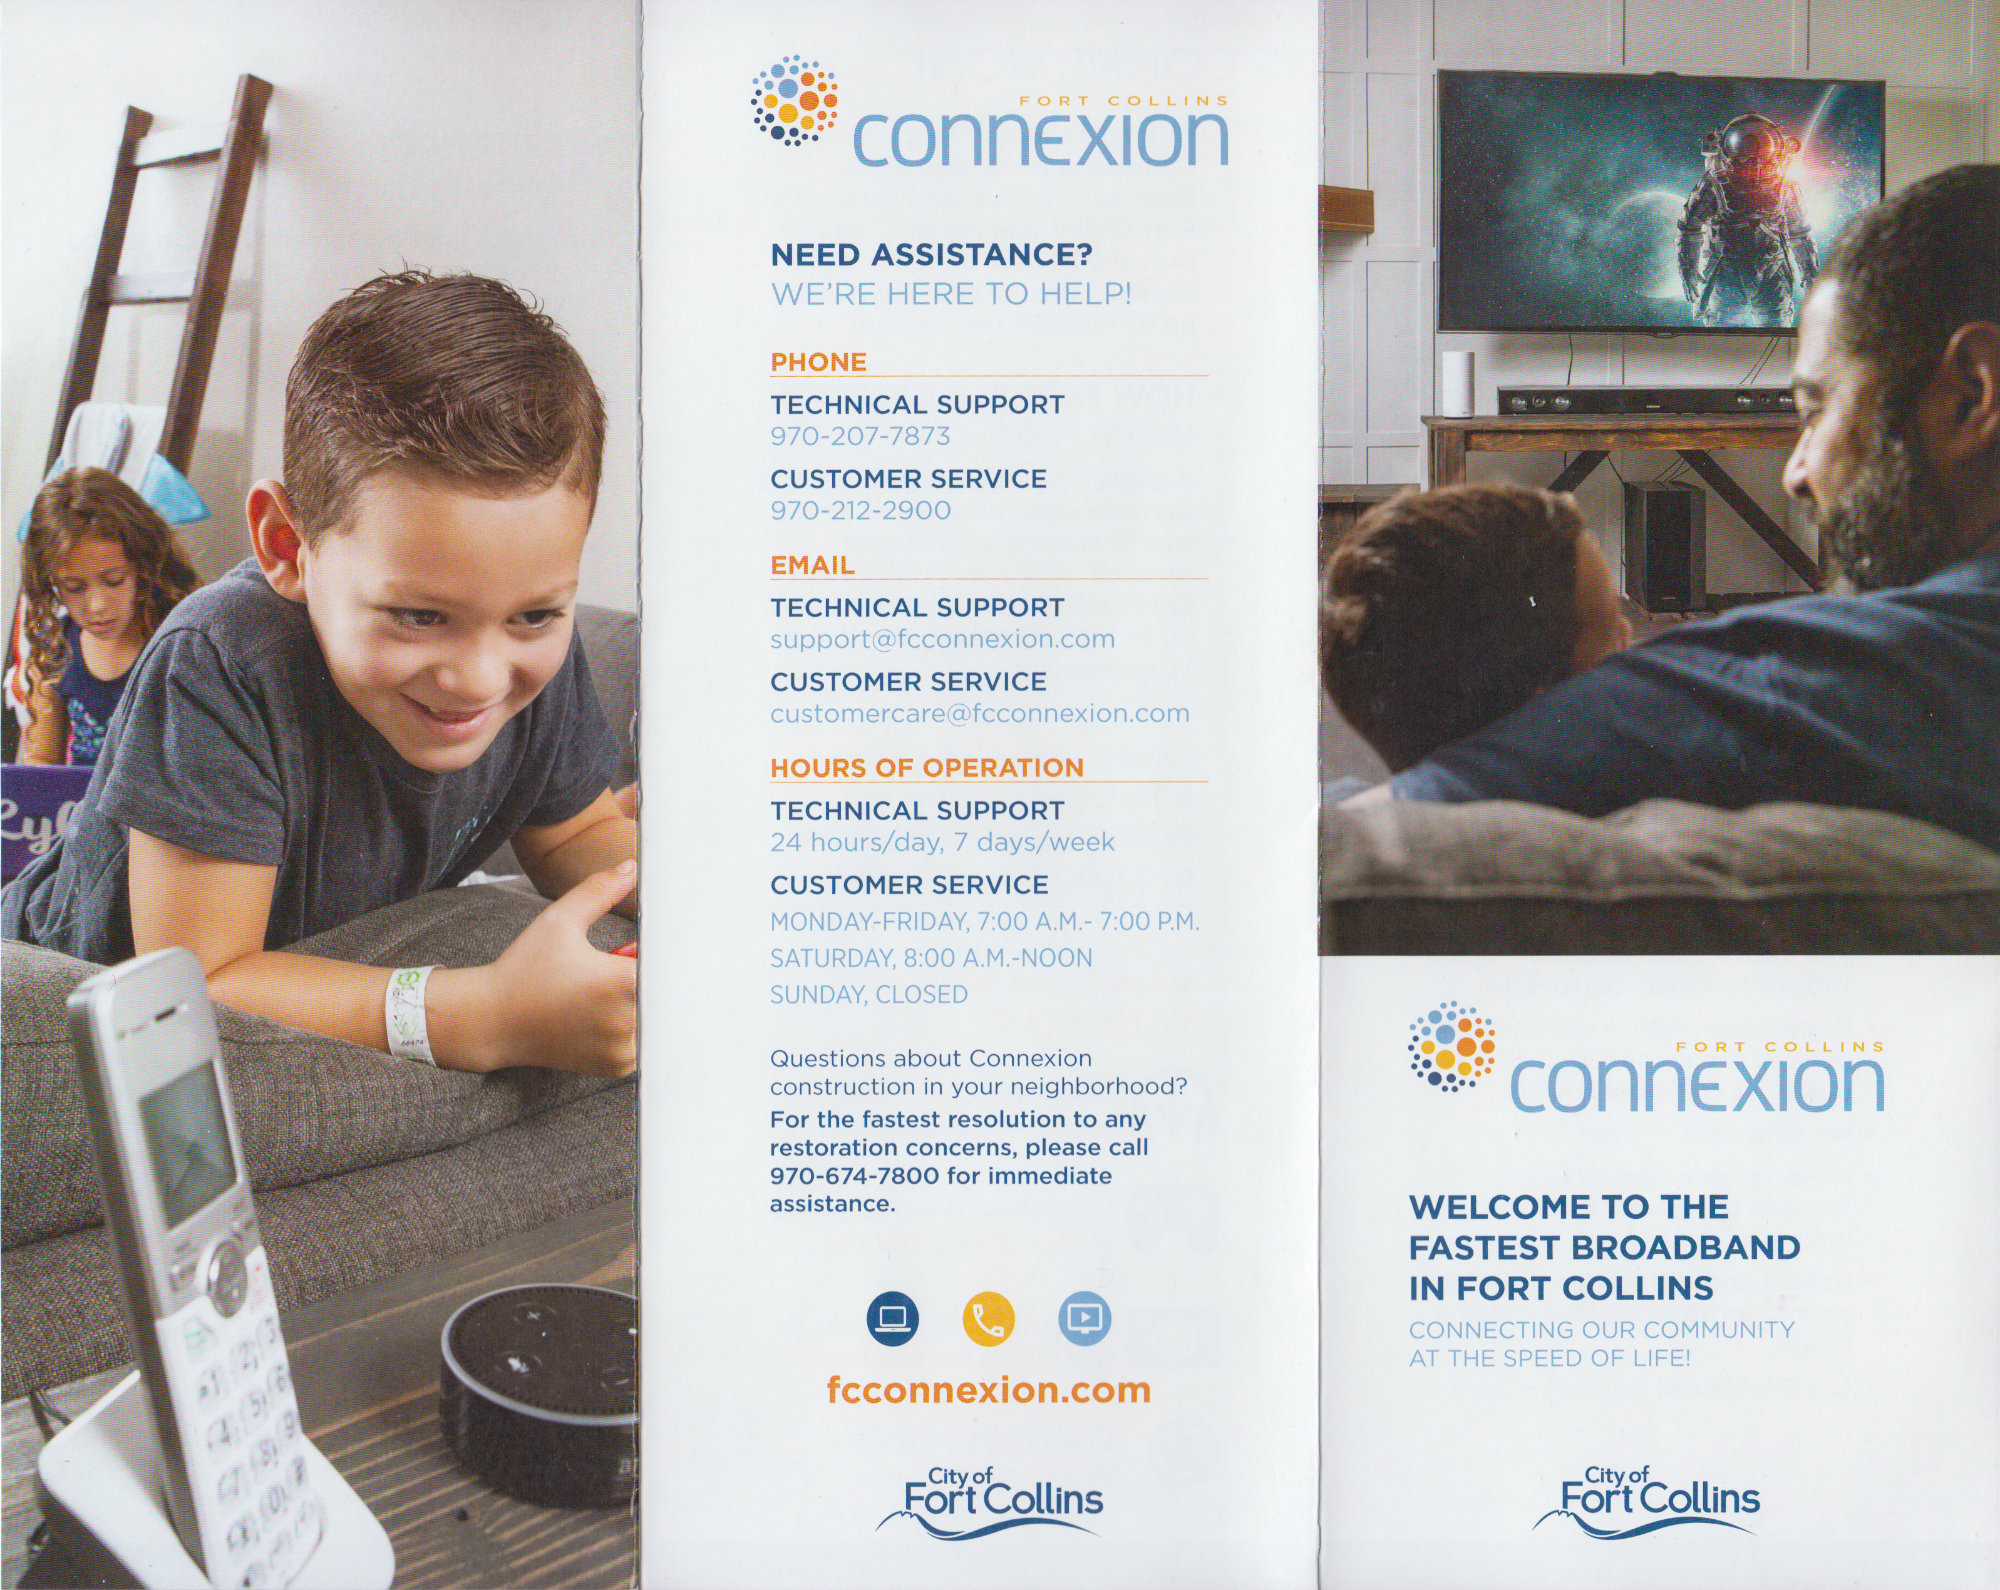
Page one of the post installation Connexion brochure.
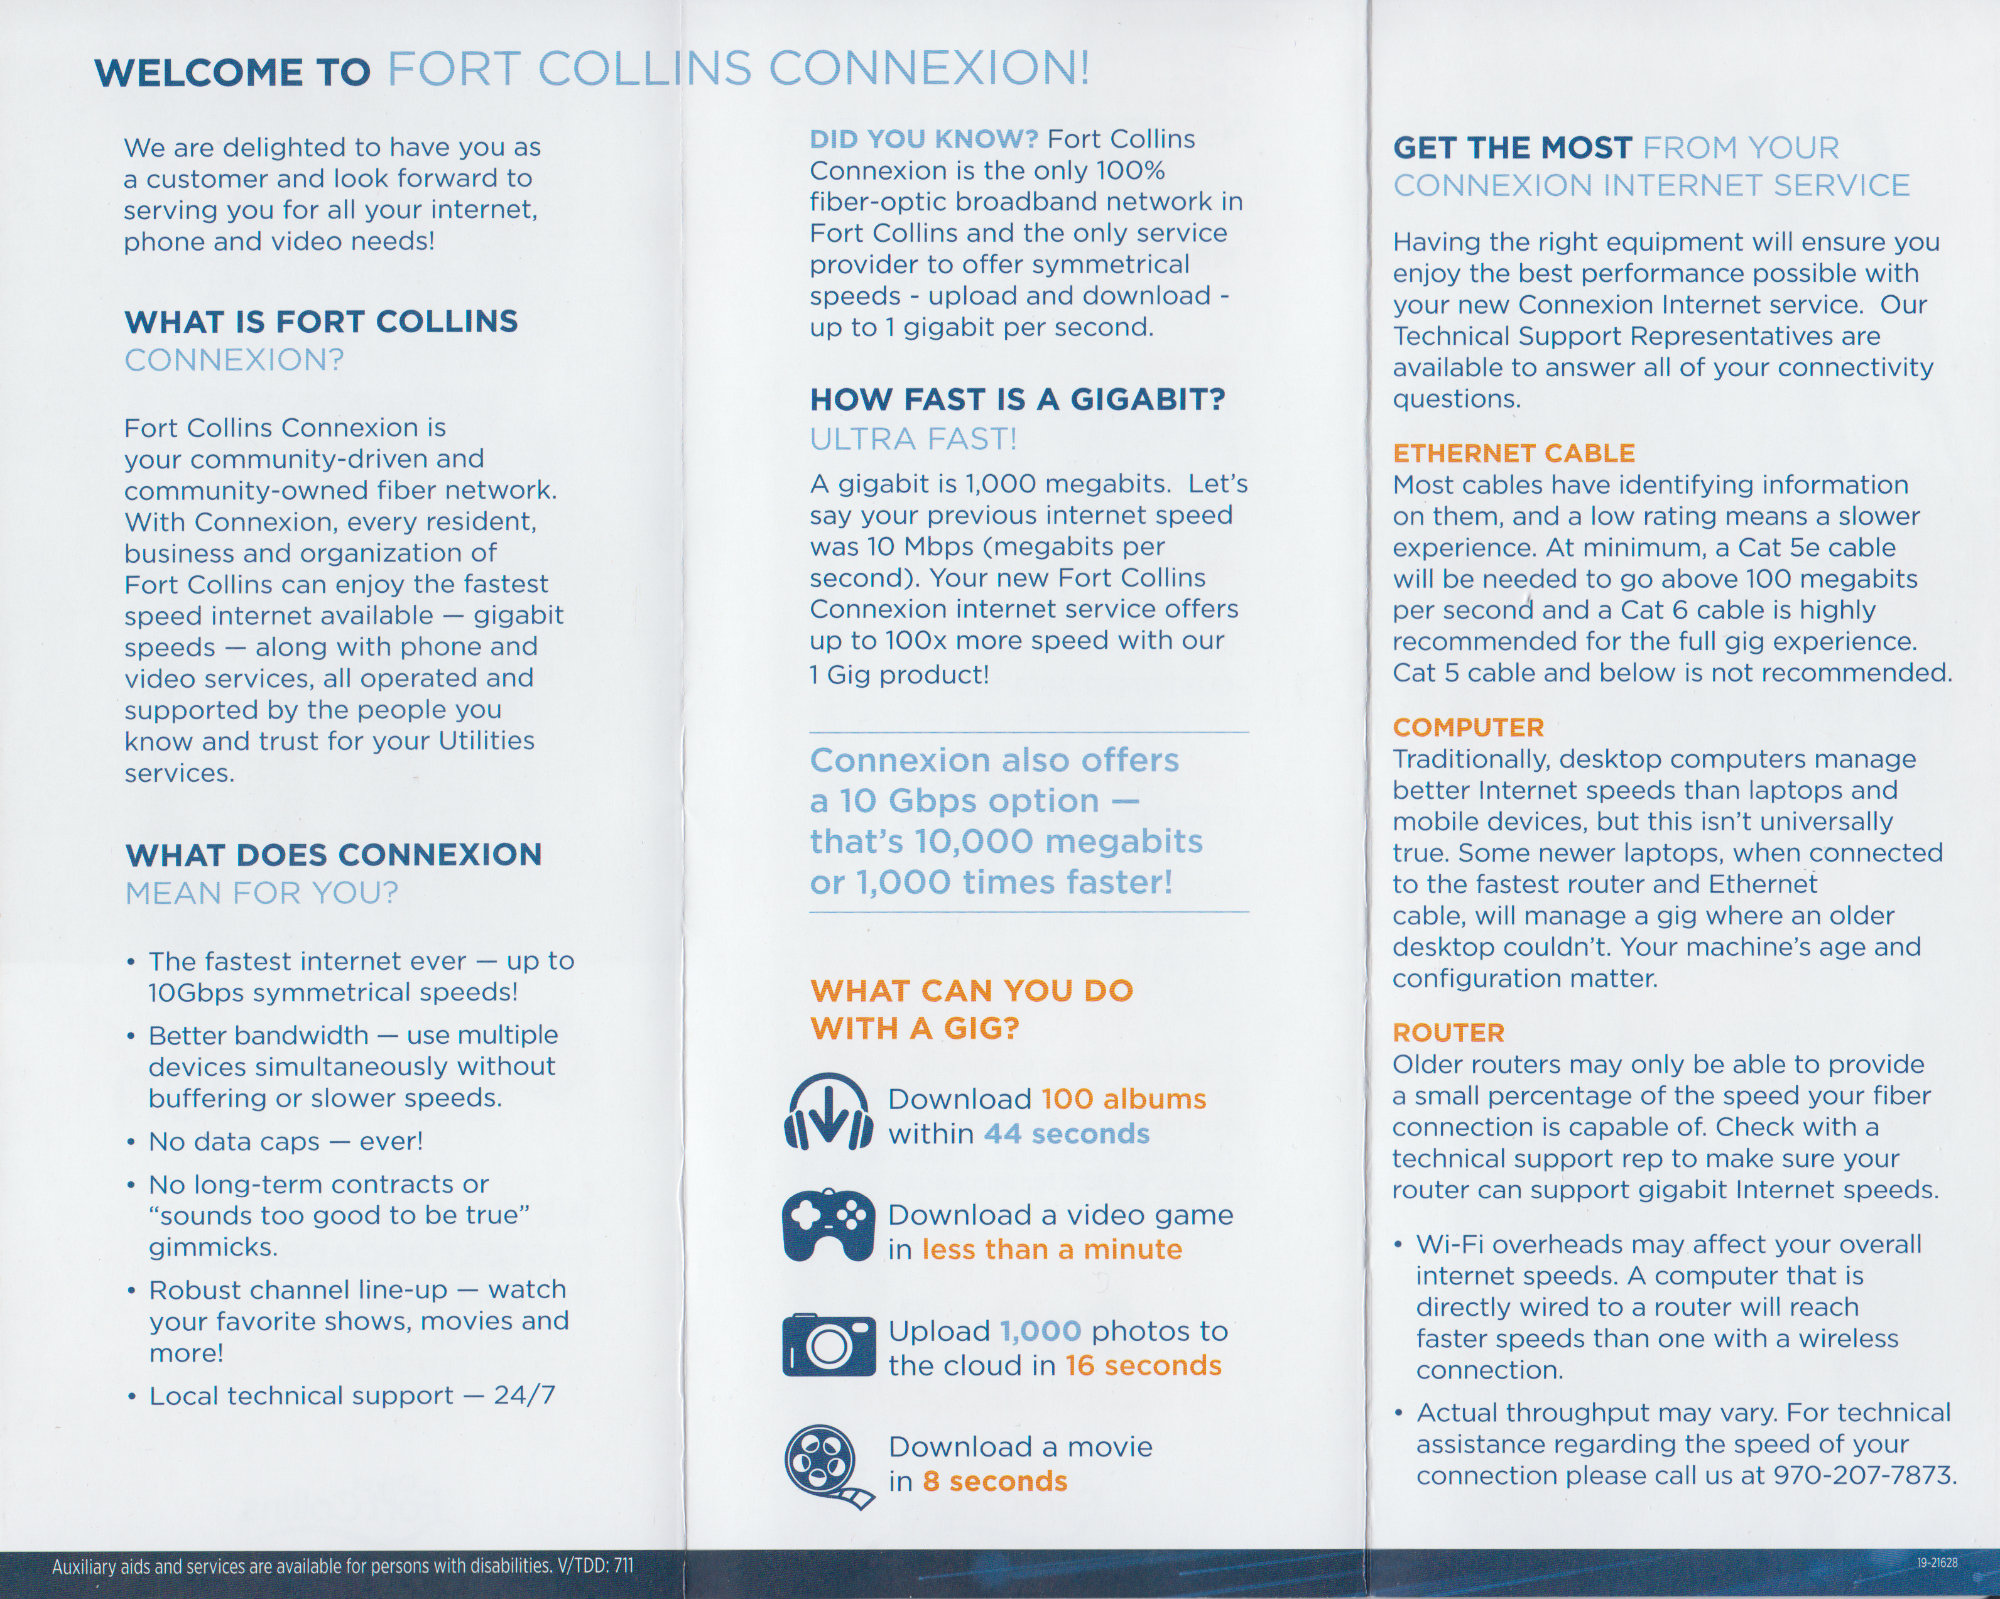
Page two of the post installation Connexion brochure.
Speed Tests
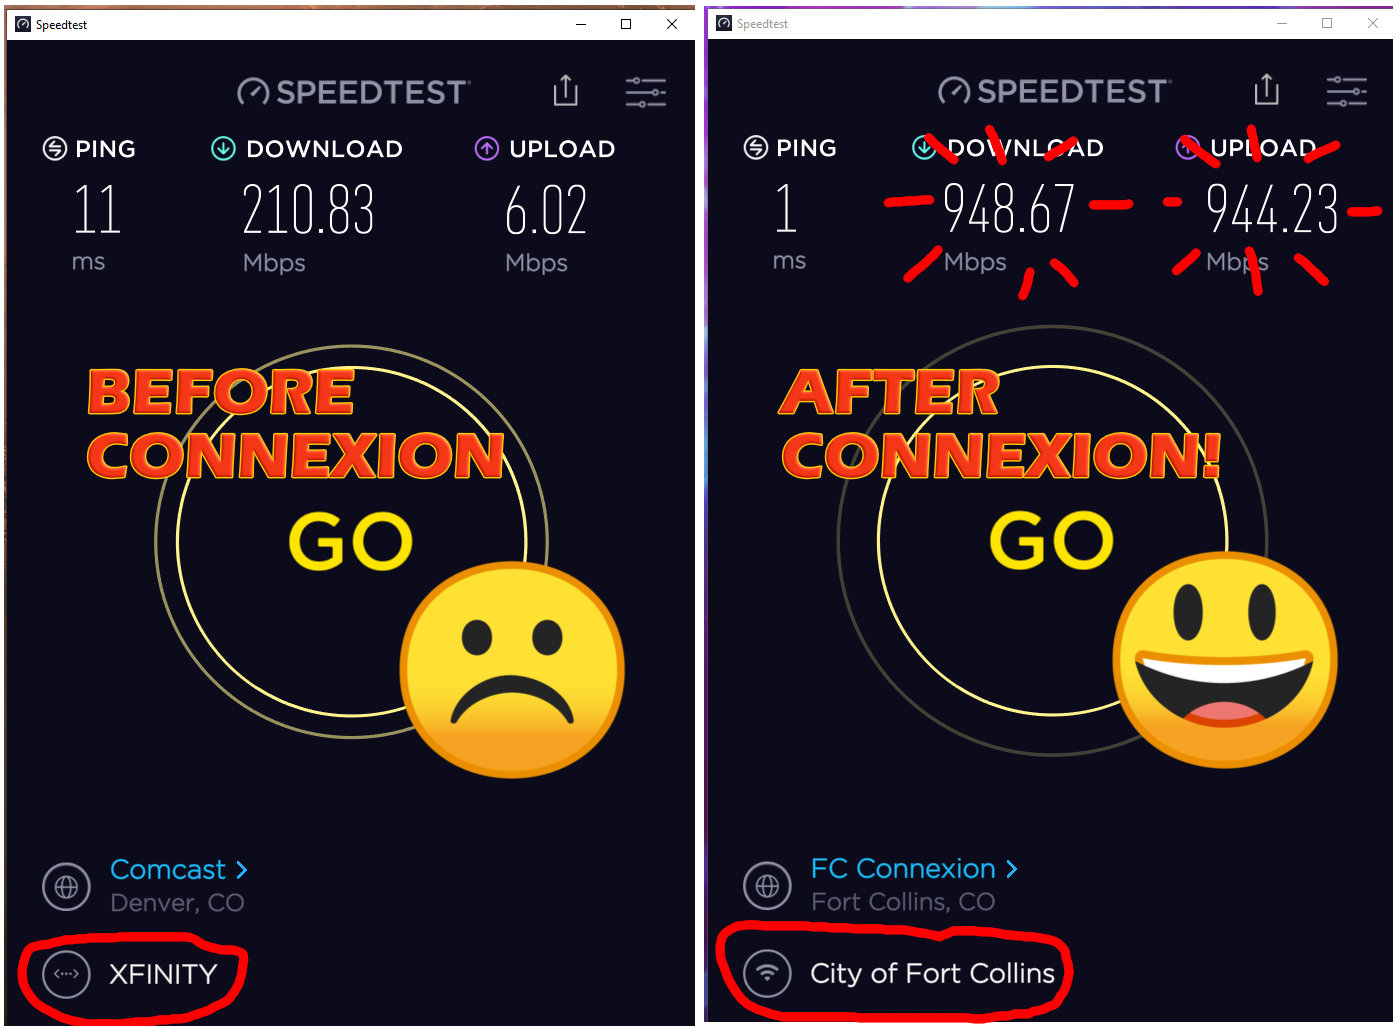
On the left, Colin’s best speed test using Comcast Xfinity service at $44.99 per month. On the right, Colin’s best speed test using Connextion fiber broadband for $59.95 per month.
Colin ran speed tests on both the Comcast Xfinity and Fort Collins Connexion services. On the left above is his best speed test result using his Comcast Xfinity service priced at $44.99 per month. On the right is one of his typical speed test results using his Fort Collins Connexion service priced at $59.95 per month.
The only downside we’ve found to the service is that he has shorter ping times to Sacramento than Denver. Ping times to Comcast’s speed test servers in Sacramento are about 37 ms. Ping times to Comcast’s speed test servers in Denver are about 54 ms. The ping time to the Denver server will be less than the Sacramento ping time once Connexion’s southbound connection to the Internet through Denver is online. The southbound connection through Denver is waiting on CDOT to move a vault which is part of the ongoing I-25 construction.
Colin’s Connexion Construction Timeline
Connexion started fiber construction in his neighborhood in March 2019. Construction was finished around June or July 2019. His service was ultimately connected in February 2020. That’s 11 months between start of construction and having service. If you’re pondering whether to sign a contract with Comcast or not while waiting for Connexion to build or turn on your neighborhood, this may be a useful data point for you.
Colin’s Connexion Bill
The Bill
<photo of a clean bill with Colin’s info redacted>
The Billing Portal
<screen capture from inside the portal with Colin’s info redacted>
The Journey Continues in My Neighborhood
The journey in my neighborhood continues in part four where I document the finishing touches on the network construction before it goes live at my address.